
Witches Brew Halloween Cake Jars Recipe
Ready to wow your friends this Halloween with a dessert that’s as spooky as it is scrumptious? I’m excited to share my Witches Brew Halloween Cake Jars Recipe—a fun, festive twist on classic chocolate cake layered beautifully in jars and topped with the cutest witchy fondant legs and shoes. This recipe isn’t just tasty; it’s a showstopper for your Halloween party that’ll have everyone asking for your secret. Stick around, and I’ll walk you through every step so you can nail it perfectly at home.
Why This Recipe Works
- Playful Presentation: Serving cake in jars with edible witch legs makes this dessert unforgettable and super Instagram-worthy.
- Rich, Moist Chocolate Cake: The combination of black cocoa and butter creates a decadent base that keeps every bite indulgent.
- Customizable Buttercream: Easily tinted vibrant green to resemble a bubbling witch’s brew, balancing sweetness with a silky texture.
- Step-by-Step Fondant Decoration: The handmade fondant witch legs and shoes add a creative flair that you’ll enjoy putting together as much as eating.

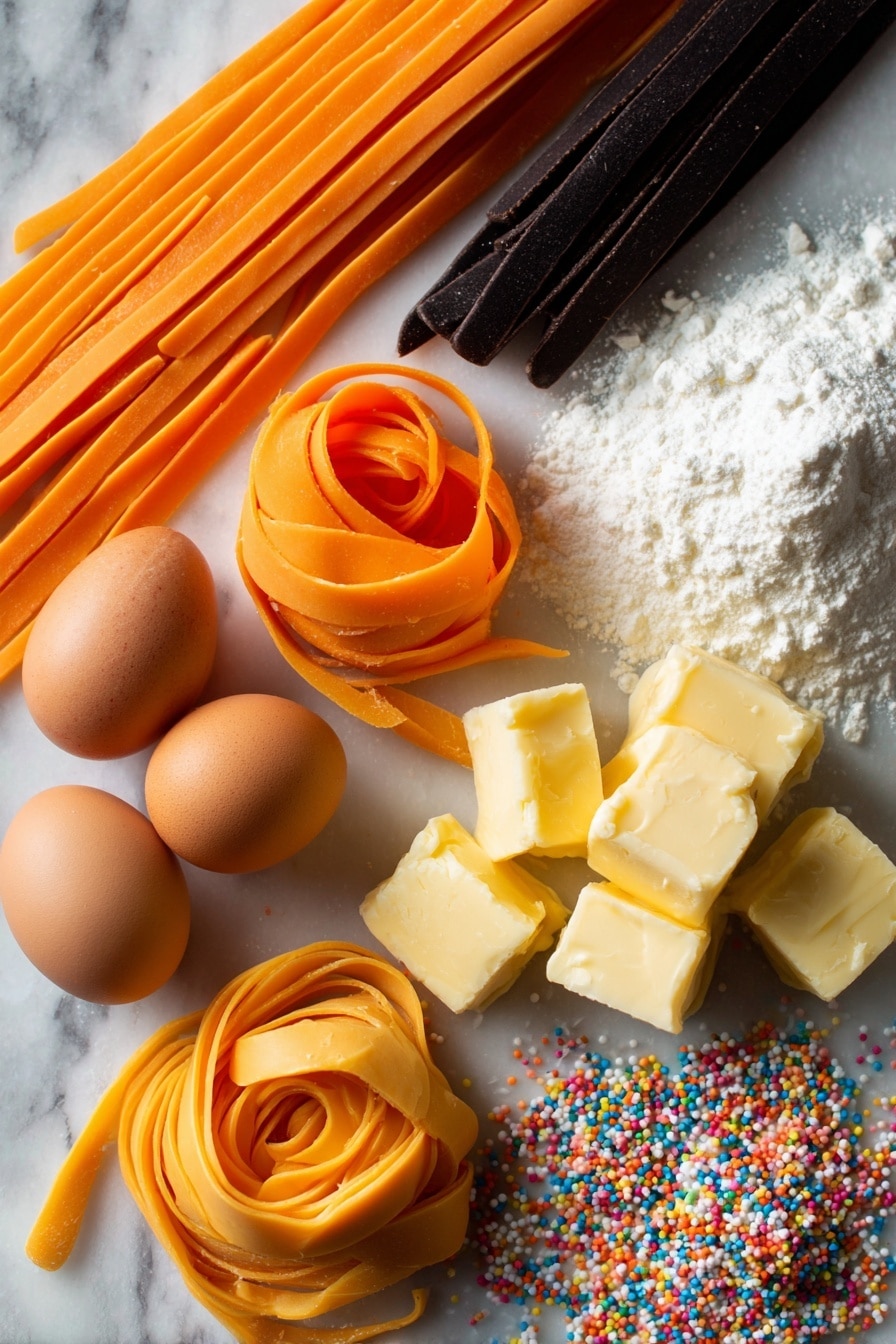
Ingredients & Why They Work
Each ingredient in my Witches Brew Halloween Cake Jars Recipe has been chosen to create that perfect spooky look while delivering delicious flavor. Knowing the role each part plays makes shopping and prepping a breeze—plus, I have some tips to help you pick the best ones.
- Self-raising flour: Provides just enough lift for a soft, tender cake without being overly dense or crumbly.
- Granulated sugar: Sweetens while helping create a light cake texture when creamed with butter.
- Butter: The richness that holds moisture and flavor; salted butter works well here, balancing sweetness.
- Eggs: Bring structure and moisture to your cake—beating them well ensures lightness.
- Unsweetened black cocoa powder: This gives you that dark, almost eerie black color for your cake and intense chocolate flavor.
- Baking powder: The extra lift to make sure the cake isn’t flat or dense after baking.
- Salt: Enhances flavor and helps balance the sweetness.
- Milk: Adds moisture and helps mix the dry ingredients smoothly for a perfect batter.
- Vanilla extract: Rounds out the flavors with a classic, comforting aroma.
- Buttercream frosting ingredients: Butter and icing sugar form a creamy, spreadable frosting that’s easy to tint and perfect for piping.
- Electric green food coloring: Gives your frosting that spooky “witches brew” vibe—just a few drops go a long way.
- Orange and black fondant: Perfect for shaping into cute witches’ legs and shoes—make sure to pick pliable fondant for easy sculpting.
- CMC powder: This helps firm up the fondant decorations so they hold their shape overnight without sagging.
- Sprinkles: Adds texture and fun colors peeking through the jars to enhance the playful theme.
Tweak to Your Taste
I love making the Witches Brew Halloween Cake Jars Recipe my own by playing around with the decorations and frosting flavors. You should definitely make it your own—there’s room to switch things up and make this recipe shine your way!
- Variation: For a less sweet version, I swap half the icing sugar with cream cheese in the buttercream—adds a subtle tang that cuts through richness.
- Dietary tweak: You can use dairy-free butter and milk alternatives if you want a vegan-friendly dessert—the fondant still sculpted well for me with this substitution.
- Seasonal change: Swap the electric green buttercream for purple or blood-red for a different Halloween vibe. Black food coloring works too if you’re brave enough!
- Frosting texture: If you like a lighter frosting, add a bit more milk or cream to make it extra fluffy and pipe easier.
Step-by-Step: How I Make Witches Brew Halloween Cake Jars Recipe
Step 1: Craft the Witchy Fondant Legs and Shoes
This part is my favorite! I make the legs and shoes a day ahead so they dry firm overnight and don’t flop when you bob them into the jars. Kneading CMC powder into the fondant is a game-changer; it keeps those skinny legs from sagging in a humid kitchen. I roll the orange fondant into thin strips, then wrap black stripes on for that classic witch sock look. The shoes are like little black sausages with pointy ends—it sounds weird but once you try it, you’ll get the hang of it super fast. Use a damp brush to stick the shoes onto the legs—just a tiny bit of water does the trick.
Step 2: Bake the Perfect Black Cocoa Chocolate Cake
Preheat your oven to 170℃, and get your 9-inch square tin ready with butter and flour. Cream the butter and sugar together until fluffy—it really pays off with a tender crumb. Add the eggs slowly in pairs, beating well so the batter doesn’t split. Mix the dry ingredients separately (flour, baking powder, black cocoa, salt) and sift them a few times before folding gently into the wet mixture with milk and vanilla. This helps keep the chocolate flavor intense and the texture just right. Bake for about 45-50 minutes, but start checking early with a skewer around 40 minutes to avoid overbaking. Let the cake cool completely before moving on.
Step 3: Whip Up the Green Buttercream
Softened butter gets whipped until creamy, then powdered sugar is added gradually—here’s a tip to prevent a sugar storm: mix it by hand first before grabbing the electric mixer. Add vanilla extract and the green food coloring drop by drop until you get that eerie witch’s brew shade. You can thin the buttercream with a pinch of milk or cream if it feels too stiff for piping beautifully.
Step 4: Assemble the Cake Jars
Use a round cutter to carve out circles from the two layers of cake, then layer them inside your jars with buttercream and sprinkles between each layer. I like to push sprinkles against the jar walls so they peek through for a fun effect. Top with a big swirl of the green frosting and then place the sprinkles over the top, covering that surface like magic fairy dust. The final touch? Poke two small holes in the frosting with a wooden skewer and insert your witch’s legs—it looks like they’re rising from the cauldron!
Pro Tips for Making Witches Brew Halloween Cake Jars Recipe
- Fondant Prep Ahead: Make the fondant legs and shoes at least a day before to avoid sagging, especially in humid climates.
- Cake Testing: Don’t rely solely on baking time—test with a skewer early to keep your cake moist and tender.
- Sprinkle Placement: Push sprinkles gently against jar walls for a colorful, visible effect without making the bottom messy.
- Food Coloring Use: Use gel or electric colors sparingly; it’s easier to add more than to fix over-colored frosting.
How to Serve Witches Brew Halloween Cake Jars Recipe
Garnishes
I love topping these jars not just with the fondant legs but also a scatter of orange and black Halloween-themed sprinkles—adds that perfect crunchy surprise. If you want to get extra creative, edible glitter dust sprinkled lightly on top gives the “magic potion” shimmer effect that always gets oohs and aahs.
Side Dishes
Pair your cake jars with some simple Halloween finger foods like caramel apples or spooky popcorn mix. A hot cup of spiced cider or chai also complements the rich chocolate and sweet buttercream beautifully if you’re doing a cozy fall gathering.
Creative Ways to Present
To really wow guests, I sometimes place the jars inside little witch hats or nestled in a bed of fake cobwebs and mini pumpkins for that full Halloween vibe. Wrapping the jars with black and orange ribbons or adding tiny name tags with spooky nicknames is a fun way to personalize each jar for party guests too.
Make Ahead and Storage
Storing Leftovers
Since these jars come with frosting and fondant, I recommend storing leftovers in the fridge with a loose cover to keep them from drying out. I leave the jars uncovered in the fridge for about 30 minutes before serving so the buttercream softens back up and tastes freshly piped.
Freezing
You can freeze the cake layers ahead of time, but I skip freezing the assembled jars since the fondant decorations don’t always thaw well. Instead, bake in advance and assemble fresh on the day you want to serve them if you want to freeze.
Reheating
I usually don’t reheat these since they’re meant to be enjoyed cool; it keeps the buttercream’s texture and fondant’s shape intact. If you want to warm the cake itself, remove it from the jar and heat gently for a few seconds in the microwave—but skip reheating the whole jar.
FAQs
-
Can I make the fondant decorations without CMC powder?
Yes, you can make the decorations without CMC powder, but they might be softer and more prone to sagging or bending, especially if it’s humid. CMC helps stabilize the fondant so your witch legs hold their shape overnight. If you don’t have it, work in a cooler, air-conditioned room and consider adding thin lollipop sticks inside the legs for extra support.
-
How do I prevent buttercream from being too stiff or too runny?
Start by creaming your butter until it’s soft and fluffy. Gradually add icing sugar to avoid a dust cloud and stiff texture. If the buttercream is too stiff, add milk or cream a teaspoon at a time until it reaches your desired softness. If it’s too runny, add more sifted powdered sugar and chill briefly before piping.
-
What’s the best way to cut cake circles for jars?
Use a round cutter that matches the diameter of your jars. Plan how many you’ll get per cake layer before cutting to minimize waste. Press the cutter straight down—don’t twist—to keep the edges crisp. Save the scraps for cake pops or crumbs later.
-
Can I prepare these jars for a party in advance?
Absolutely! Prepare the fondant decorations and bake the cakes a day or two before. Assemble the cake jars on the day of serving for best frosting texture and decoration freshness. If you need to assemble early, keep jars covered and refrigerated, but take them out about 30 minutes before serving.
Final Thoughts
This Witches Brew Halloween Cake Jars Recipe has become a staple for me whenever Halloween rolls around. It’s one of those recipes that feels like a fun project but isn’t hard to pull off, and the reaction you get is totally worth the effort. Whether you’re baking with kids or whipping up a surprise for friends, these spooky jars will make your party extra special. I can’t wait for you to try it and put your own magical twist on it—happy baking, and have a delightfully eerie Halloween!
Print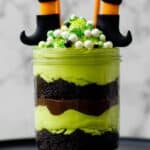
Witches Brew Halloween Cake Jars Recipe
- Prep Time: 20 minutes
- Cook Time: 50 minutes
- Total Time: 3 hours 10 minutes
- Yield: 9 jars
- Category: Dessert
- Method: Baking
- Cuisine: American
Description
A fun and festive Halloween dessert featuring rich black cocoa chocolate cake layered in jars with vibrant green buttercream frosting and decorated with whimsical fondant witches’ legs and shoes.
Ingredients
Cake
- 330 g self raising flour
- 360 g granulated sugar
- 360 g butter
- 6 eggs
- 30 g unsweetened black cocoa powder
- 1½ teaspoon baking powder
- ½ teaspoon salt
- 90 ml milk
- 2 teaspoon vanilla extract
Buttercream Frosting and Decoration
- 400 g salted butter
- 800 g powdered sugar (icing sugar)
- 1¼ teaspoon vanilla extract
- 2 tablespoon milk or cream (optional, if the buttercream is too stiff)
- Electric green food coloring (a few drops)
- 250 g orange fondant
- 200 g black fondant
- 1 tablespoon CMC powder
- Sprinkles
Instructions
- Prepare Fondant Legs: Knead half a tablespoon of CMC powder into orange fondant until soft and pliable. Roll into long strips about 5mm in diameter, cut into 10 cm lengths to make 18 legs. Keep covered to prevent drying.
- Add Black Stripes: Roll black fondant into thin strips 2–3mm diameter and about 25–30cm long. Dampen orange fondant legs with a brush, attach black strips as stripes leaving 1 cm spacing, cut excess, and smooth. Repeat to make 5 stripes per leg on all legs. Keep covered.
- Make Fondant Shoes: Knead remaining CMC into black fondant and form 18 balls about 2 cm diameter. Roll each into a short sausage, pinch and shape to form heel, top, and pointy front of the shoe. Use a ball tool or rounded object to make an opening for the leg insertion.
- Attach Shoes to Legs: Lightly moisten the opening inside the shoes with damp brush, fit them onto orange legs, press gently. Stand assembled legs on flat surface to set overnight until dry and firm.
- Preheat Oven and Prepare Tin: Preheat oven to 170℃. Grease and flour a 9-inch square cake tin. Set aside.
- Cake Batter Preparation: Cream butter and sugar on medium speed until light and fluffy for about 2 minutes, scraping bowl halfway. Add eggs two at a time, beating well after each addition.
- Mix Dry Ingredients: Whisk together flour, baking powder, cocoa powder, and salt in a separate bowl. Sift dry mixture into creamed butter and sugar in three batches, alternating with milk, folding gently each time. Fold in vanilla extract last.
- Bake Cake: Pour batter into prepared tin and bake for 50 minutes. Check doneness with skewer 5 to 10 minutes prior to finish; cake is done when skewer comes out clean and top springs back slightly.
- Cool Cake: Let cake rest in tin for 2 to 3 minutes, loosen sides with a knife, invert onto wire rack, then flip again to cool right side up completely before frosting.
- Make Buttercream: Cream butter until soft and smooth. Gradually add sifted powdered sugar, mixing with spatula first, then using electric mixer until fluffy. Add vanilla extract, beat again. If too stiff, add milk. Blend in green food coloring thoroughly.
- Prepare Cake Layers: Level top of cooled cake if uneven. Slice cake horizontally into two layers. Use a round cutter or cake jar to cut 9 circles from each layer.
- Assemble Cake Jars: Place a spoonful of sprinkles at bottom of each jar, pushing to sides for visibility. Add first cake circle, pipe buttercream layer starting from sides inward, add sprinkles along sides, then second cake circle. Finish with a large buttercream swirl on top, garnishing all over with sprinkles.
- Decorate with Fondant Legs: Use a skewer to make two holes in each cake jar’s buttercream swirl. Insert the prepared witches’ fondant legs into the holes to complete the decoration.
Notes
- Make fondant legs at least one day ahead for drying and firmness to avoid bending after assembly.
- Use a fondant smoother to roll strips evenly without marks.
- In humid environments, add CMC powder and work in air-conditioned space or use lollipop sticks for support in legs.
- Apply water sparingly on fondant with a slightly damp brush to avoid sogginess or color bleeding.
- Keep fondant balls covered while shaping shoes to prevent drying; re-knead if dry.
- The first shoe takes longer; speed improves with practice.
- Use gel food coloring sparingly as it is very concentrated; start with a few drops and add more as needed.
- Plan the layout for cutting cake circles to maximize usage for 9 jars per layer.
- Adding sprinkles to jar bottoms is optional and helps if jar bottoms are uneven.
Nutrition
- Serving Size: 1 jar
- Calories: 620 kcal
- Sugar: 70 g
- Sodium: 160 mg
- Fat: 35 g
- Saturated Fat: 20 g
- Unsaturated Fat: 12 g
- Trans Fat: 0.5 g
- Carbohydrates: 70 g
- Fiber: 3 g
- Protein: 6 g
- Cholesterol: 140 mg
