Witch Hat Cupcakes Recipe
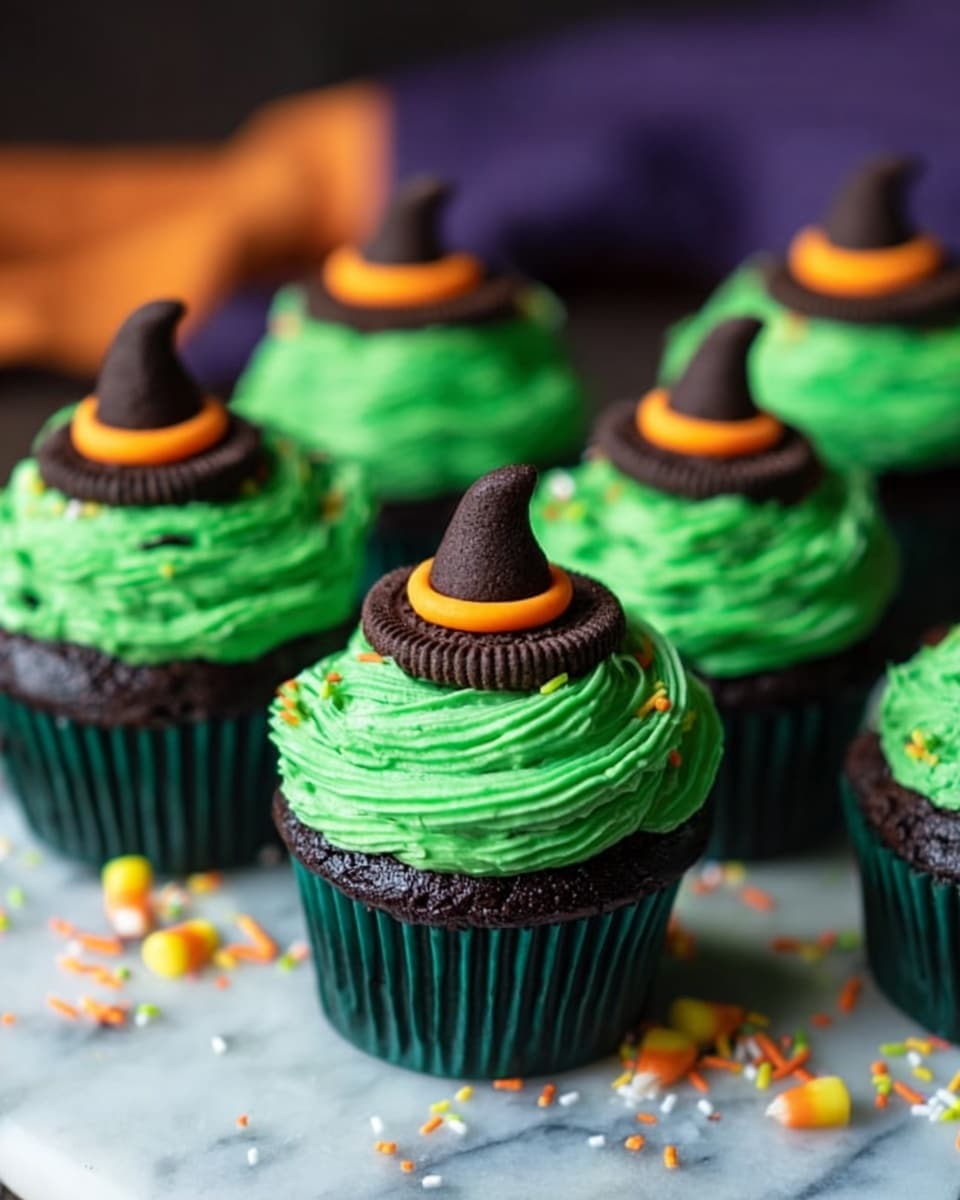
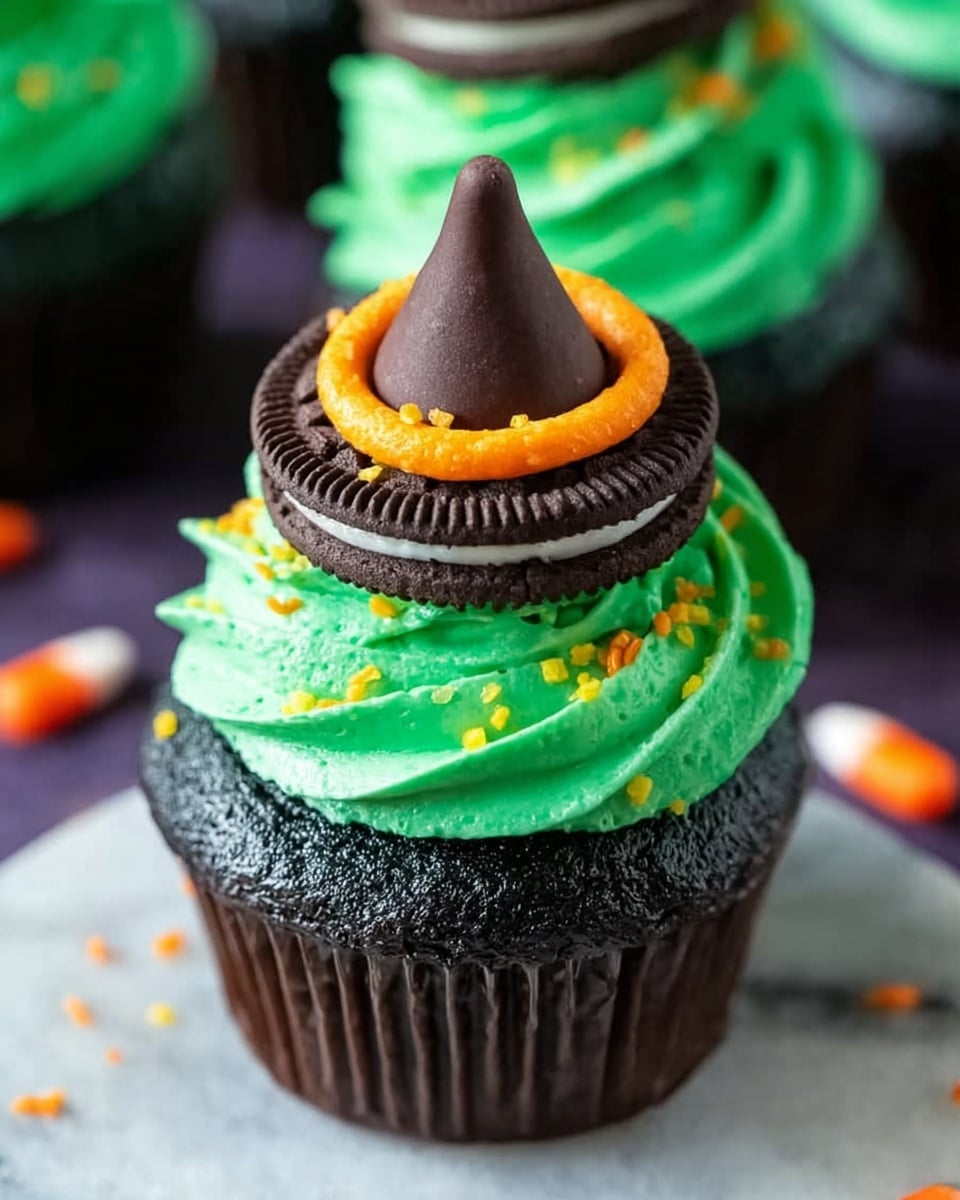
If you’re on the hunt for a delightfully spooky and utterly delicious treat, you’ve got to try my Witch Hat Cupcakes Recipe. These cupcakes aren’t just cute—they’re incredibly fun to make and even better to eat. Perfect for Halloween parties or whenever you want to add a little magic to your dessert table. Stick with me, and I’ll guide you through every step to make these festive cupcakes a smashing hit!
Why This Recipe Works
- Easy Assembly: The witch hat design uses simple, store-bought ingredients that come together quickly for delightful results.
- Flavor Balance: Cream cheese frosting adds a tangy creaminess that perfectly balances the chocolate cupcake and Oreos.
- Festive and Fun: With pops of green and orange frosting plus sprinkles, these cupcakes instantly bring Halloween vibes to your table.
- Kid-Friendly: These cupcakes are a hit with kids and adults alike, making them perfect for parties or family bake days.
Ingredients & Why They Work
This Witch Hat Cupcakes Recipe uses a handful of familiar ingredients that mesh beautifully to create a cupcake that’s both eye-catching and scrumptious. When shopping, opt for a creamy cream cheese frosting or make your own to ensure the best texture and tang.
- Chocolate cupcakes: I usually use a boxed mix for convenience, but homemade works great too—rich chocolate is the foundation here.
- Oreo cookies: These form the “brim” of the witch’s hat—splitting them evenly makes a neat base.
- Hershey’s chocolate kisses: Perfect to mimic the pointed witch hat top—no decorating skills needed!
- Cream cheese frosting: Its tang cuts through the sweetness and holds the structure of the hat.
- Green and orange food coloring: The festive colors bring Halloween spirit to life in your frosting swirls.
- White and orange sprinkles: These add whimsical detail and a textural crunch to the finished cupcakes.
Tweak to Your Taste
I love how adaptable this Witch Hat Cupcakes Recipe is—you can easily tweak colors, add flavors, or even swap ingredients to suit your style or dietary needs. Don’t be shy about customizing it to your unique taste!
- Flavor Swap: I once added a hint of cinnamon to the cream cheese frosting for a subtle spice, which felt super cozy and festive.
- Dietary Change: Using dairy-free cream cheese and vegan chocolate cupcakes worked beautifully when I made these for a friend with allergies!
- Color Customization: Try purple and black frosting for a different witchy vibe that’s just as fun and spooky.
Step-by-Step: How I Make Witch Hat Cupcakes Recipe
Step 1: Prepare Your Frosting Colors
Once your cream cheese frosting is ready (homemade or store-bought), I like to set aside half a cup into a smaller bowl. Then, I mix green food coloring into the bigger portion—don’t forget to stir well so it’s vibrant but not streaky! The smaller amount gets the orange color, perfect for the tiny “brim” accents on the cookies. This prep makes decorating a breeze and keeps your colors vivid.
Step 2: Split the Oreos Carefully
Here’s a little trick: gently twist the Oreo cookies apart instead of biting or breaking them. This keeps the biscuit halves neat, creating a perfect hat brim. Be gentle—you want them intact so the decorations look sharp!
Step 3: Assemble the Witch Hats
Take a tiny spoonful of orange frosting and dab it right in the middle of the flat side of the Oreo half (this will act like glue). Then press a chocolate kiss gently on top—voila, you have a mini witch’s hat! Finish with a sprinkle or two on top to add some festive flair. Set them aside while you work on the cupcakes.
Step 4: Frost Your Cupcakes with Green Swirls
Using a piping bag or simply a spoon, drop green frosting in the center of each chocolate cupcake. Don’t spread it all the way to edges; instead, wind it upwards into a pointed swirl resembling a witch’s pointy jacket or hat base. This layered approach gives good height and texture for the hat topper to rest on.
Step 5: Top and Chill
Carefully place the Oreo witch hats you made onto the frosted swirl’s peak. To keep your cupcakes cozy and the frosting firm, cover and refrigerate them until it’s time to serve—this also helps flavors meld beautifully.
Pro Tips for Making Witch Hat Cupcakes Recipe
- Gentle Oreo Handling: Twist Oreos apart slowly to avoid breakage — a clean split makes your witches’ hats look pro.
- Coloring Frosting: Add food coloring gradually; too much can change frosting texture, so you want vibrant yet silky smooth.
- Swirled Frosting Technique: Use a small round piping tip or the back of a spoon to build frosting layers that hold the hat firmly without squishing it.
- Keep It Cool: Refrigerate the cupcakes after decorating to avoid melting or collapse of the frosting hats.
How to Serve Witch Hat Cupcakes Recipe
Garnishes
I usually stick to white and orange sprinkles on top of the hats for that extra Halloween pop—they give a fun crunch and look adorable. Sometimes I add a tiny edible glitter dust to give the cupcakes a bit of mystical sparkle, which guests always ask about.
Side Dishes
These Witch Hat Cupcakes pair wonderfully with warm apple cider, a pot of hot chocolate, or even a fruity punch. At one party, I served them alongside candied pumpkin bites and it was a hit—mixing the rich chocolate with fresh pumpkin flavors is pure magic.
Creative Ways to Present
I’ve tried arranging the cupcakes on a large black platter with fake cobwebs, mini pumpkins, and some twinkling string lights for a spooky display that’s perfect for Halloween. You can even place them on individual cupcake stands decorated with fake spider rings or leaves to amp up the fun.
Make Ahead and Storage
Storing Leftovers
I usually store leftover Witch Hat Cupcakes in an airtight container in the fridge. They stay moist and the frosting keeps its shape for up to 3 days. Just be sure to let them come closer to room temperature before serving again for maximum flavor enjoyment.
Freezing
Freezing cupcakes with delicate frosting can be tricky, but I’ve had good success freezing just the chocolate cupcakes before decorating. Wrap each cupcake tightly in plastic wrap and freeze in a single layer. When ready, thaw completely, then pipe on fresh frosting and assemble the witch hats for best results.
Reheating
Since these are best served chilled and decorated, I skip reheating after fridge storage. If you prefer warm cupcakes, remove the witch hats and frosting first, warm gently in the microwave (about 10 seconds), then add fresh frosting or enjoy plain. This keeps them from melting or losing their shape.
FAQs
-
Can I use a different cookie instead of Oreos for the witch hats?
Absolutely! While Oreos are classic and convenient due to their shape and size, you can use other round sandwich cookies or even thin chocolate wafers. Just make sure whatever cookie you choose can be split cleanly and hold the Hershey’s kiss on top securely.
-
What if I don’t have cream cheese frosting? Can I use buttercream?
Yes, you can substitute with a good buttercream frosting if you prefer. Keep in mind the cream cheese frosting’s slight tang adds to the flavor balance, but buttercream will also provide a smooth base for your colored swirls and hold the hats well.
-
How far ahead can I make these cupcakes before serving?
You can bake the cupcakes and prepare frosting a day or two in advance, but I recommend decorating them the same day or the night before. This keeps the frostings fresh and the witch hats intact. Store decorated cupcakes covered in the fridge.
-
Can kids help with making Witch Hat Cupcakes?
Absolutely! This recipe is simple and safe enough for kids to help with assembling and decorating, which makes it perfect for a fun baking activity. Just supervise when handling the Oreo splitting and placing the chocolate kisses.
-
Any tips to avoid the chocolate kisses sliding off?
Using a small dollop of orange frosting as “glue” is key to securing the Hershey’s kiss on the Oreo half. Press gently but firmly, and refrigerate the cupcakes soon after decorating to help set everything in place.
Final Thoughts
These Witch Hat Cupcakes Recipe hold a special place in my heart for turning baking into pure Halloween fun without fuss. From picking out the colors to assembling those adorable hats, it feels like creating edible magic. I hope you enjoy making and sharing these as much as I do—they’re guaranteed to bring smiles and fang-tastic flavors to your party or family gathering!
Print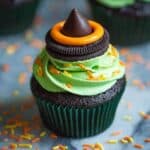
Witch Hat Cupcakes Recipe
- Prep Time: 30 minutes
- Cook Time: 25 minutes
- Total Time: 55 minutes
- Yield: 12 cupcakes
- Category: Dessert
- Method: Baking
- Cuisine: American
Description
These Witch Hat Cupcakes are a fun and festive Halloween treat featuring chocolate cupcakes topped with colorful cream cheese frosting and decorated with Oreo cookies and Hershey’s chocolate kisses to resemble witch hats. Perfect for parties and celebrations.
Ingredients
For the Cupcakes
- 12 chocolate cupcakes
For Decoration
- 6 Oreo cookies
- 12 Hershey’s chocolate kisses
- 1/2 batch cream cheese frosting
- Green food coloring
- Orange food coloring
- White sprinkles
- Orange sprinkles
Instructions
- Prepare Frosting Colors: After making the cream cheese frosting, separate ½ cup of the frosting into a separate bowl. Color the larger portion of frosting green and the smaller portion orange using food coloring.
- Prepare Oreo Witch Hats: Gently split each Oreo cookie in half. Place a very small spoonful of orange frosting in the center of the top half of each Oreo. Then place a Hershey’s chocolate kiss on top and press down gently. Decorate the hats with some white and orange sprinkles. Set these aside.
- Frost the Cupcakes: Pipe the green frosting into the center of each chocolate cupcake, avoiding the edges. Wind the frosting gently upwards into a few layers to create a cone shape resembling a witch hat brim.
- Assemble the Cupcakes: Place an Oreo witch hat on top of the piped green frosting on each cupcake.
- Chill and Serve: Refrigerate the cupcakes covered until ready to serve to allow frosting to set.
Notes
- To easily separate Oreo cookies without breaking, twist gently and use a butter knife if needed.
- Use a piping bag fitted with a round tip for neat frosting application.
- Store cupcakes in an airtight container in the refrigerator to keep them fresh and maintain frosting shape.
- For a dairy-free version, substitute cream cheese frosting with a suitable vegan frosting.
Nutrition
- Serving Size: 1 cupcake
- Calories: 320 kcal
- Sugar: 28 g
- Sodium: 150 mg
- Fat: 18 g
- Saturated Fat: 7 g
- Unsaturated Fat: 9 g
- Trans Fat: 0 g
- Carbohydrates: 38 g
- Fiber: 2 g
- Protein: 3 g
- Cholesterol: 30 mg


