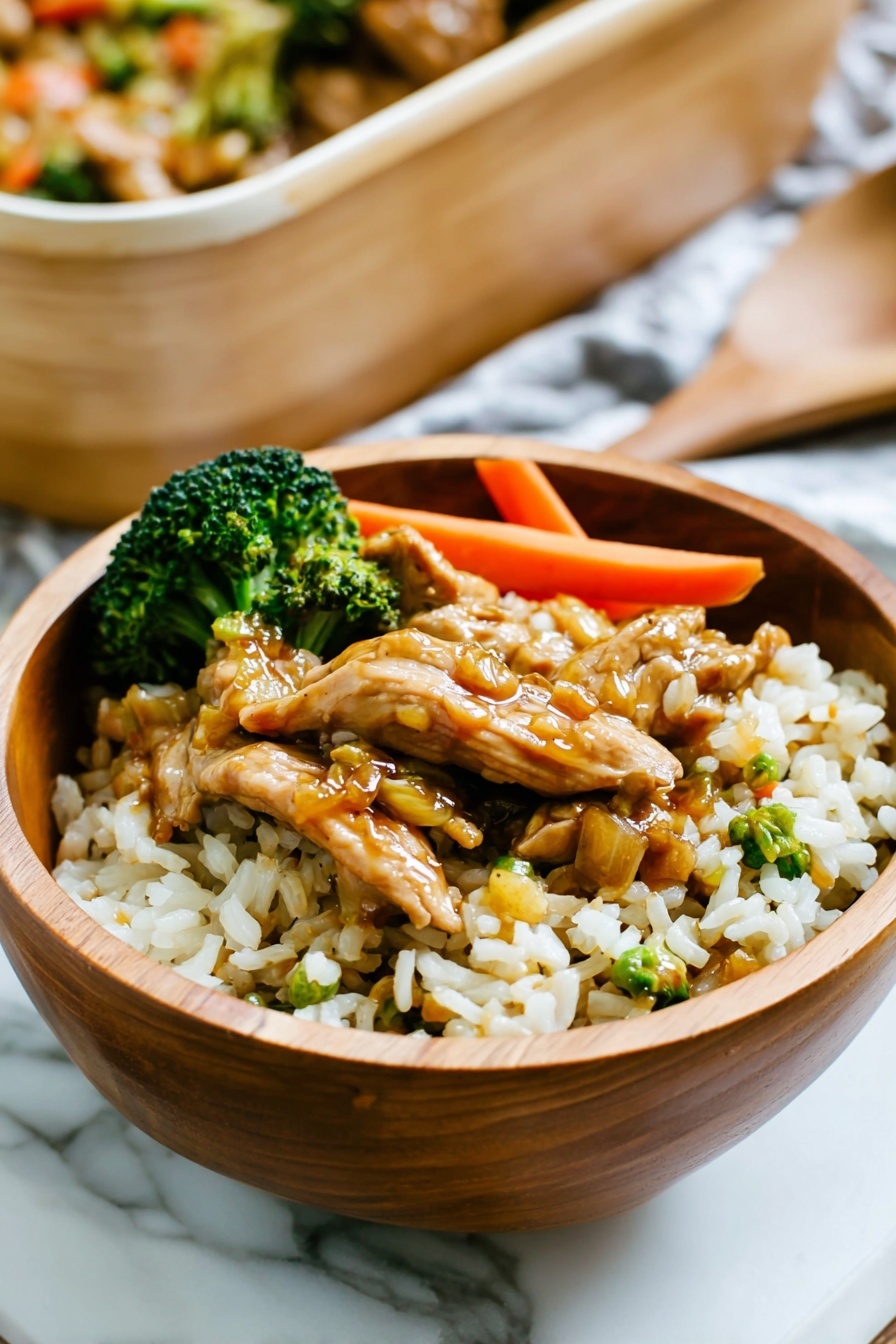
Teriyaki Chicken Casserole with Vegetables Recipe
If you’re craving something comforting yet packed with flavor, you’ve got to try this Teriyaki Chicken Casserole with Vegetables Recipe. It’s one of those all-in-one dishes that hits the sweet spot between healthy, hearty, and downright delicious. I love how easy it comes together—and seriously, it tastes like you spent hours in the kitchen when you really didn’t. Stick with me, and I’ll walk you through everything so you nail it on your first try!
Why This Recipe Works
- Simplicity Meets Flavor: The homemade teriyaki sauce balances sweet and savory perfectly without complicated ingredients.
- One-Dish Comfort: Everything bakes together, making cleanup a breeze and dinner time stress-free.
- Flexibility: The veggies and rice can be swapped or enhanced depending on what you have on hand.
- Family Friendly: Even picky eaters tend to love the tender shredded chicken and that sticky-sweet sauce.

Ingredients & Why They Work
Each ingredient in this Teriyaki Chicken Casserole with Vegetables Recipe plays a special part to create that irresistible, homey dish. From the soy sauce’s saltiness to the brown sugar’s caramel notes, everything strikes a good balance. When shopping, fresh veggies and good-quality chicken definitely up the game.
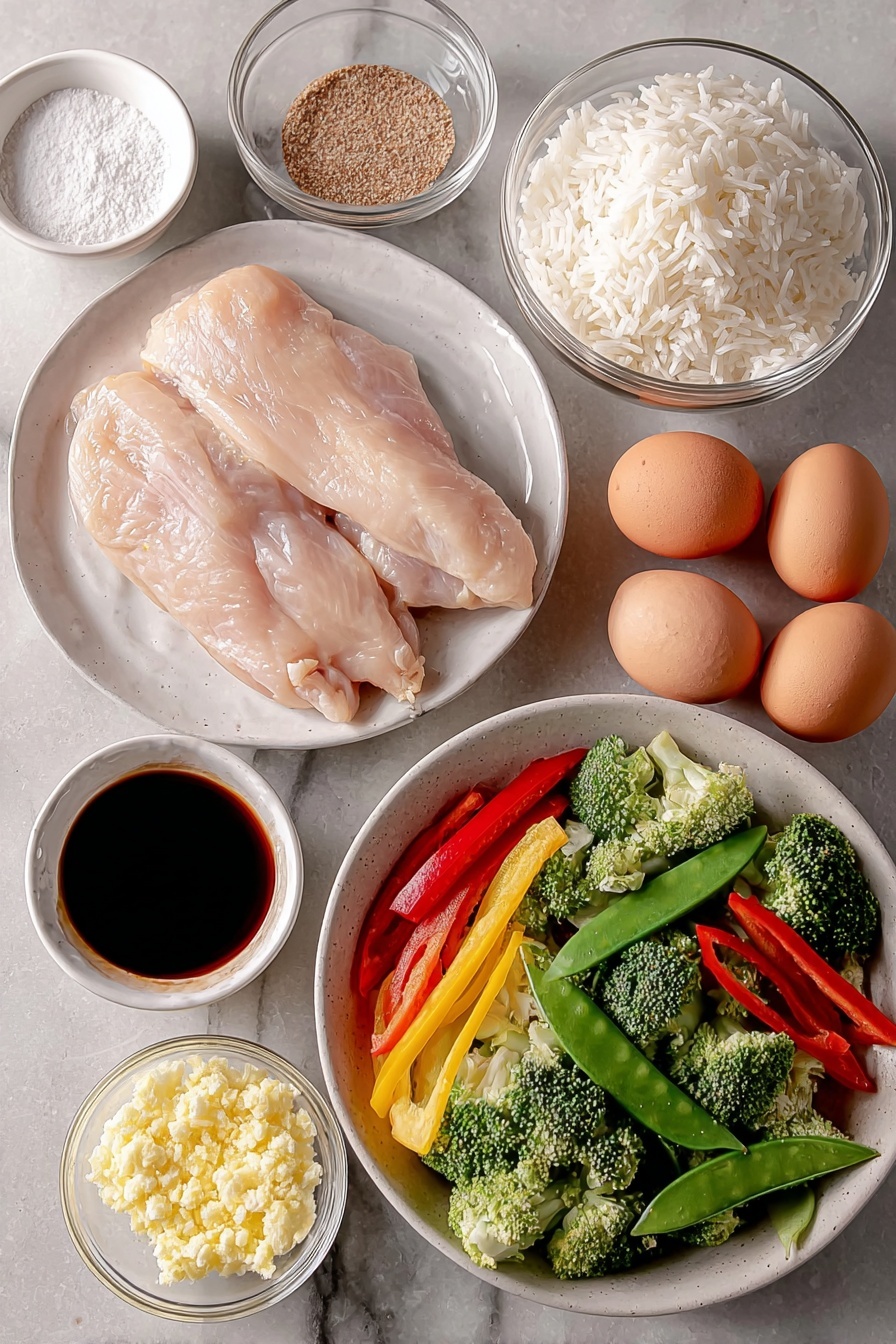
- Low-sodium soy sauce: Keeps the dish flavorful without overpowering saltiness.
- Brown sugar: Adds sweetness and depth to the homemade teriyaki sauce.
- Ground ginger: Brings that essential warm, slightly spicy note typical in teriyaki.
- Minced garlic: Gives a subtle punch, enhancing the overall aroma.
- Cornstarch: Key for thickening the sauce to that perfect glaze consistency.
- Boneless skinless chicken breasts: Easy to shred, lean, and cook evenly in the casserole.
- Refrigerated stir-fry vegetables: A convenient mix of broccoli, carrots, snow peas, and more—adds texture and color.
- Cooked rice: Soaks up the sauce and completes the meal, making it filling and satisfying.
Tweak to Your Taste
I like to think of this Teriyaki Chicken Casserole with Vegetables Recipe as a canvas. You can easily swap veggies in and out or dial up the sauce’s sweetness or zing depending on your preferences—and I encourage you to make it yours!
- Vegetable swaps: I’ve tried it with bell peppers and snap peas, and my family loved the extra crunch and color.
- Spice it up: For a little heat, adding a pinch of red pepper flakes or a drizzle of sriracha on top amps things up deliciously.
- Low-carb version: Serve the casserole on cauliflower rice instead of traditional rice for a lighter meal.
- Make it gluten-free: Use tamari or coconut aminos in place of soy sauce and make sure your stir-fry veggies contain nothing added.
Step-by-Step: How I Make Teriyaki Chicken Casserole with Vegetables Recipe
Step 1: Preheat and Prepare
First things first, preheat your oven to 350°F and give your 9×13-inch baking pan a good spray with non-stick spray. This keeps everything from sticking and makes cleanup a snap. I always double-check my oven temp with a thermometer because some ovens run hotter or cooler than they say—little things like that make the difference between juicy chicken and dry chicken.
Step 2: Whip Up the Teriyaki Sauce
In a small saucepan, mix the low-sodium soy sauce, water, brown sugar, ground ginger, and minced garlic. Cover and bring it to a gentle boil over medium heat. Once boiling, remove the lid and boil for an additional minute. Meanwhile, in a small bowl, whisk together the cornstarch and water until smooth. Slowly stir this mixture into your saucepan and keep cooking until the sauce thickens into a glossy glaze. This sauce is the heart of the dish—don’t skimp on tasting it while it simmers to get that perfect balance!
Step 3: Assemble the Casserole
Place your chicken breasts in the prepared pan. Surround them with the steamed stir-fry vegetables. I steam the veggies quickly while the sauce is cooking so everything also stays vibrant and crisp. Pour one cup of your homemade teriyaki sauce evenly over the chicken and veggies, then cover the pan tightly with foil to keep all those luscious juices locked in.
Step 4: Bake and Shred
Bake the covered casserole for 30 minutes or until your chicken reaches an internal temp of 165°F. When done, remove the foil carefully (watch out for steam!). Using two forks, shred the chicken right in the dish—it blends beautifully with all the sauce and veggies and makes for such a cozy texture.
Step 5: Mix in the Rice and Finish Baking
Add the cooked brown or white rice to the casserole dish and pour in most of the remaining teriyaki sauce, saving a little for drizzling later. Gently toss everything together so the flavors meld. Pop it back in the oven, uncovered, for 10 more minutes until everything is heated through. Let it sit for five minutes before serving to let the flavors settle.
Pro Tips for Making Teriyaki Chicken Casserole with Vegetables Recipe
- Don’t Skip the Cornstarch Slurry: This thickens the sauce perfectly—if you add it too quickly or too much, the sauce can get gloopy, so go slow and stir well.
- Even Chicken Thickness: Pound your chicken breasts to an even thickness before baking, so they cook uniformly without drying out.
- Fresh Veggies Are Key: I always use fresh, high-quality stir-fry veggies instead of frozen, so they retain their texture after baking.
- Shred While Warm: Shredding the chicken right out of the oven while still warm makes the process easier and juicier—plus, the sauce clings better.
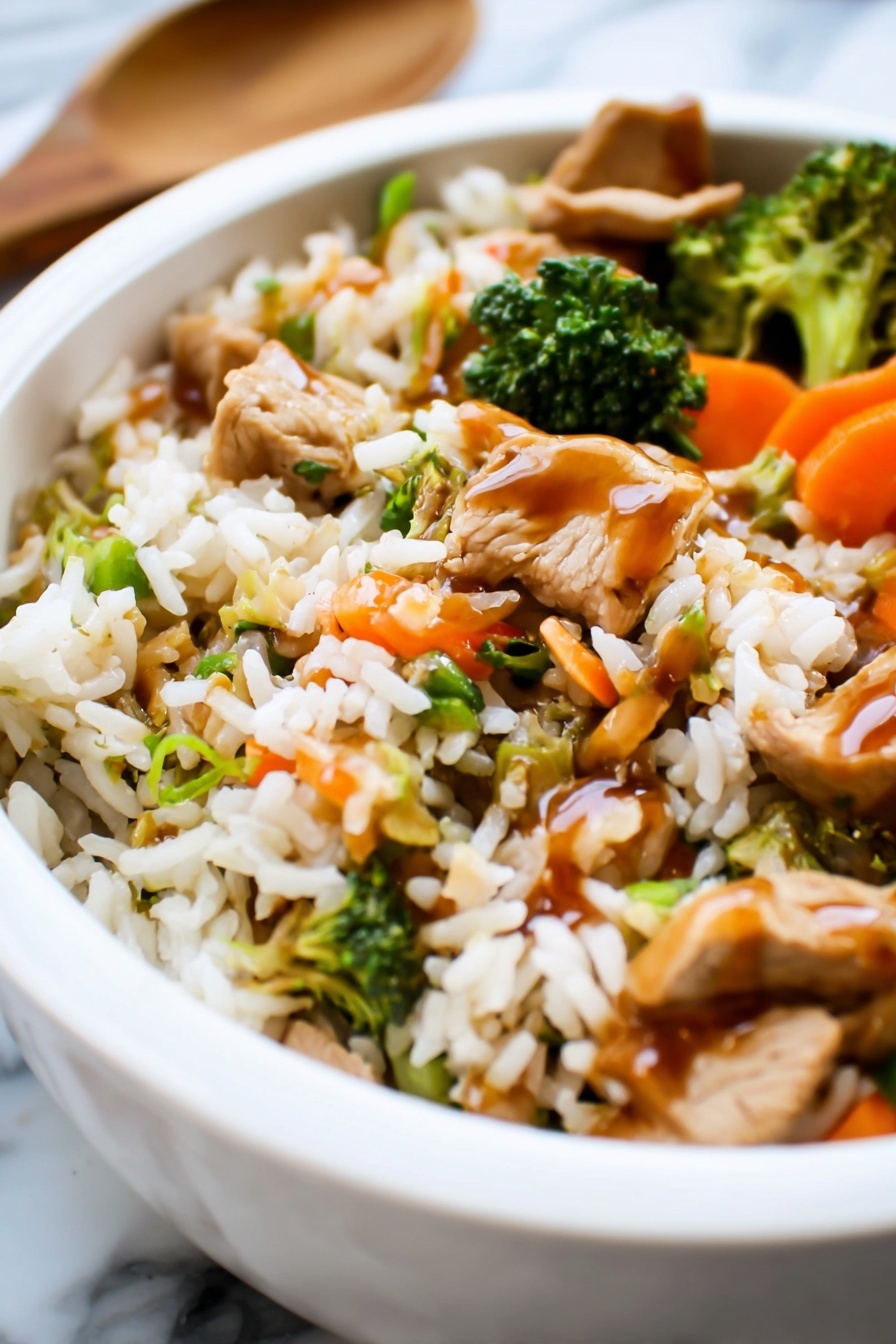
How to Serve Teriyaki Chicken Casserole with Vegetables Recipe
Garnishes
When I serve this casserole, I love a sprinkle of toasted sesame seeds and some chopped fresh green onions on top—not only for a pop of color but also for a little crunch and fresh bite. Sometimes I add a few cilantro leaves if I want it a touch more vibrant.
Side Dishes
This casserole really stands on its own, but if you want to keep it light, a simple cucumber salad or steamed edamame pairs beautifully. For a heartier meal, I’ll whip up some miso soup or a crunchy Asian slaw next to it.
Creative Ways to Present
For a dinner party, I’ve served the casserole in individual ramekins and garnished with a drizzle of extra teriyaki sauce and thinly sliced chilies. It makes for a fancy, yet comfortable presentation that guests love. You can also layer the casserole in a clear glass dish for a colorful visual before baking.
Make Ahead and Storage
Storing Leftovers
After dinner, I let leftovers cool completely and store them in an airtight container in the fridge. They keep beautifully for up to 3 days. Because the chicken and veggies are already mixed with rice, it reheats evenly without drying out.
Freezing
I’ve frozen this casserole successfully by portioning it into freezer-safe containers right after cooling. Just be sure to thaw overnight in the fridge for best texture and flavor, then reheat gently to avoid drying out the chicken.
Reheating
My favorite way to reheat leftovers is in the oven at 325°F covered with foil to keep moisture in. Microwave works too—just cover loosely and stir halfway through. Either way, add a splash of water or extra sauce if it feels dry.
FAQs
-
Can I use chicken thighs instead of breasts for this casserole?
Absolutely! Chicken thighs are a great alternative if you want a bit more rich flavor and juiciness. Just keep in mind that thighs may need a few extra minutes to cook through, so check for an internal temperature of 165°F before shredding.
-
Is it possible to make this recipe vegetarian?
Yes! You can replace chicken with firm tofu or tempeh, and use vegetable broth instead of water when making the sauce for extra flavor. Just make sure to press and bake the tofu first to get rid of excess moisture.
-
How can I make the sauce thicker if it’s too runny?
If your sauce isn’t thickening enough, add a bit more cornstarch mixed with water slowly while stirring over medium heat. Sometimes the thickness depends on the cooking temperature and timing, so be patient and stir constantly for the best results.
-
Can I use frozen vegetables in this Teriyaki Chicken Casserole with Vegetables Recipe?
You can, but make sure to thaw and drain them well to avoid extra water in the casserole, which can make it soggy. I personally prefer fresh veggies for that crisp texture after baking.
Final Thoughts
This Teriyaki Chicken Casserole with Vegetables Recipe has become such a go-to comfort meal for me—easy enough for a busy weeknight but impressive enough when friends come over. I hope you enjoy making it as much as I do. Don’t be afraid to tweak it and make it your own; after all, cooking is about joy and sharing tasty moments. Now, grab your apron, and let’s get baking!
Print
Teriyaki Chicken Casserole with Vegetables Recipe
- Prep Time: 15 minutes
- Cook Time: 40 minutes
- Total Time: 55 minutes
- Yield: 4 servings
- Category: Main Course
- Method: Baking
- Cuisine: Asian
- Diet: Low Fat
Description
This Teriyaki Chicken Casserole is a flavorful and convenient one-dish meal that combines tender shredded chicken, steamed stir-fry vegetables, and rice all baked together with a savory homemade teriyaki sauce. Perfect for a family dinner that’s both satisfying and easy to prepare.
Ingredients
Teriyaki Sauce
- 3/4 cup low-sodium soy sauce
- 1/2 cup water
- 1/4 cup brown sugar
- 1/2 teaspoon ground ginger
- 1/2 teaspoon minced garlic
- 2 tablespoons cornstarch
- 2 tablespoons water (for cornstarch slurry)
Main Ingredients
- 1 pound boneless skinless chicken breasts
- 1 bag (12 ounces) refrigerated stir-fry vegetables (broccoli, carrots, snow peas, etc.), steamed
- 3 cups cooked brown or white rice
Instructions
- Preheat and prepare baking dish: Preheat oven to 350° F. Spray a 9×13-inch baking pan with non-stick spray to prevent sticking.
- Make the teriyaki sauce base: Combine soy sauce, 1/2 cup water, brown sugar, ground ginger, and minced garlic in a small saucepan and cover. Bring to a boil over medium heat, then remove the lid and cook for one minute.
- Thicken the sauce: In a separate small bowl, stir together cornstarch and 2 tablespoons water until smooth. Once the sauce is boiling, add this slurry to the saucepan, stirring continuously until the sauce thickens, then remove from heat.
- Arrange chicken and vegetables: Place the chicken breasts in the prepared baking pan. Surround the chicken with the steamed stir-fry vegetables.
- Add sauce and bake: Pour 1 cup of the teriyaki sauce over the chicken and vegetables. Cover the pan with foil and bake for 30 minutes or until the chicken reaches an internal temperature of 165° F.
- Shred chicken: Remove the pan from the oven and carefully take off the foil. Using two forks, shred the chicken directly in the casserole dish.
- Add rice and sauce: Add the cooked rice to the casserole dish along with most of the remaining sauce, reserving some to drizzle when serving. Gently toss everything together until combined.
- Bake again and serve: Return the casserole to the oven and bake for an additional 10 minutes until heated through. Let it stand for 5 minutes before serving. Drizzle each portion with the reserved sauce and enjoy!
Notes
- Use low-sodium soy sauce to control salt content in the dish.
- Steaming the vegetables before adding ensures they stay tender and crisp.
- You can substitute chicken breasts with chicken thighs for a juicier texture.
- Leftover sauce can be stored in the refrigerator for up to 3 days and used as a dipping sauce or glaze.
- For a gluten-free version, substitute soy sauce with tamari.
Nutrition
- Serving Size: 1 serving
- Calories: 464 kcal
- Sugar: 10 g
- Sodium: 700 mg
- Fat: 1.5 g
- Saturated Fat: 0.3 g
- Unsaturated Fat: 1.0 g
- Trans Fat: 0 g
- Carbohydrates: 21 g
- Fiber: 3 g
- Protein: 31 g
- Cholesterol: 70 mg


