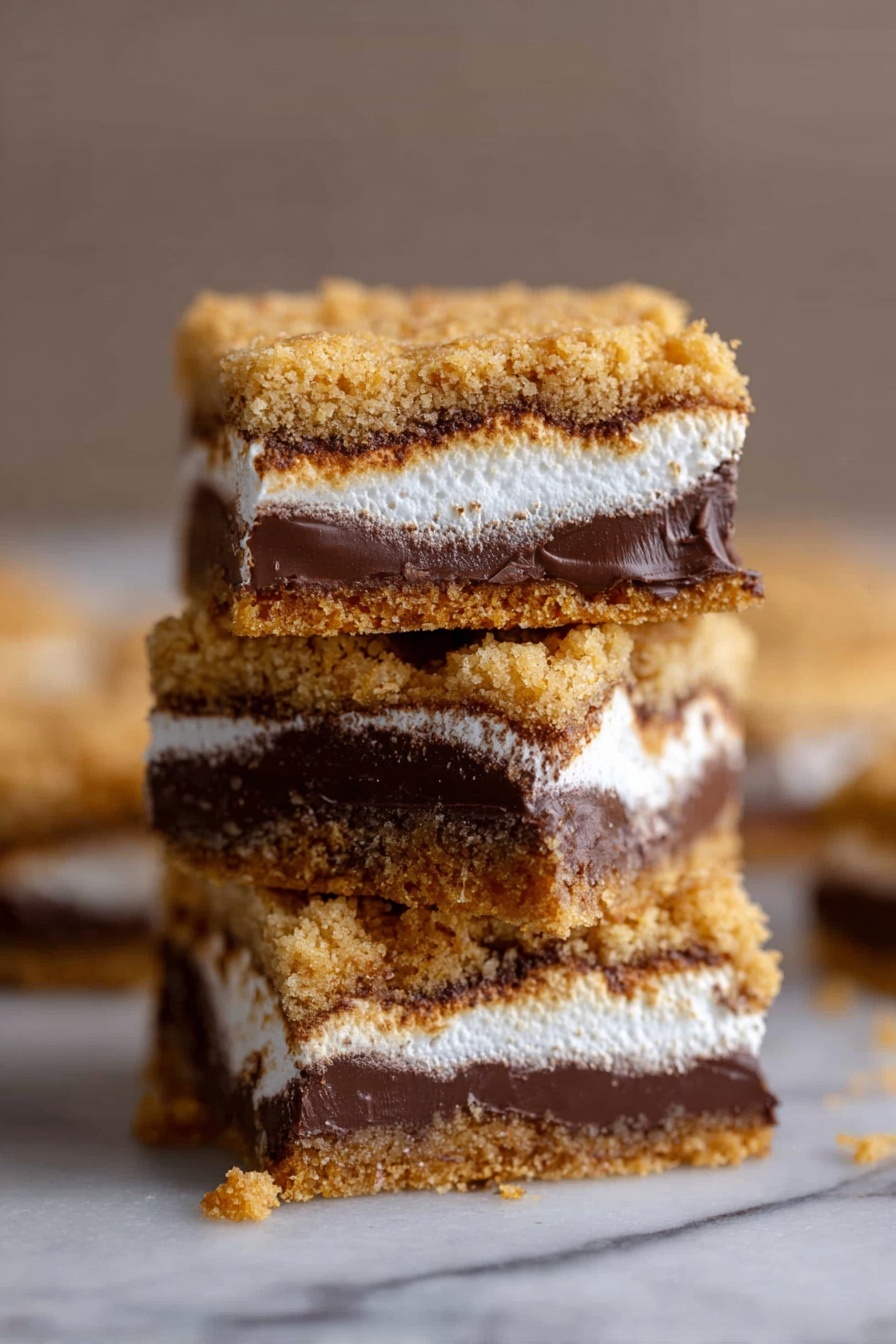
S’mores Cookie Bars Recipe
If you’re a fan of all things gooey, chocolatey, and nostalgic, you’re absolutely going to love this S’mores Cookie Bars Recipe. It’s like taking all the magic of a classic campfire s’more and turning it into a dessert bar that’s easy to slice, share, and enjoy anytime—no fire pit required! I promise, once you try this, you’ll want to make it over and over, and I’ve packed in all my best tips to help you nail it perfectly.
Why This Recipe Works
- Perfectly Balanced Flavors: You get the crunchy graham cracker, rich chocolate, and melty marshmallow all in one bite.
- Simple Yet Impressive: No crazy techniques here—just straightforward steps for a delicious payoff.
- Gooey Middle, Crisp Edges: The two cookie dough layers sandwich a plush filling that stays soft but holds together beautifully.
- Adaptable & Shareable: Easy to cut into bars that are perfect for potlucks, parties, or just satisfying your sweet tooth.

Ingredients & Why They Work
This S’mores Cookie Bars Recipe keeps it simple but packs in key ingredients that genuinely elevate the flavor and texture. The combination of graham cracker crumbs right in the dough and classic Hershey bars bring that authentic s’mores vibe home.
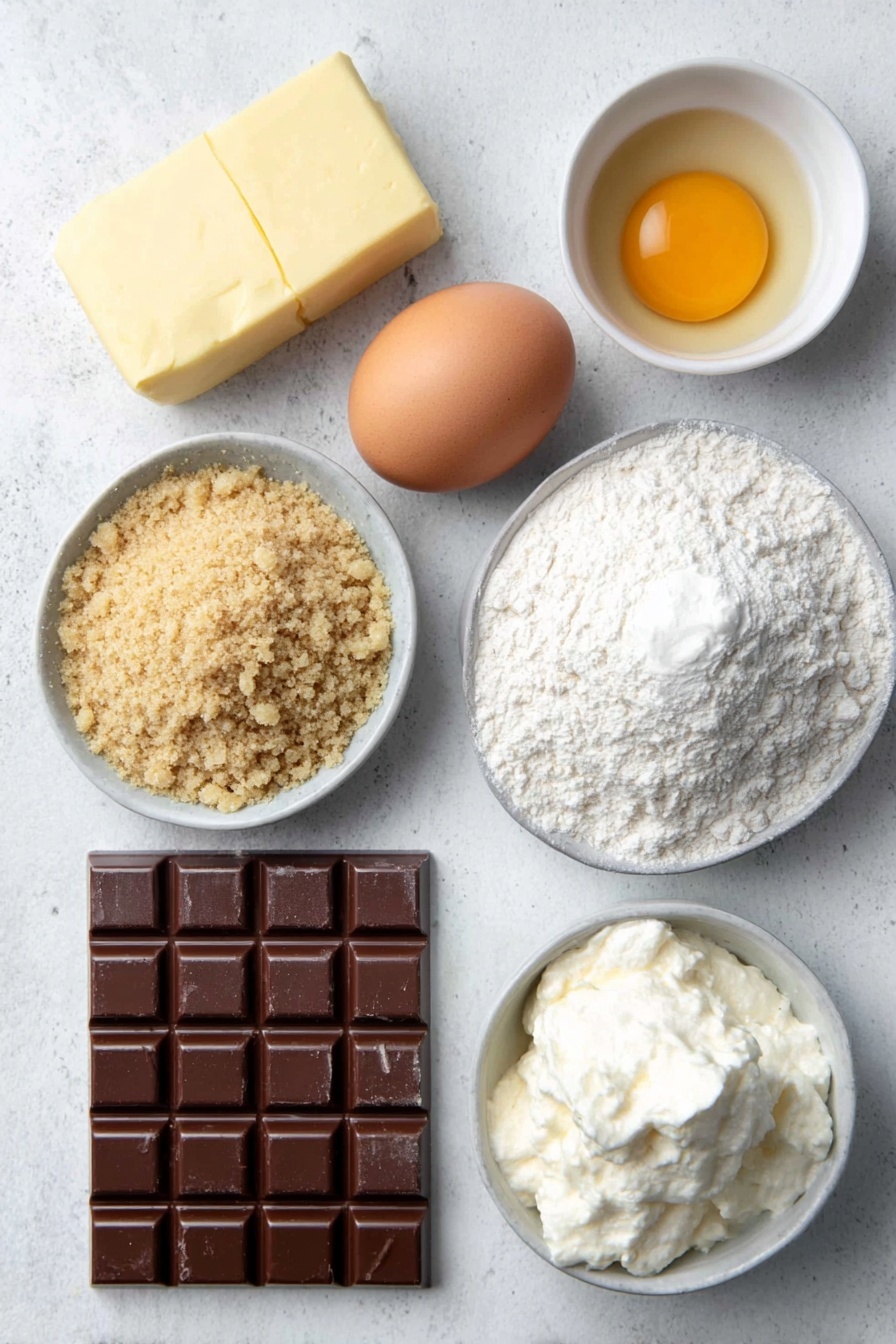
- Butter: Softened butter adds richness and helps create that tender, chewy cookie base.
- Brown sugar & Granulated sugar: The brown sugar adds moisture and chewiness, while granulated sugar keeps the texture right.
- Egg: Binds everything together and helps the bars set perfectly.
- Vanilla extract: Brings warmth and depth to the dough’s flavor.
- All-purpose flour: The structure base for the cookie bars.
- Graham crackers (finely crushed): This little secret adds authentic s’mores flavor and a touch of crunch straight in the cookie layer.
- Salt & Baking soda: Salt enhances flavors while baking soda gives just the right rise.
- Hershey bars: The classic chocolate that melts just right in the middle.
- Marshmallow fluff: Keeps the bars gooey and gives that soft, pillowy layer we all love.
Tweak to Your Taste
I love how versatile this S’mores Cookie Bars Recipe is—you can easily tailor it to fit your flavors or mood. I often swap out the classic Hershey bars for milk chocolate chips or even peanut butter cups if I’m feeling adventurous. You really can’t go wrong!
- Variation: Once, I added a sprinkle of toasted coconut on top of the marshmallow layer before putting the top cookie dough layer—it gave a delightful texture contrast and a subtle tropical twist.
Step-by-Step: How I Make S’mores Cookie Bars Recipe
Step 1: Cream Butter and Sugars Until Fluffy
Start by preheating your oven to 350°F and lining an 8×8-inch baking pan with parchment paper. I always press the parchment so it fits snugly because it really helps pop the bars out after baking. In a bowl, cream together the softened butter with both brown and granulated sugars until the mixture is light and fluffy—this usually takes about 3-4 minutes with a hand mixer. This step is crucial because it creates that tender crumb you want in your cookie layers.
Step 2: Add Egg and Vanilla
Next, add the egg and vanilla extract to your butter-sugar mix. Beat just until combined; don’t overmix or you risk making the dough too tough. This step adds structure and flavor to your bars.
Step 3: Mix in Dry Ingredients Gently
Now, whisk together your all-purpose flour, crushed graham crackers, salt, and baking soda separately. Slowly add this to your wet ingredients and mix just until no flour streaks remain. The graham cracker crumbs add that unmistakable s’mores aroma and texture throughout the dough. Be careful not to overmix here to maintain tenderness.
Step 4: Divide Dough & Freeze One Half
Press half of your dough evenly into the prepared pan. Here’s my little trick: after pressing, carefully remove the parchment with the dough and pop it in the freezer while you line the pan again and press the other half of the dough. Freezing it makes it much easier to flip and layer later without it falling apart—it’s a game changer.
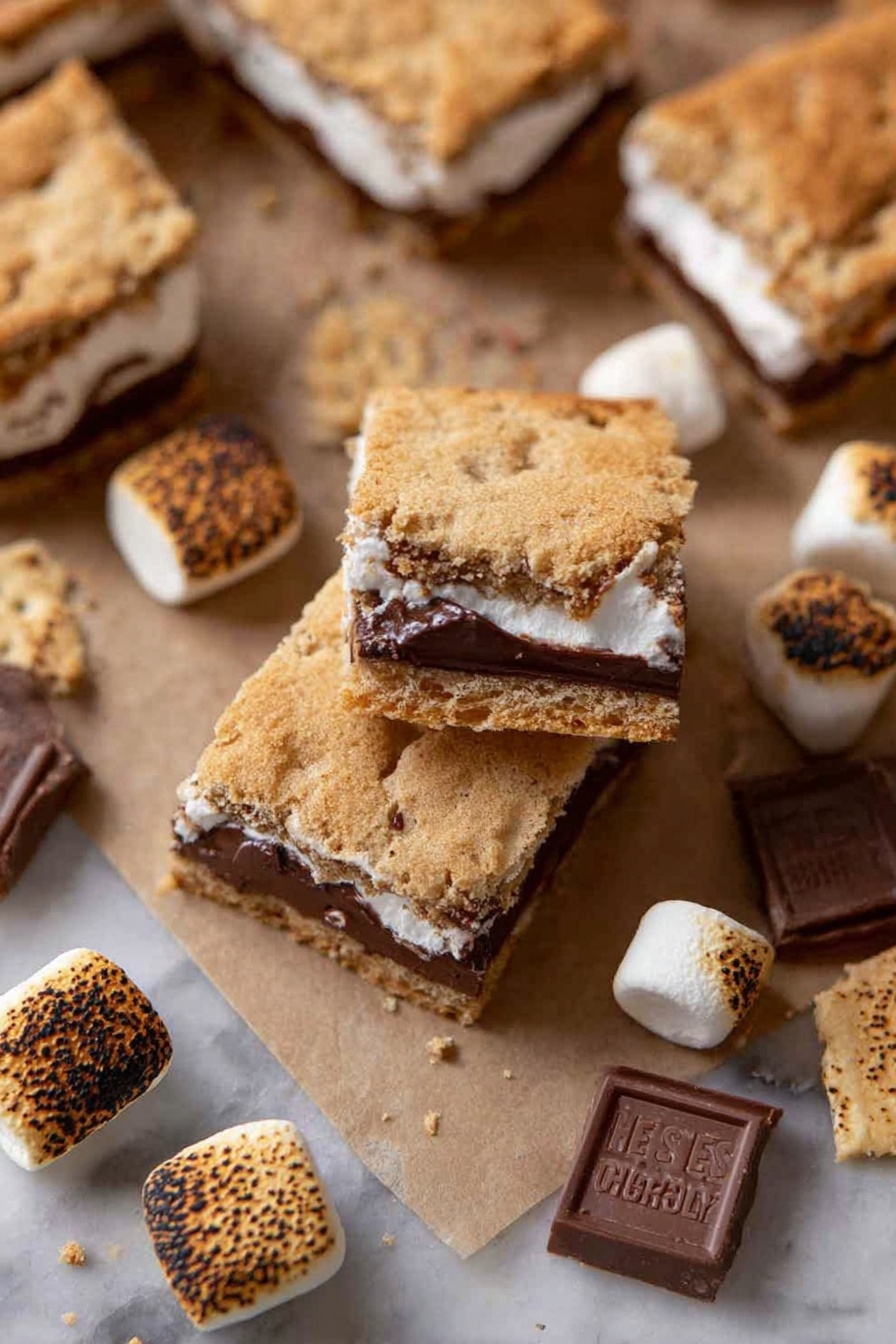
Step 5: Layer Chocolate and Marshmallow Fluff
Break your Hershey bars into pieces to cover the other cookie dough half (the one still in the pan). Spread the marshmallow fluff evenly on top of the chocolate. This step is pure comfort food magic—make sure you get that marshmallow layer as smooth as you can for the best ooey-gooey texture.
Step 6: Flip and Layer the Frozen Dough
Carefully lift the frozen dough from the freezer and flip it over onto the marshmallow layer. Working gently is key here so the dough stays intact and covers everything nicely. This creates the perfect sandwich effect.
Step 7: Bake and Cool
Bake in your preheated oven for 25 minutes. The smell while they’re baking is basically irresistible. Once out, give them plenty of time to cool fully before slicing—this keeps the layers neat and lets the marshmallow settle just right. If you cut too soon, things get messy fast (been there!).
Pro Tips for Making S’mores Cookie Bars Recipe
- Freeze the Dough Layer: This makes flipping the dough less sticky and easier to work with, minimizing cracks and tears.
- Use Quality Chocolate: Hershey bars are classic, but a good quality milk chocolate bar melts creamier and tastes richer.
- Even Marshmallow Spread: Smoothing the fluff carefully ensures every bite has the perfect gooey texture without oozing over the sides.
- Patience is Key: Letting the bars cool completely is tough (I get it!) but it’s essential to keep slices clean and layers distinct.
How to Serve S’mores Cookie Bars Recipe
Garnishes
I usually keep garnishes simple because the bars speak for themselves. A light dusting of powdered sugar or a few extra crushed graham cracker crumbs sprinkled on top add a nice visual and subtle texture. For a holiday twist, a drizzle of caramel sauce is divine.
Side Dishes
These bars are a sweet treat on their own, but pairing them with a cold glass of milk or a scoop of vanilla ice cream takes things up a notch. For something a little different, I love serving them alongside fresh berries to balance all that richness.
Creative Ways to Present
For a fun party, I slice the bars into bite-size squares and arrange them on a wooden board with little bowls of mini marshmallows and chocolate chips — making it a build-your-own s’mores bar experience! It’s always a hit with kids and adults alike.
Make Ahead and Storage
Storing Leftovers
Once completely cooled, I store these bars in an airtight container at room temperature for up to 3 days. The texture stays soft and the marshmallow stays nice and gooey without getting sticky or hard.
Freezing
These bars freeze incredibly well. I wrap individual slices tightly in plastic wrap and then place them in a freezer-safe container or bag. They keep perfectly for up to a month and thaw quickly on the counter when you want a quick treat.
Reheating
To reheat, I pop a slice in the microwave for 10-15 seconds just to soften the marshmallow and chocolate without melting everything into a mess. You want warm and gooey, but still holding their shape.
FAQs
-
Can I use store-bought graham cracker crumbs instead of crushing sheets?
Absolutely! Store-bought graham cracker crumbs work just fine, just measure out the same amount the recipe calls for. Crushing your own can add a fresher crunch but either way works well.
-
Why do we freeze half the dough before layering?
Freezing the dough makes it firm and less sticky, which helps when flipping it over onto the marshmallow layer—otherwise, it can tear or stick to everything.
-
Can I make these bars gluten-free?
Yes! Swap the all-purpose flour for a gluten-free flour blend that measures cup-for-cup. Just be sure to use gluten-free graham crackers as well to keep the recipe safe and delicious.
-
How should I cut the bars to avoid them falling apart?
Make sure the bars are fully cooled and firmed up before slicing. Use a sharp knife and clean it between cuts for neat edges and less sticking.
Final Thoughts
This S’mores Cookie Bars Recipe is one of those feel-good desserts that always brings a smile to my face. It hits that perfect sweet spot between crunchy, gooey, and chocolatey—just like the classic you remember from campfires, but without the mess and with way less effort. I hope you give it a try soon and come to love it as much as I do. Honestly, keep some handy for surprise guests or those late-night snack cravings—they’re total crowd-pleasers!
Print
S’mores Cookie Bars Recipe
- Prep Time: 15 minutes
- Cook Time: 25 minutes
- Total Time: 40 minutes
- Yield: 16 servings
- Category: Dessert
- Method: Baking
- Cuisine: American
Description
Delicious S’mores cookie bars featuring a buttery graham cracker cookie base, layers of Hershey’s chocolate bars, and fluffy marshmallow topping, baked to golden perfection. A perfect treat combining classic s’mores flavors in an easy-to-make bar.
Ingredients
Cookie Dough
- 1/2 cup butter, softened, salted or unsalted
- 1/3 cup brown sugar
- 1/4 cup granulated sugar
- 1 egg
- 1 tsp vanilla extract
- 1 1/2 cup all-purpose flour
- 1/2 cup graham crackers, finely crushed (about 3.5 sheets)
- 1/4 tsp salt
- 3/4 tsp baking soda
Assembly
- 5 standard Hershey bars
- 1 1/2 cup marshmallow fluff
Instructions
- Preheat and prepare pan: Preheat the oven to 350 degrees Fahrenheit. Line an 8×8 inch baking pan with parchment paper and set aside.
- Cream wet ingredients: In a mixing bowl, cream the softened butter, granulated sugar, and brown sugar together until well combined. Add the egg and vanilla extract, mixing thoroughly to combine.
- Add dry ingredients: Gradually incorporate the all-purpose flour, crushed graham crackers, salt, and baking soda into the wet mixture. Mix just until the flour mixture disappears and the dough comes together.
- Form base layers: Press half of the cookie dough evenly into the prepared baking pan. Carefully lift this parchment paper with the dough and place it in the freezer. Re-line the pan with fresh parchment paper and press the remaining dough evenly into the pan.
- Add chocolate and marshmallow layers: Break the Hershey bars into pieces and evenly distribute them over the dough layer in the pan. Spread the marshmallow fluff evenly on top of the chocolate layer. Remove the chilled dough from the freezer and carefully flip it on top of the marshmallow layer, working carefully to keep it intact.
- Bake the bars: Bake in the preheated oven for 25 minutes until golden and set.
- Cool and serve: Allow the bars to cool completely before slicing into 16 squares to achieve clean slices and showcase the beautiful layers.
Notes
- Use either salted or unsalted butter depending on preference; if using unsalted, you may add a pinch more salt if desired.
- Freezing the bottom layer of dough helps maintain structure and prevents the marshmallow from melting into the dough when assembled.
- You can substitute Hershey bars with other milk chocolate bars if preferred.
- For easier slicing, chill the bars in the refrigerator after cooling to let layers firm up more.
- Make sure to spread marshmallow fluff gently to avoid tearing the dough.
Nutrition
- Serving Size: 1 bar
- Calories: 250 kcal
- Sugar: 18 g
- Sodium: 110 mg
- Fat: 12 g
- Saturated Fat: 7 g
- Unsaturated Fat: 4 g
- Trans Fat: 0 g
- Carbohydrates: 30 g
- Fiber: 1 g
- Protein: 3 g
- Cholesterol: 35 mg
