
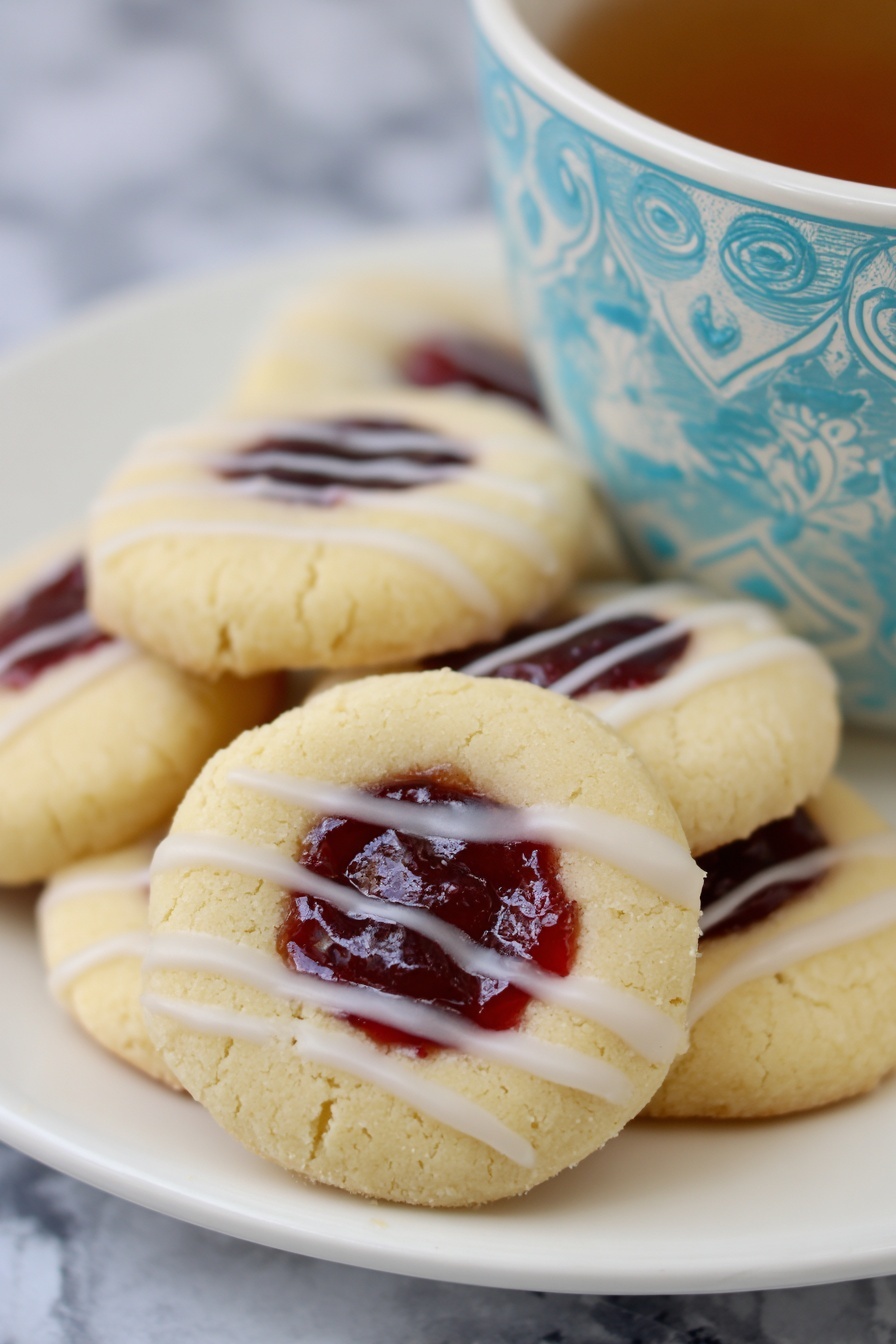
Raspberry Thumbprint Cookies Recipe
There’s just something downright irresistible about a classic cookie with a burst of fruit jam right in the center. If you’re on the hunt for a wonderfully buttery, flavorful treat, you’re going to absolutely adore this Raspberry Thumbprint Cookies Recipe. These cookies have been a family favorite for years, and I promise, they bake up perfectly every time—crispy on the edges, a little crunchy, and topped with a sweet layer of raspberry jam and icing that’s just the right touch. Trust me, once you try these, you’ll keep coming back for more.
Why This Recipe Works
- Perfect Balance of Texture: Buttery dough that’s slightly crunchy on the edges pairs beautifully with soft, fruity jam centers.
- Simple Yet Flavorful Ingredients: Using everyday pantry staples ensures the cookies shine without complicated steps.
- Chilling the Dough: This step helps solidify flavors and makes shaping the perfect thumbprint easy without sticky messes.
- Versatile Jam Technique: Melting the jam before spooning creates a gorgeous glossy finish and keeps stacking cookies neat.

Ingredients & Why They Work
The magic in this Raspberry Thumbprint Cookies Recipe comes from simple ingredients that complement each other—rich butter brings tenderness, sugar adds sweetness and texture, and the raspberry jam brightens up every bite. Using softened butter and chilling your dough makes handling much easier, so don’t skip those steps.

- Butter: Using softened butter ensures your dough is creamy and blends perfectly without melting too fast in your hands.
- Sugar: Splitting sugar between dough and coating adds just the right crunch and sweetness without overwhelming the jam.
- Egg: Binds everything together and adds richness.
- Vanilla Extract: Adds warmth and depth to the flavor, balancing the tartness of the raspberry jam.
- Flour: The foundation of the cookie; use all-purpose for that traditional texture.
- Baking Powder: Gives a light rise without turning your cookie cakey.
- Salt: Enhances all the other flavors and cuts the sweetness.
- Seedless Raspberry Jam: The star of the show, providing tangy sweetness and that classic look.
- Confectioners’ Sugar (for icing): Creates a sweet, smooth glaze that adds another layer of delightful flavor.
- Water & Vanilla (for icing): Helps thin the icing to the right consistency and adds extra aroma.
Tweak to Your Taste
One of the things I love most about this Raspberry Thumbprint Cookies Recipe is how easy it is to personalize. Whether you prefer a different jam flavor or want to make them gluten-free, the base dough is wonderfully adaptable. I’ve tried a few variations over time, and each brings its own charm!
- Jam Variations: I’ve swapped raspberry for strawberry, apricot, or even blackberry jam, and each cookie still shines—pick your favorite or use what you have on hand.
- Gluten-Free Option: Using a gluten-free flour blend works beautifully; just be sure to chill the dough longer if it feels too soft.
- Less Sweet Version: You can reduce sugar slightly if you prefer a more tart cookie—perfect for those who like their jam to stand out.
- Jam Inside or After Baking: I usually spoon melted jam after baking for the sheen and easier stacking, but you can press jam before baking if you like a more set filling.
Step-by-Step: How I Make Raspberry Thumbprint Cookies Recipe
Step 1: Mix Dry Ingredients
Start by whisking together the flour, baking powder, and salt in a medium bowl. Having these dry ingredients combined ahead will help you gradually incorporate them into the butter mixture without overmixing.
Step 2: Cream Butter, Sugar, and Vanilla
In a large bowl, cream softened butter with half of the granulated sugar and vanilla extract. I use my stand mixer on medium speed to get a fluffy, smooth mixture—about 2 to 3 minutes should do it. This step is key for that tender crumb and buttery flavor.
Step 3: Add Egg and Dry Ingredients
Beat in the egg until fully incorporated. Then slowly add your flour mixture, mixing gently to combine. Don’t overwork the dough here; you want it just blended for the perfect texture.
Step 4: Chill the Dough
Here’s a step I can’t recommend enough—chill your dough for exactly one hour. I’ve found it helps the cookie maintain shape when baking and makes the dough way easier to handle without sticking to your fingers.
Step 5: Shape and Sugar-Coat Your Cookies
Preheat your oven to 350°F. Line baking sheets with parchment paper or silicone mats. Roll the dough into 1-inch balls. Toss each round in the remaining sugar for a sparkly, crunchy coating—this little touch gives them great texture.
Step 6: Make the Thumbprint and Bake
Using your thumb, the back of a teaspoon, or even a wooden spoon handle, press a small indentation into the center of each dough ball. Pop them into the oven for about 13 to 16 minutes, until the edges are just starting to brown. Watch carefully, as timing may vary by oven.
Step 7: Add Jam and Cool
While warm, melt the raspberry jam in the microwave for about 20 seconds, then spoon it generously into each cookie’s thumbprint. This step elevates the look and taste, creating a shiny, inviting center. Transfer cookies to a wire rack to cool completely.
Step 8: Drizzle the Icing
Mix confectioners’ sugar with vanilla and water until you get a thick but pourable glaze. Drizzle over the cooled cookies for a pretty, sweet finishing touch. Keep in mind the icing will tint slightly pink over time from the jam—that’s just part of its charm!
Pro Tips for Making Raspberry Thumbprint Cookies Recipe
- Chill That Dough: I never skip chilling; it makes rolling a breeze and prevents cookies from spreading too thin in the oven.
- Use Softened, Not Melted Butter: Softer butter creams better but melts slower, making dough easier to handle.
- Don’t Overfill the Thumbprint: Too much jam can overflow—fill just enough for a neat little pool in the center.
- Watch Baking Time Closely: Edges should be lightly golden; baking even a minute too long can dry these delicate cookies out.
How to Serve Raspberry Thumbprint Cookies Recipe
Garnishes
My go-to garnish is a light dusting of extra powdered sugar for an elegant touch. Sometimes I sprinkle finely chopped pistachios or a tiny fresh raspberry on top of each cookie to amp up the presentation—especially if I’m serving at a party or during the holidays.
Side Dishes
I love pairing these cookies with a warm cup of tea or fresh brewed coffee. For brunches or afternoon snacks, they’re fantastic alongside fresh fruit or a soft cheese plate like Brie or cream cheese spreads.
Creative Ways to Present
For special occasions, I arrange these thumbprint cookies on a tiered dessert tray with ribbons or fresh flowers tucked around. They also look fabulous wrapped in cellophane tied with twine as homemade gifts for neighbors or friends—they always get rave reviews!
Make Ahead and Storage
Storing Leftovers
I store these cookies in an airtight container lined with parchment paper between layers to keep them from sticking together. They last beautifully at room temperature for about 4-5 days, and the jam stays juicy without drying out.
Freezing
If you want to freeze, I recommend freezing the cookie dough balls before baking. Simply roll, sugar-coat, and place them on a baking sheet to freeze solid, then transfer to a freezer-safe bag. Bake them straight from frozen, adding a few extra minutes to the bake time. You can also freeze baked cookies, but avoid icing first—add that after thawing for best results.
Reheating
Leftover cookies warm up beautifully in a 300°F oven for about 5 minutes to regain a just-baked texture. I find microwaving softens the jam too much, so the oven is my preferred method to keep that slightly crunchy edge.
FAQs
-
Can I use other types of jam for this Raspberry Thumbprint Cookies Recipe?
Absolutely! While raspberry jam is classic and delicious, you can substitute with strawberry, apricot, blackberry, or any seedless jam you prefer. Just make sure the jam isn’t too runny, so it stays nicely in the thumbprint indentation.
-
How long do Raspberry Thumbprint Cookies last?
Stored in an airtight container at room temperature, these cookies will stay fresh for up to 5 days. If you want to keep them longer, freezing the dough or baked cookies is a great option.
-
Should I add the jam before or after baking?
Both work, but I prefer adding melted jam after baking—it provides a glossy finish and makes stacking cookies easier. Adding jam before baking gives a more cooked-down filling, but it can be a little less vibrant in color.
-
Can I make these cookies gluten-free?
Yes! Simply use a gluten-free all-purpose flour blend in place of regular flour. You might want to chill the dough a bit longer since gluten-free doughs tend to be softer.
-
How do I prevent the cookies from spreading too much?
Chilling the dough is essential. Also, make sure your butter is softened, not melted, and avoid overmixing after adding flour. These steps help cookies hold their shape during baking.
Final Thoughts
Honestly, this Raspberry Thumbprint Cookies Recipe holds a special spot in my heart—not just because they’re delicious, but because they bring everyone together. My kids’ enthusiastic ratings always make me smile, and I love how easy it is to whip them up for every occasion. Whether you’re a seasoned baker or just looking for a simple, satisfying treat, give this recipe a try. I’m confident it’ll become one of your favorites too. Happy baking!
Print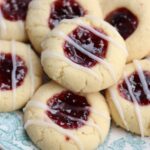
Raspberry Thumbprint Cookies Recipe
- Prep Time: 40 minutes
- Cook Time: 16 minutes
- Total Time: 1 hour 56 minutes
- Yield: 42 cookies
- Category: Dessert
- Method: Baking
- Cuisine: American
- Diet: Vegetarian
Description
Delight in these classic Raspberry Thumbprint Cookies, featuring a buttery, flavorful dough with a crisp texture and a sweet raspberry jam center. Finished with a smooth vanilla glaze, these cookies offer a perfect balance of crunchy and soft, making them an irresistible treat for any occasion.
Ingredients
Cookie Dough
- 1 cup butter softened
- 3/4 cup sugar divided
- 1 egg
- 1 teaspoon vanilla extract
- 2 cups flour
- 1 teaspoon baking powder
- 1/4 teaspoon salt
- 2/3 cup seedless raspberry jam
Icing
- 1/2 cup confectioners’ sugar
- 1/2 teaspoon vanilla extract
- 1 1/2 teaspoons water
Instructions
- Prepare Dry Ingredients: In a medium bowl, stir together the flour, baking powder, and salt until evenly combined.
- Cream Butter and Sugar: In a large bowl, cream the softened butter with 1/2 cup of granulated sugar and vanilla extract on medium speed for 2 to 3 minutes until light and fluffy.
- Add Egg and Dry Ingredients: Beat in the egg until well incorporated, then gradually add the flour mixture, beating until a uniform dough forms.
- Chill Dough: Cover the dough and chill it in the refrigerator for one hour to firm up for easier handling.
- Preheat Oven and Prepare Baking Sheets: Preheat the oven to 350°F. Line baking sheets with parchment paper or silicone mats or lightly grease them.
- Form and Sugar the Dough Balls: Roll the chilled dough into 1-inch balls. Roll each ball in the remaining 1/4 cup granulated sugar and place on prepared baking sheets about 2 inches apart.
- Create Thumbprint Indentations: Use your thumb or the back of a rounded 1/2 teaspoon measuring spoon to press an indentation into the center of each dough ball.
- Bake the Cookies: Bake in the preheated oven for 16 minutes or until the edges are lightly browned and cookies are set.
- Prepare Jam: While cookies bake, place raspberry jam in a small bowl and heat briefly in the microwave until melted and slightly runny.
- Fill Cookies: Remove baked cookies from oven and immediately spoon melted raspberry jam into the thumbprint indentations.
- Cool Completely: Transfer the cookies to wire racks and allow them to cool fully before glazing.
- Make Icing: In a small bowl, combine confectioners’ sugar, vanilla extract, and water. Mix until smooth and thickened to a drizzling consistency.
- Glaze Cookies: Drizzle the icing over the cooled jam-filled cookies to finish.
- Store Cookies: Store the cookies in an airtight container with parchment paper between layers, keeping them in a cool place to preserve freshness.
Notes
- You may add the raspberry jam before baking or after baking without melting it, but melting the jam before filling provides a prettier presentation and easier stacking.
- Over time, the white icing glaze will develop a tint from the raspberry jam.
- The cookies have a buttery flavor with a crunchy texture rather than chewy, according to family feedback.
- Use parchment or silicone mats to prevent sticking and create easy cleanup.
- For a thicker icing, reduce water quantity slightly; for thinner glaze, add extra water in small increments.
Nutrition
- Serving Size: 1 cookie
- Calories: 120 kcal
- Sugar: 8 g
- Sodium: 50 mg
- Fat: 6 g
- Saturated Fat: 3.5 g
- Unsaturated Fat: 2 g
- Trans Fat: 0 g
- Carbohydrates: 15 g
- Fiber: 0.5 g
- Protein: 1 g
- Cholesterol: 20 mg

