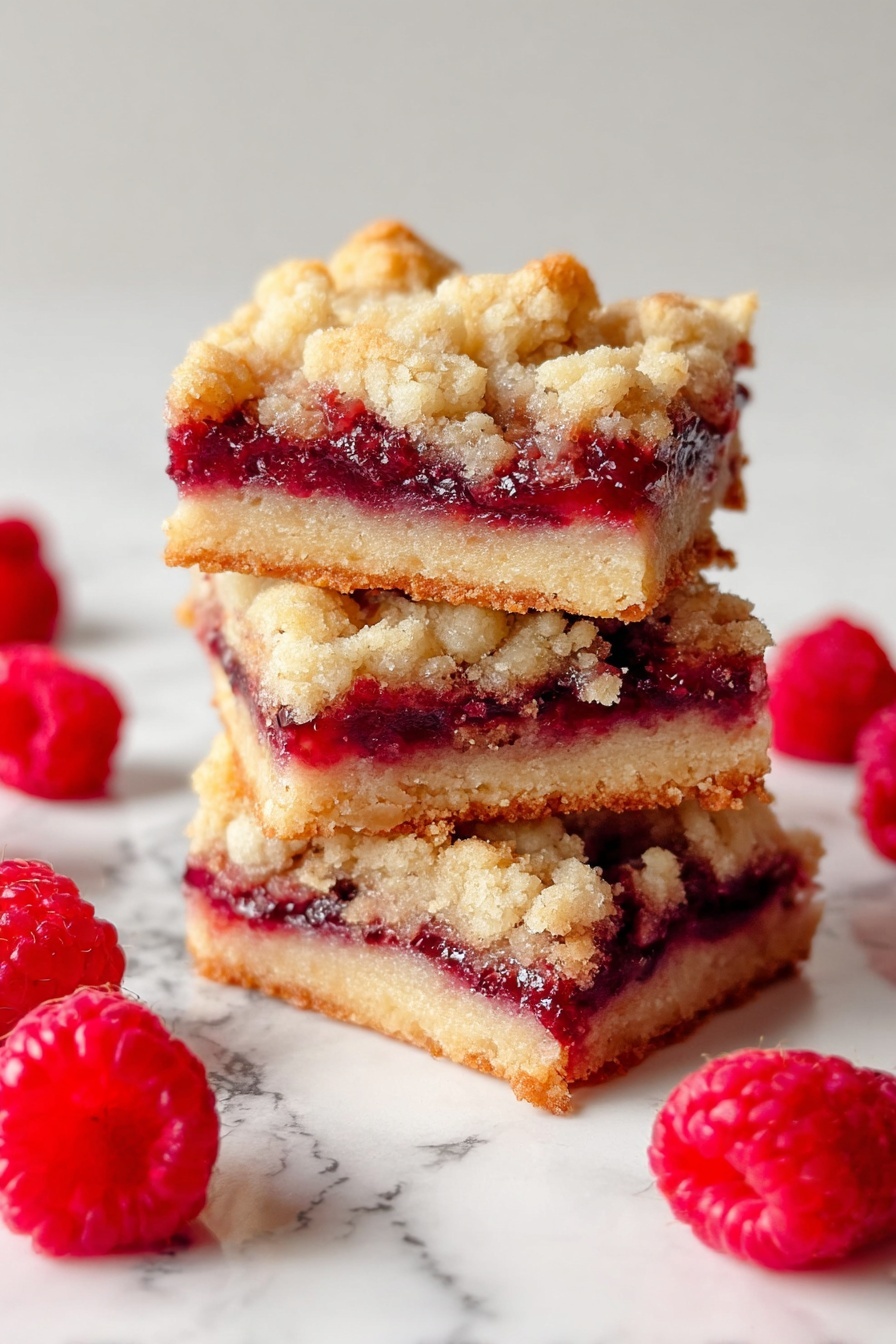
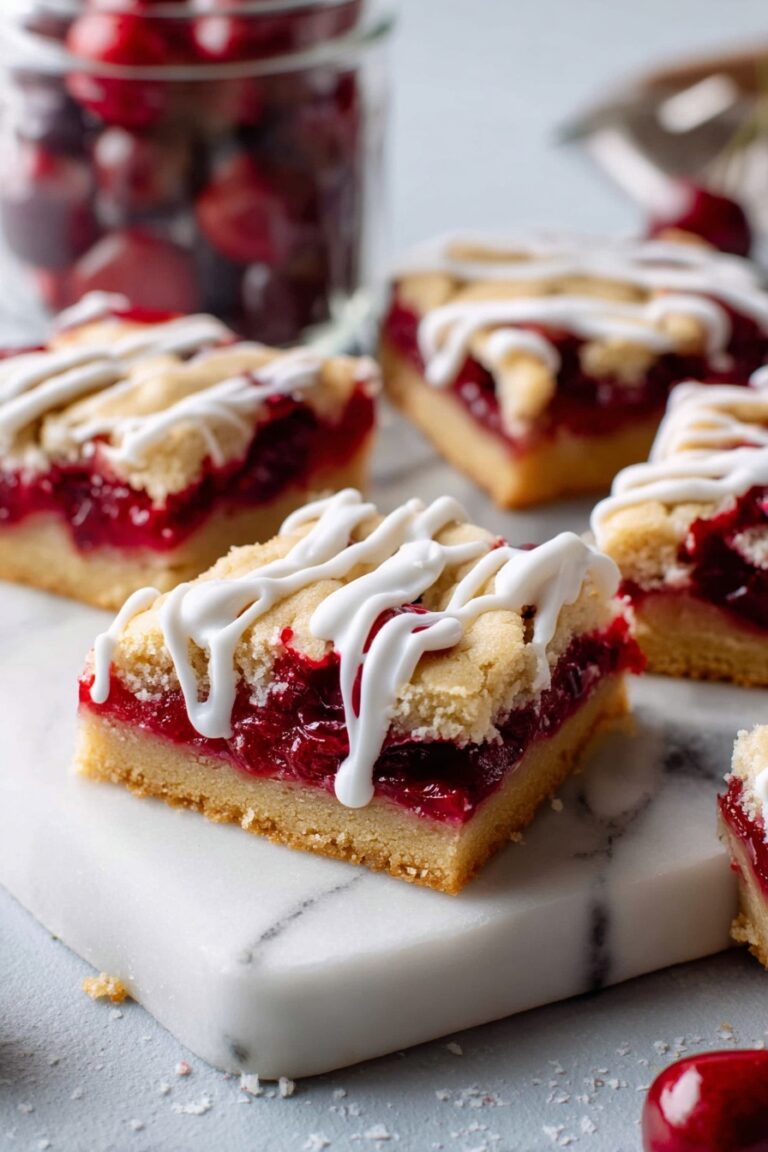
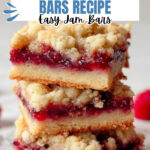
Raspberry Jam Bars Recipe
If you’re on a hunt for the perfect sweet treat that’s easy to whip up yet utterly delicious, this Raspberry Jam Bars Recipe is going to be your new best friend. I’ve made these bars countless times — they’re buttery, jammy, and have just the right crumbly texture that keeps everyone coming back for more. Stick with me, and I’ll show you how to nail this crowd-pleaser every single time.
Why This Recipe Works
- Simple Ingredients: Only five pantry staples are needed, making it easy to pull together anytime.
- Perfect Texture: A buttery crumbly base and topping that perfectly balances the sweet-tart raspberry jam.
- Versatile Sweetness: Using seedless jam keeps the bars smooth and ensures every bite melts in your mouth.
- Effortless Prep: Minimal mixing and no fancy equipment make this recipe perfect for beginners and last-minute baking.

Ingredients & Why They Work
Each ingredient in this Raspberry Jam Bars Recipe is carefully chosen for flavor and texture. These components come together easily, and you’ll find that even with minimal fuss, the results taste like you spent hours baking.
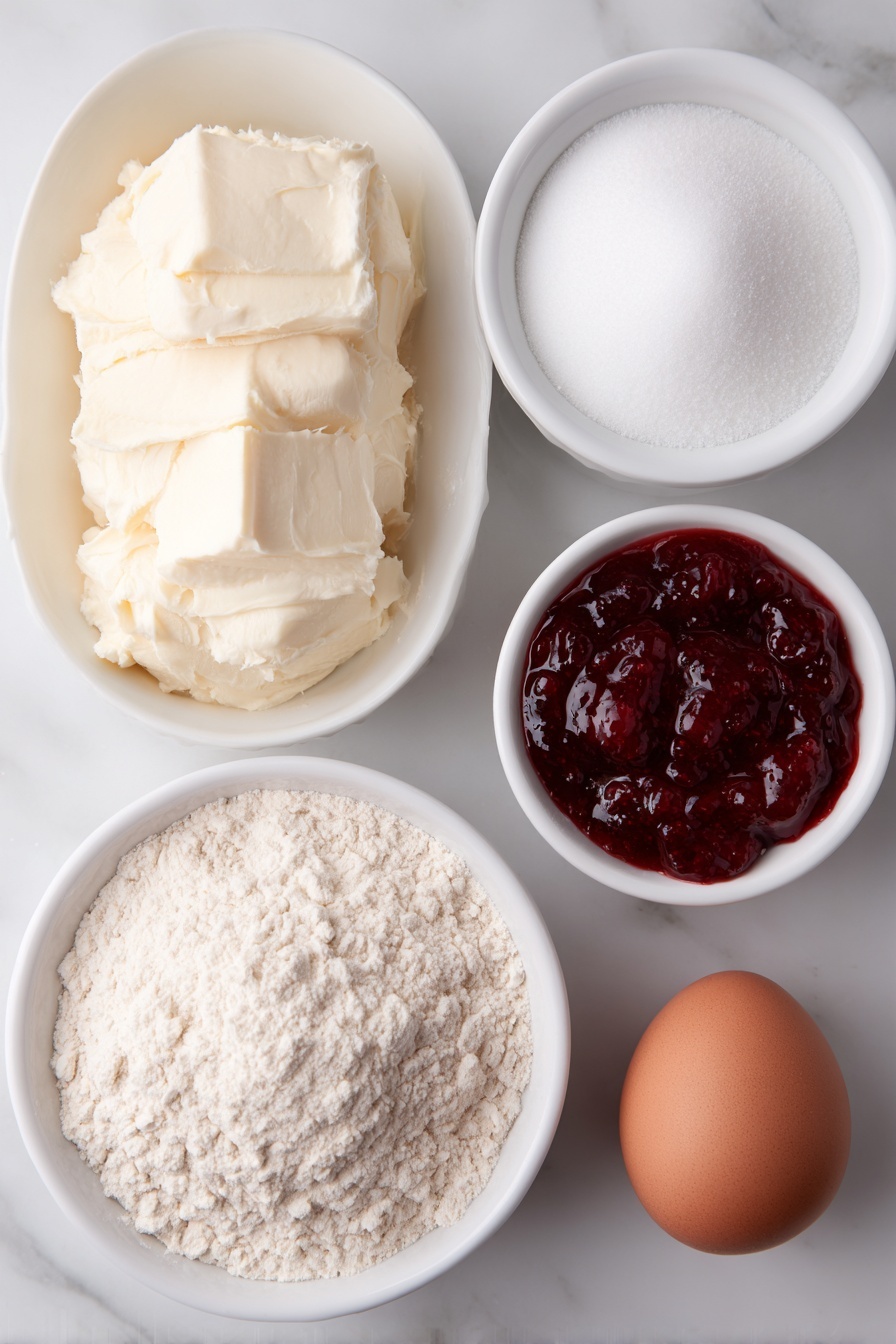
- Unsalted Butter: Using room temperature butter helps form that perfect crumbly texture, while being unsalted lets you control the sweet balance.
- All-Purpose Flour: The base of the bars, giving them structure without becoming too cakey or dense.
- Granulated Sugar: Adds sweetness and crunch to the crust and topping; I prefer regular sugar here over powdered to keep texture.
- Egg: Acts as a binder and enriches the dough, helping it hold together under the jam layer.
- Seedless Raspberry Jam: This is the star – smooth, vibrant, and tart, it spreads evenly and keeps the bars from becoming messy.
Tweak to Your Taste
This Raspberry Jam Bars Recipe is fantastic on its own, but I’ve had so much fun making it my own over the years. Don’t be afraid to experiment — that’s the beauty of a simple recipe like this!
- Variation: Sometimes, I swap raspberry jam for strawberry or apricot to mix up the flavor, and trust me — each jam brings a unique twist that’s just as delicious.
- Dietary Modifications: If you want to make it a bit lighter, swapping half the butter for coconut oil works surprisingly well, and it adds a subtle hint of tropical flavor.
Step-by-Step: How I Make Raspberry Jam Bars Recipe
Step 1: Whip Up That Oh-So-Buttery Crust
I like to soften my butter ahead of time — just leave it out for about 30 minutes before baking to get that perfect scoopable texture. Using an electric mixer on low speed, mix the butter, sugar, flour, and egg until you see a crumbly dough forming. Don’t overmix! The texture should resemble coarse crumbs, kind of like sand with some pea-sized clumps. Reserve about one and a half cups from this dough for the topping, and press the remaining mixture evenly into a greased 13 x 9-inch pan. Press it firmly but gently; this crust is the canvas for your jam masterpiece.
Step 2: Jam Time — The Sweet Heart of Your Bars
Spread the entire jar of seedless raspberry jam evenly over the crust. Don’t skimp here — the jam is what brings that beautiful burst of tartness and color. I find seedless jam is best because it melts smoothly and doesn’t make your bars too chunky or sticky. Use the back of a spoon or an offset spatula to get a nice, even layer.
Step 3: Crumble Topping Goes On Top
Take the reserved crumbly dough and sprinkle it evenly over the jam layer. I like to press it down very lightly — just enough so it sticks a bit but doesn’t compress the jam too much underneath. This topping gives the bars their signature crumbly finish, and it turns a golden brown in the oven that makes these bars downright irresistible.
Step 4: Bake to Golden Perfection
Pop your jam bars into a 350°F oven and bake for 30 to 40 minutes until the topping is a beautiful golden brown. I recommend starting to peek at 30 minutes; if the edges are browning too quickly, tent with foil to prevent burning while the middle finishes baking. You’ll know they’re done when a toothpick inserted in the edge comes out mostly clean with just a few moist crumbs.
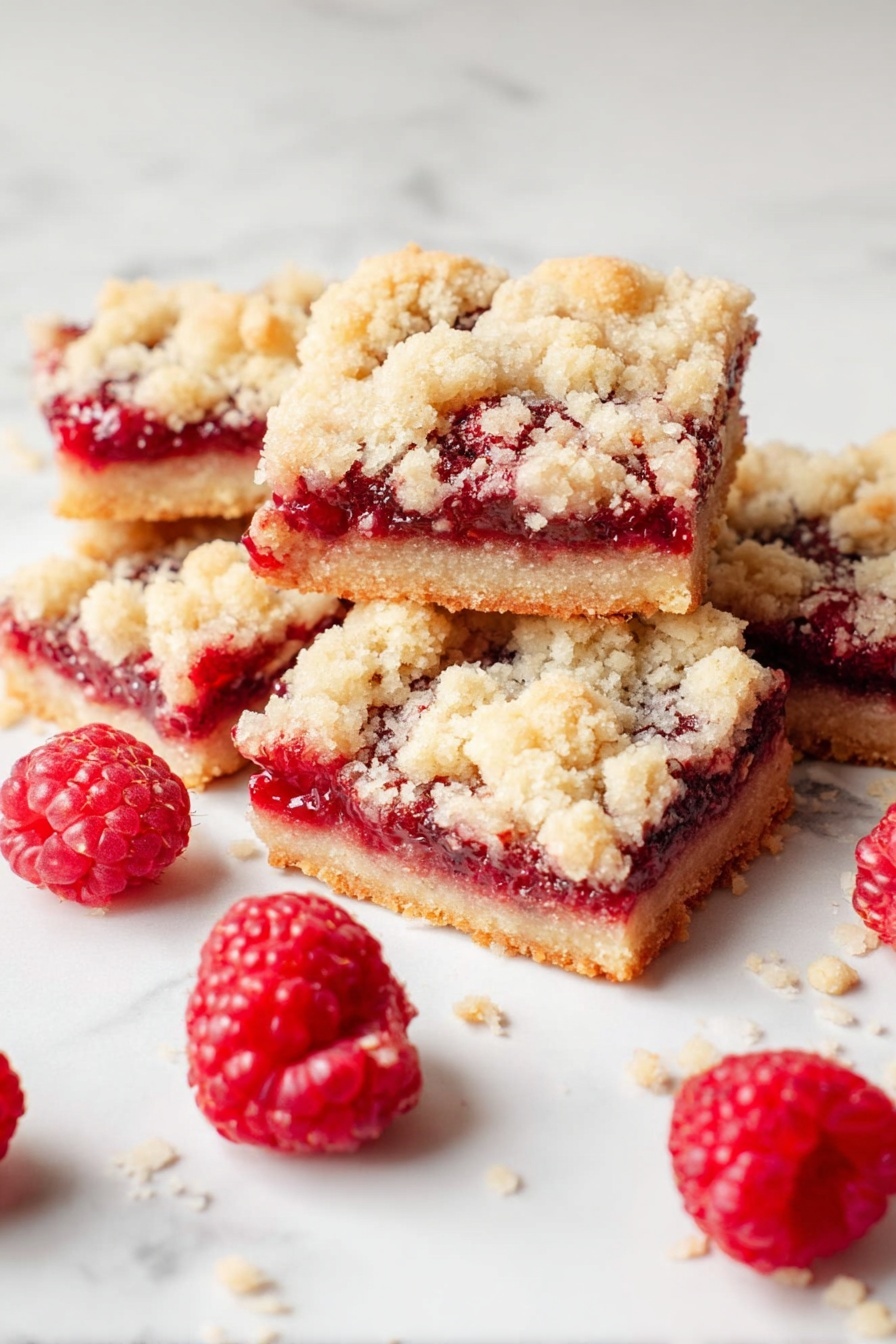
Step 5: Cool and Cut
Once baked, let the bars cool completely in the pan before cutting into squares. This cooling step is key because it allows the jam to set nicely, so you get clean cuts and no messy oozing. I usually wait at least an hour — if you’re impatient like me, pop them in the fridge to speed things along!
Pro Tips for Making Raspberry Jam Bars Recipe
- Butter Temperature: Make sure your butter is soft but not melted for that ideal crumbly texture.
- Even Jam Layer: Spread the jam carefully to avoid clumps that can cause uneven baking.
- Gentle Pressing: Lightly press the crumb topping to keep the bars flaky and crumbly, not dense.
- Cooling Time: Patience here pays off—you’ll have prettier bars that don’t fall apart.
How to Serve Raspberry Jam Bars Recipe
Garnishes
I usually keep the garnish simple — just a light dusting of powdered sugar, which adds a pretty touch and a hint of extra sweetness without overpowering the raspberry flavor. Sometimes, I add fresh raspberries on top for a fresh burst and color that’s hard to beat.
Side Dishes
These bars pair beautifully with a scoop of vanilla ice cream or a dollop of fresh whipped cream to balance the tartness. For brunch, I love serving them alongside a pot of freshly brewed coffee or tea — simple and satisfying.
Creative Ways to Present
For special occasions, I’ve arranged these bars on a pretty tiered dessert stand, garnished with edible flowers and fresh mint leaves — it’s an instant showstopper. You can also cut them into mini “bite-sized” squares for parties or pack them in decorative boxes as sweet homemade gifts.
Make Ahead and Storage
Storing Leftovers
I usually store leftover bars in an airtight container at room temperature for up to three days. If your kitchen is warm, I prefer the fridge to keep the jam from getting sticky. They stay just as tasty and maintain their texture nicely.
Freezing
These raspberry jam bars freeze well! I wrap individual bars tightly in plastic wrap and place them in a freezer-safe bag. When I want a quick treat, I thaw them at room temperature or pop them in the microwave for about 15 seconds — still delicious and easy.
Reheating
To bring day-old bars back to freshly baked delight, I warm them in a 300°F oven for 5 to 7 minutes. This revives the buttery crust crunch without drying out the jam layer. Just perfect for a cozy snack!
FAQs
-
Can I use homemade raspberry jam for this recipe?
Absolutely! Homemade jam works beautifully in this recipe, especially if it’s silky and not overly chunky. Just make sure it’s not too watery to prevent the crust from becoming soggy.
-
What can I substitute for butter?
You can substitute unsalted butter with margarine or coconut oil. Keep in mind that this might change the texture slightly — coconut oil gives a subtle tropical flavor, while margarine may produce a softer crust.
-
How do I prevent the jam from bubbling over during baking?
Spreading the jam evenly in a thin layer and not overfilling helps. If bubbling happens, don’t worry—it usually doesn’t affect flavor, just wipe any overflow after baking while the bars are still warm.
-
Can I make these bars gluten-free?
Yes! Try using a gluten-free all-purpose flour blend. Since gluten-free flours behave a bit differently, keep an eye on the dough texture and consider adding a tablespoon of almond flour for extra tenderness.
Final Thoughts
These Raspberry Jam Bars Recipe have been a staple in my kitchen because they’re incredibly easy, reliable, and pretty much everyone loves them. They’re perfect for casual get-togethers, lunchboxes, or whenever you need a little homemade sweetness that feels special but doesn’t mess with your day. I promise, once you try them, you’ll find yourself reaching for this recipe again and again – just like I do!
Print
Raspberry Jam Bars Recipe
- Prep Time: 10 minutes
- Cook Time: 40 minutes
- Total Time: 50 minutes
- Yield: 24 bars
- Category: Dessert
- Method: Baking
- Cuisine: American
Description
These Fabulous Five Ingredient Raspberry Bars are a delightful dessert featuring a buttery crumbly crust, a sweet and tangy raspberry jam filling, and a golden crumble topping. Simple to make with just a few pantry staples, they are perfect for satisfying your sweet tooth with minimal effort.
Ingredients
Crust and Topping
- 1 cup unsalted butter softened to room temperature
- 2 1/4 cups all-purpose flour
- 1 cup granulated sugar
- 1 egg room temperature
Filling
- 1 jar seedless raspberry jam 9-12 ounce jar
Instructions
- Preheat Oven: Preheat your oven to 350 degrees Fahrenheit to ensure it reaches the right temperature for baking the bars.
- Prepare Crust Mixture: Using an electric mixer on a low setting, combine the butter, flour, sugar, and egg until the mixture becomes crumbly. Reserve 1 1/2 cups of this crumbly mixture to use later as the topping.
- Form Crust: Press the remaining crumb mixture evenly into the bottom of a prepared 13 x 9 inch baking dish to form the crust layer.
- Add Raspberry Filling: Evenly spread the entire jar of seedless raspberry jam over the crust, creating a smooth layer.
- Add Topping: Sprinkle the reserved crumble topping evenly over the raspberry jam and press lightly to adhere it.
- Bake: Place the baking dish in the oven and bake at 350 degrees for 40 minutes, or until the topping turns a golden brown color.
- Cool and Serve: Once baked, allow the bars to cool completely. Cut into 24 bars and enjoy!
Notes
- Ensure the butter and egg are at room temperature before mixing for a smoother dough.
- Press the crust firmly to create an even base that holds the filling well.
- If you prefer a thicker jam layer, use a 12-ounce jar rather than 9 ounces.
- Let the bars cool completely before cutting to prevent crumbling.
- Store bars in an airtight container at room temperature for up to 3 days or refrigerate for longer freshness.
Nutrition
- Serving Size: 1 bar
- Calories: 180 kcal
- Sugar: 12 g
- Sodium: 90 mg
- Fat: 9 g
- Saturated Fat: 5 g
- Unsaturated Fat: 3 g
- Trans Fat: 0 g
- Carbohydrates: 24 g
- Fiber: 1 g
- Protein: 2 g
- Cholesterol: 30 mg