Pumpkin Pie Rice Krispie Treats Recipe
- Salted Butter: Browning it for the crust adds a rich nuttiness that deepens flavor far beyond regular melted butter.
- Mini Marshmallows: These melt quickly and help everything stick together without clumping or graininess.
- Rice Krispies Cereal: Classic crispy texture that stays crunchy even after mixing with marshmallows.
- Pumpkin Pie Spice: A warm blend of cinnamon, nutmeg, ginger, and cloves that gives that signature pumpkin pie taste.
- Orange Food Coloring (optional): Just a few drops help amp up the autumn vibe with a festive color, but you can skip it if you prefer natural hues.
- Whipped Cream: A light dollop on top perks up each square, adding creaminess and a touch of elegance.
Tweak to Your Taste
I like to have fun adapting the Pumpkin Pie Rice Krispie Treats recipe depending on who I’m sharing them with. You can easily tone down the spice or amp it up, and even add mix-ins for an extra surprise. It’s all about making this recipe your own.
- Extra Spice Kick: One time, I added an additional half teaspoon of pumpkin pie spice and a sprinkle of cayenne for a subtle warmth, which my spice-loving friends adored.
- Nutty Twist: Toasted pecans folded into the filling layer add a crunchy surprise and complement the pumpkin flavor really well.
- Gluten-Free Note: Since Rice Krispies cereal can sometimes contain malt flavoring, I suggest checking the label or opting for a certified gluten-free crispy cereal to keep it safe for gluten-sensitive guests.
- Food Coloring-Free: If you prefer to avoid artificial dyes, the treats still look beautiful with the natural golden hue from browned butter and spices.
Step-by-Step: How I Make Pumpkin Pie Rice Krispie Treats Recipe
Step 1: Brown the butter and make the crust
Start by greasing your 9×9 baking dish so your crust doesn’t stick later. Heat the butter over medium heat, stirring often, until it becomes golden brown and smells nutty — this takes about 4 to 6 minutes. Be patient here; browning butter is the secret flavor booster! Next, lower the heat, add the mini marshmallows and stir until smooth and melted. Quickly fold in the Rice Krispies cereal, then scrape the mixture into your dish and press down evenly to form the crust. Set this aside to cool and firm up while you prepare the filling.
Step 2: Make the pumpkin pie spiced filling
In the same pot (to save dishes!), melt the butter and, once melted, stir in the pumpkin pie spice and a few drops of orange food coloring if you’re using it. Then add the marshmallows and stir until completely melted. Remove from heat and gently fold in the Rice Krispies cereal until evenly coated with that luscious spiced marshmallow mixture. Spread this layer evenly over the cooled crust and press down gently with a spatula for a nice compact layer.
Step 3: Chill and garnish
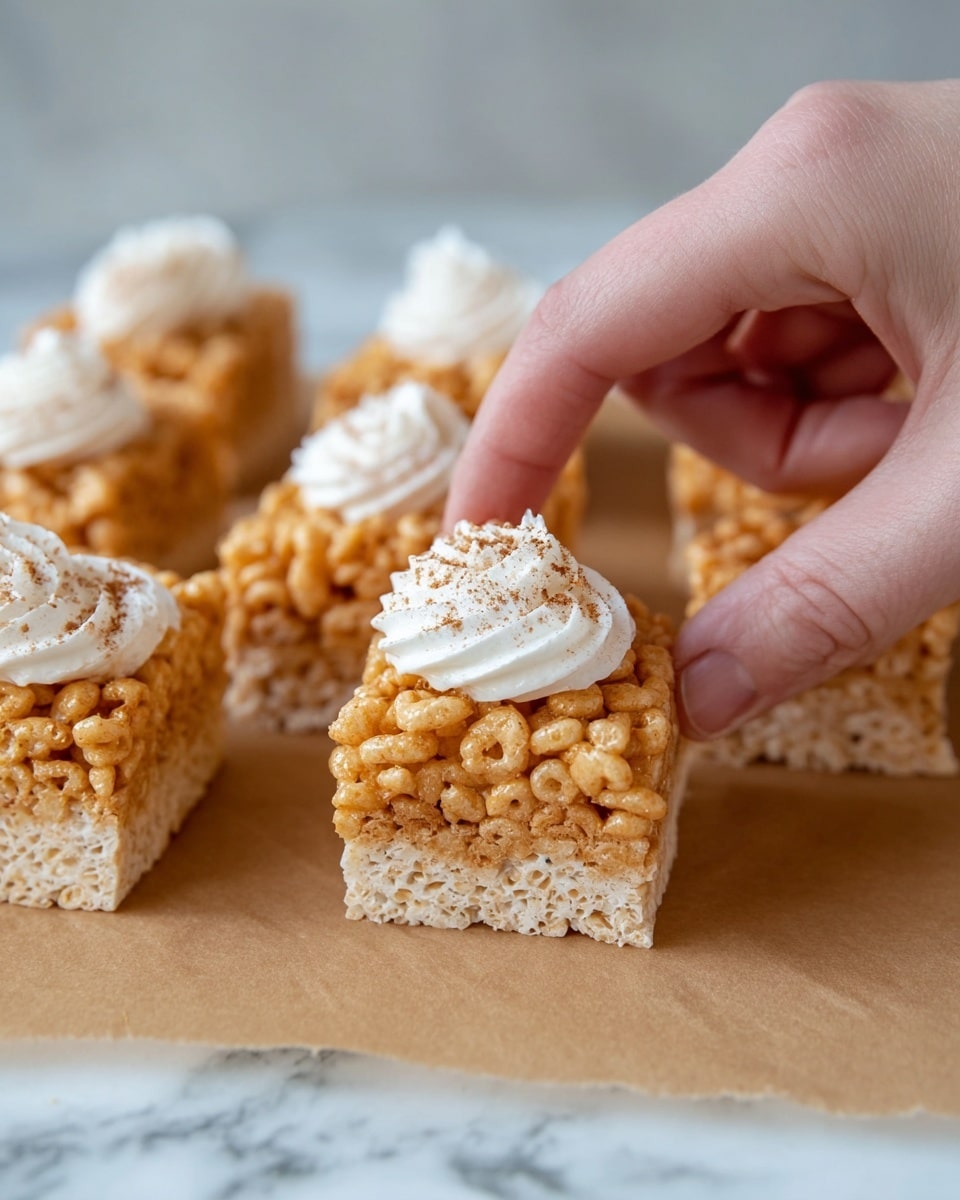
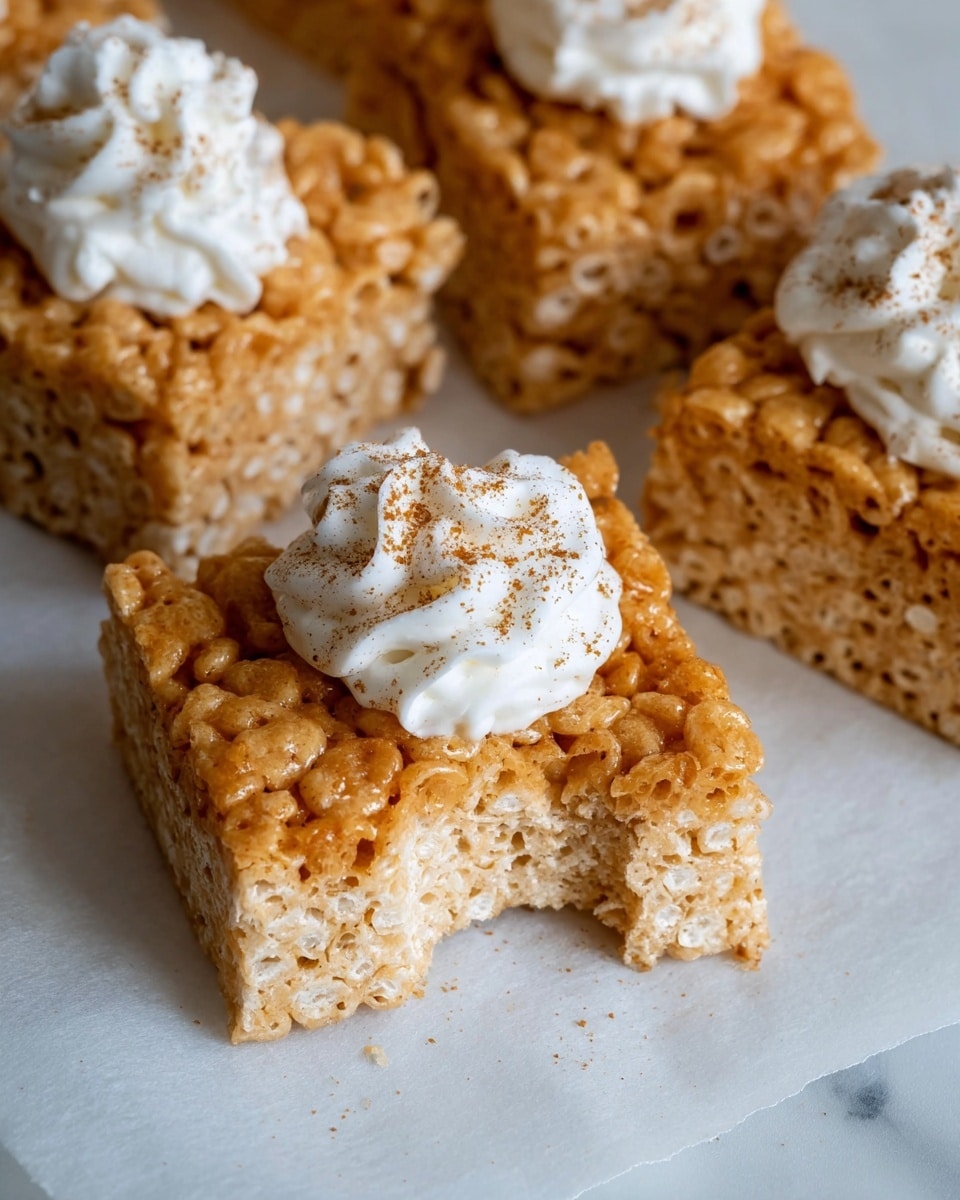
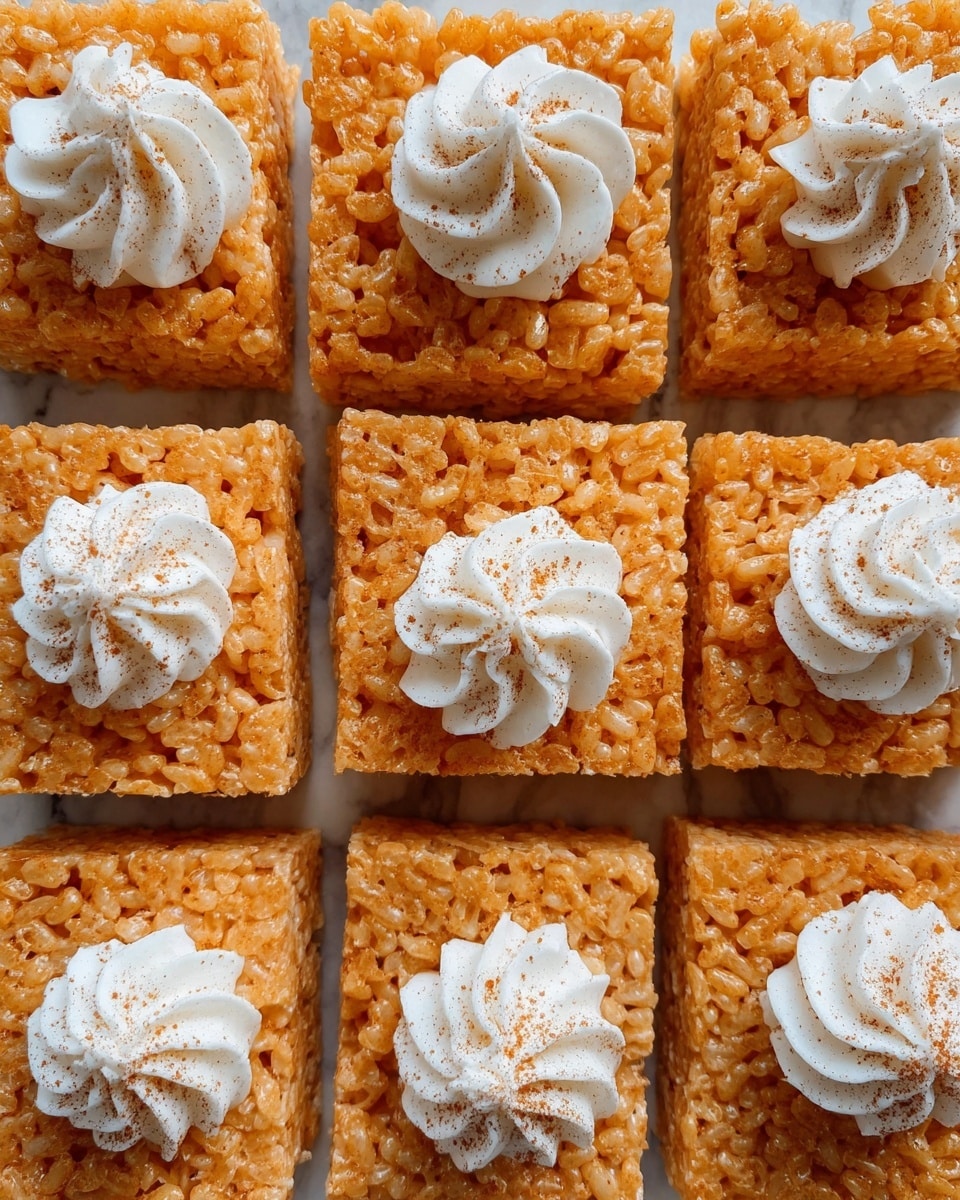
Allow your layered treats to set at room temperature or pop them in the fridge for about an hour. When ready, cut into 16 squares. Just before serving, add a generous dollop of whipped cream on each square and finish with a light sprinkle of pumpkin pie spice or cinnamon — this little touch turns amazing into unforgettable.
Pro Tips for Making Pumpkin Pie Rice Krispie Treats Recipe
- Don’t Rush Browning Butter: Keep the heat medium, and stir constantly—it can go from perfect to burnt in seconds.
- Work Quickly When Folding In Cereal: Marshmallows start setting fast, so have your bowl ready and mix efficiently to avoid clumps.
- Press Layers Evenly But Gently: Use a spatula or wax paper to avoid compacting too much, keeping the treats light and crispy.
- Chill Before Cutting: This prevents crumble and makes slicing clean squares much easier.
How to Serve Pumpkin Pie Rice Krispie Treats Recipe

Garnishes
I always finish off these treats with a fluffy cloud of whipped cream and a light sprinkle of pumpkin pie spice. Sometimes I’ll swap the whipped cream for a drizzle of caramel sauce or even a dusting of powdered sugar for extra sweetness and a pretty finish. The garnishes add texture contrast and visually elevate these little snack squares.
Side Dishes
They’re sweet enough to be a stand-alone treat but also pair beautifully with warm beverages like spiced apple cider, pumpkin spice lattes, or even a simple cup of black coffee. For gatherings, I love offering them alongside pumpkin muffins or candied nuts to create a pumpkin-themed snack spread.
Creative Ways to Present
When making these for parties, I sometimes cut them into fun shapes using cookie cutters – little pumpkins or leaves work perfectly for the season. Wrapping individual pieces in wax paper tied with twine also makes a charming gift or party favor. You can layer them in a glass container with cinnamon sticks to create a beautiful, edible centerpiece.
Make Ahead and Storage
Storing Leftovers
Store your Pumpkin Pie Rice Krispie Treats in an airtight container at room temperature to keep that perfect chew and crunch. They usually stay fresh for up to 3 days, although I rarely see them last that long in my house! If you want to keep them longer, the fridge works but might firm them up more than I like.
Freezing
I’ve frozen these treats successfully by wrapping each square individually in plastic wrap, then placing them in a freezer-safe bag. When I want one, I let it thaw at room temperature 20–30 minutes before eating. The texture stays surprisingly good, making it a convenient make-ahead dessert option.
Reheating
If you want to warm them up a bit, a quick zap in the microwave for 10–15 seconds works well—just be careful not to overdo it or the marshmallow might get too melty. This step helps soften the crispy cereal and bring out the pumpkin spice aroma.
FAQs
-
Can I use regular-sized marshmallows instead of mini marshmallows?
Yes, you can, but I recommend chopping them into smaller pieces to ensure they melt evenly and don’t leave clumps in your treat layers.
-
What if I don’t have pumpkin pie spice?
No worries! You can make a simple substitute by mixing cinnamon, ground nutmeg, ground ginger, and a pinch of cloves or allspice. Usually, a teaspoon of cinnamon plus half teaspoons each of the others does the trick.
-
Can I make these vegan or dairy-free?
Definitely possible with some swaps. Use vegan butter or coconut oil to replace butter, and pick a vegan marshmallow brand. Just be sure the Rice Krispies or cereal you use are vegan-friendly too.
-
Why do I need to brown the butter for the crust?
Browned butter adds a deeper, nutty flavor that plain melted butter can’t match. It gives the crust layer its signature warmth that pairs so beautifully with the pumpkin spice filling.
-
How do I keep my treats from being too sticky?
Pressing the layers evenly and letting the bars set completely before cutting helps reduce stickiness. Also, a light dusting of powdered sugar or wax paper between stacks can keep them from sticking together during storage.
Final Thoughts
I honestly can’t recommend this Pumpkin Pie Rice Krispie Treats recipe enough if you’re looking for a playful, flavorful change-up that brings fall vibes in every bite. They’re simple enough to pull off any day but special enough to make your gatherings feel a little more cozy and festive. Give this recipe a try for your next party or as a sweet pick-me-up—you’ll enjoy the layered textures and that pumpkin warmth as much as I do. And hey, if you end up sneaking an extra square when no one’s looking, I totally get it!
Oh, you’re going to love these Pumpkin Pie Rice Krispie Treats! They’re such a fun twist on the classic Rice Krispie treat, with that warm pumpkin pie flavor built right in. I remember making my first batch during a chilly fall afternoon, and honestly, they instantly became a seasonal favorite in my house. What’s so wonderful is how they capture all the cozy vibes of pumpkin pie without the fuss of baking a traditional pie.
This Pumpkin Pie Rice Krispie Treats recipe is a total crowd-pleaser for potlucks, Thanksgiving dessert tables, or any time you want a nostalgic treat with a festive upgrade. The mix of browned butter in the crust and that spiced, gooey filling makes you want to come back for just one more. Plus, they’re pretty quick to whip up, which means you’ll have a homemade fall treat ready in no time.
Why This Recipe Works
- Layered Texture: The two-layer approach creates a crunchy, chewy crust base with a spiced, gooey pumpkin-flavored filling on top.
- Browned Butter Magic: Browning the butter in the crust adds a deep, nutty flavor that elevates these treats beyond ordinary Rice Krispies.
- Perfect Pumpkin Spice Balance: Using pumpkin pie spice in the filling delivers all the cozy fall flavors without overpowering the sweetness.
- Quick & Easy to Make: Ready in under 30 minutes of active time, it’s a no-fuss seasonal treat that anyone can pull off.
Ingredients & Why They Work
Each ingredient here is carefully chosen to balance taste, texture, and that unmistakable pumpkin pie aroma. The mini marshmallows melt perfectly for binding, while the Rice Krispies cereal provides that iconic crispness we all love. Browned butter takes it up a notch, making the crust robust and flavorful.
- Salted Butter: Browning it for the crust adds a rich nuttiness that deepens flavor far beyond regular melted butter.
- Mini Marshmallows: These melt quickly and help everything stick together without clumping or graininess.
- Rice Krispies Cereal: Classic crispy texture that stays crunchy even after mixing with marshmallows.
- Pumpkin Pie Spice: A warm blend of cinnamon, nutmeg, ginger, and cloves that gives that signature pumpkin pie taste.
- Orange Food Coloring (optional): Just a few drops help amp up the autumn vibe with a festive color, but you can skip it if you prefer natural hues.
- Whipped Cream: A light dollop on top perks up each square, adding creaminess and a touch of elegance.
Tweak to Your Taste
I like to have fun adapting the Pumpkin Pie Rice Krispie Treats recipe depending on who I’m sharing them with. You can easily tone down the spice or amp it up, and even add mix-ins for an extra surprise. It’s all about making this recipe your own.
- Extra Spice Kick: One time, I added an additional half teaspoon of pumpkin pie spice and a sprinkle of cayenne for a subtle warmth, which my spice-loving friends adored.
- Nutty Twist: Toasted pecans folded into the filling layer add a crunchy surprise and complement the pumpkin flavor really well.
- Gluten-Free Note: Since Rice Krispies cereal can sometimes contain malt flavoring, I suggest checking the label or opting for a certified gluten-free crispy cereal to keep it safe for gluten-sensitive guests.
- Food Coloring-Free: If you prefer to avoid artificial dyes, the treats still look beautiful with the natural golden hue from browned butter and spices.
Step-by-Step: How I Make Pumpkin Pie Rice Krispie Treats Recipe
Step 1: Brown the butter and make the crust
Start by greasing your 9×9 baking dish so your crust doesn’t stick later. Heat the butter over medium heat, stirring often, until it becomes golden brown and smells nutty — this takes about 4 to 6 minutes. Be patient here; browning butter is the secret flavor booster! Next, lower the heat, add the mini marshmallows and stir until smooth and melted. Quickly fold in the Rice Krispies cereal, then scrape the mixture into your dish and press down evenly to form the crust. Set this aside to cool and firm up while you prepare the filling.
Step 2: Make the pumpkin pie spiced filling
In the same pot (to save dishes!), melt the butter and, once melted, stir in the pumpkin pie spice and a few drops of orange food coloring if you’re using it. Then add the marshmallows and stir until completely melted. Remove from heat and gently fold in the Rice Krispies cereal until evenly coated with that luscious spiced marshmallow mixture. Spread this layer evenly over the cooled crust and press down gently with a spatula for a nice compact layer.
Step 3: Chill and garnish
Allow your layered treats to set at room temperature or pop them in the fridge for about an hour. When ready, cut into 16 squares. Just before serving, add a generous dollop of whipped cream on each square and finish with a light sprinkle of pumpkin pie spice or cinnamon — this little touch turns amazing into unforgettable.
Pro Tips for Making Pumpkin Pie Rice Krispie Treats Recipe
- Don’t Rush Browning Butter: Keep the heat medium, and stir constantly—it can go from perfect to burnt in seconds.
- Work Quickly When Folding In Cereal: Marshmallows start setting fast, so have your bowl ready and mix efficiently to avoid clumps.
- Press Layers Evenly But Gently: Use a spatula or wax paper to avoid compacting too much, keeping the treats light and crispy.
- Chill Before Cutting: This prevents crumble and makes slicing clean squares much easier.
How to Serve Pumpkin Pie Rice Krispie Treats Recipe
Garnishes
I always finish off these treats with a fluffy cloud of whipped cream and a light sprinkle of pumpkin pie spice. Sometimes I’ll swap the whipped cream for a drizzle of caramel sauce or even a dusting of powdered sugar for extra sweetness and a pretty finish. The garnishes add texture contrast and visually elevate these little snack squares.
Side Dishes
They’re sweet enough to be a stand-alone treat but also pair beautifully with warm beverages like spiced apple cider, pumpkin spice lattes, or even a simple cup of black coffee. For gatherings, I love offering them alongside pumpkin muffins or candied nuts to create a pumpkin-themed snack spread.
Creative Ways to Present
When making these for parties, I sometimes cut them into fun shapes using cookie cutters – little pumpkins or leaves work perfectly for the season. Wrapping individual pieces in wax paper tied with twine also makes a charming gift or party favor. You can layer them in a glass container with cinnamon sticks to create a beautiful, edible centerpiece.
Make Ahead and Storage
Storing Leftovers
Store your Pumpkin Pie Rice Krispie Treats in an airtight container at room temperature to keep that perfect chew and crunch. They usually stay fresh for up to 3 days, although I rarely see them last that long in my house! If you want to keep them longer, the fridge works but might firm them up more than I like.
Freezing
I’ve frozen these treats successfully by wrapping each square individually in plastic wrap, then placing them in a freezer-safe bag. When I want one, I let it thaw at room temperature 20–30 minutes before eating. The texture stays surprisingly good, making it a convenient make-ahead dessert option.
Reheating
If you want to warm them up a bit, a quick zap in the microwave for 10–15 seconds works well—just be careful not to overdo it or the marshmallow might get too melty. This step helps soften the crispy cereal and bring out the pumpkin spice aroma.
FAQs
-
Can I use regular-sized marshmallows instead of mini marshmallows?
Yes, you can, but I recommend chopping them into smaller pieces to ensure they melt evenly and don’t leave clumps in your treat layers.
-
What if I don’t have pumpkin pie spice?
No worries! You can make a simple substitute by mixing cinnamon, ground nutmeg, ground ginger, and a pinch of cloves or allspice. Usually, a teaspoon of cinnamon plus half teaspoons each of the others does the trick.
-
Can I make these vegan or dairy-free?
Definitely possible with some swaps. Use vegan butter or coconut oil to replace butter, and pick a vegan marshmallow brand. Just be sure the Rice Krispies or cereal you use are vegan-friendly too.
-
Why do I need to brown the butter for the crust?
Browned butter adds a deeper, nutty flavor that plain melted butter can’t match. It gives the crust layer its signature warmth that pairs so beautifully with the pumpkin spice filling.
-
How do I keep my treats from being too sticky?
Pressing the layers evenly and letting the bars set completely before cutting helps reduce stickiness. Also, a light dusting of powdered sugar or wax paper between stacks can keep them from sticking together during storage.
Final Thoughts
I honestly can’t recommend this Pumpkin Pie Rice Krispie Treats recipe enough if you’re looking for a playful, flavorful change-up that brings fall vibes in every bite. They’re simple enough to pull off any day but special enough to make your gatherings feel a little more cozy and festive. Give this recipe a try for your next party or as a sweet pick-me-up—you’ll enjoy the layered textures and that pumpkin warmth as much as I do. And hey, if you end up sneaking an extra square when no one’s looking, I totally get it!