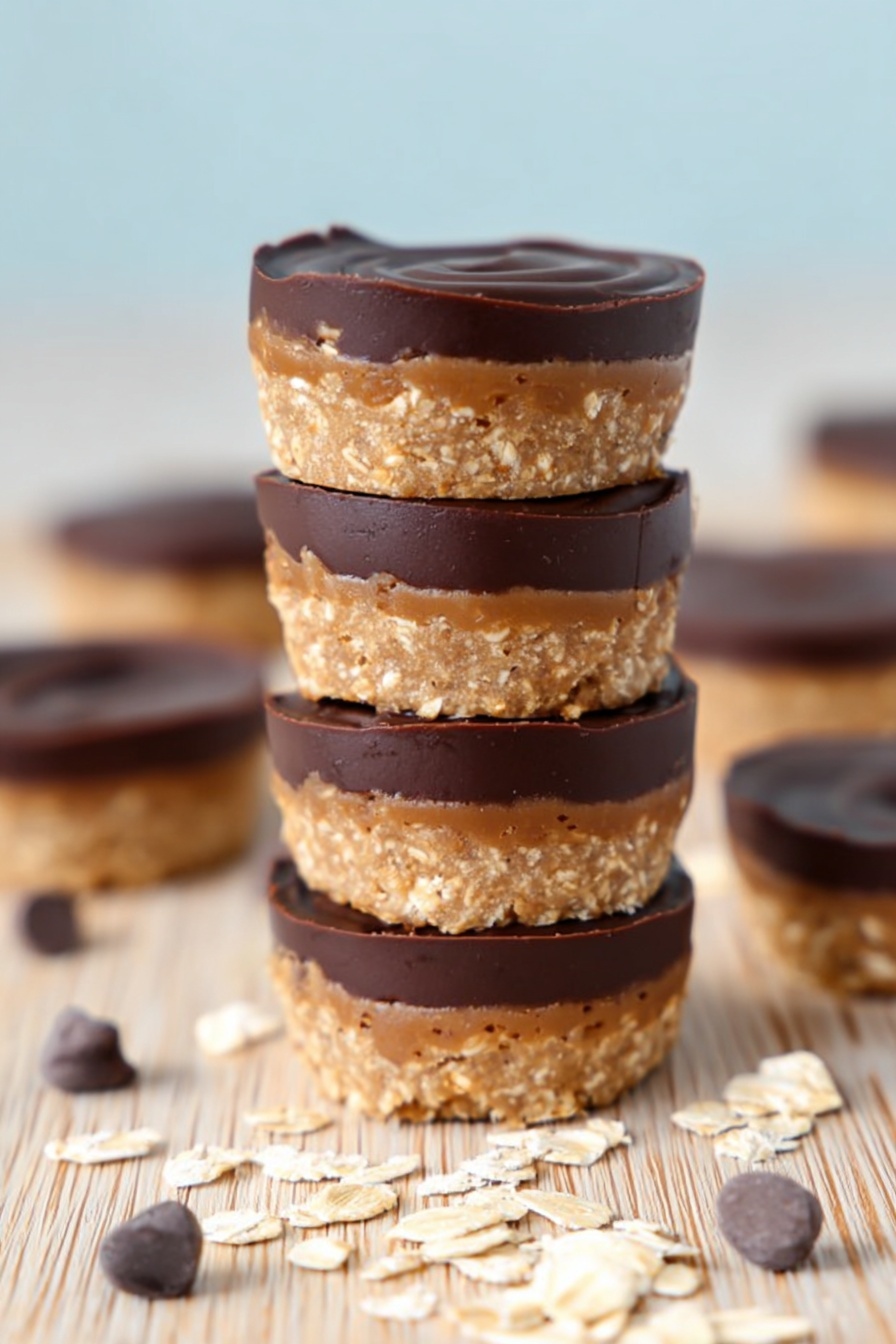
No-Bake Peanut Butter Oat Cups Recipe
If you’ve ever craved a quick, delicious treat that doesn’t require oven time, you’re going to love this No-Bake Peanut Butter Oat Cups Recipe. It’s one of those go-to snacks I whip up when I want something indulgent but wholesome, and trust me—it hits the spot every single time. Sticky peanut butter, smooth chocolate, and a pleasantly chewy oat base come together effortlessly, making it perfect for a midday pick-me-up or a simple dessert. Keep reading because I’m sharing all my insider tips to help you nail this recipe with ease!
Why This Recipe Works
- Simple No-Bake Prep: No oven, no fuss—this recipe comes together quickly with just a few steps.
- Wholesome Ingredients: The peanut butter and oats give you protein and fiber, making these cups satisfyingly filling.
- Customizable Flavors: Easily adapt it with mix-ins or spices to suit your taste or dietary needs.
- Perfect Snack Size: Individually portioned, these cups are great to grab on the go or pack in a lunchbox.

Ingredients & Why They Work
This No-Bake Peanut Butter Oat Cups Recipe
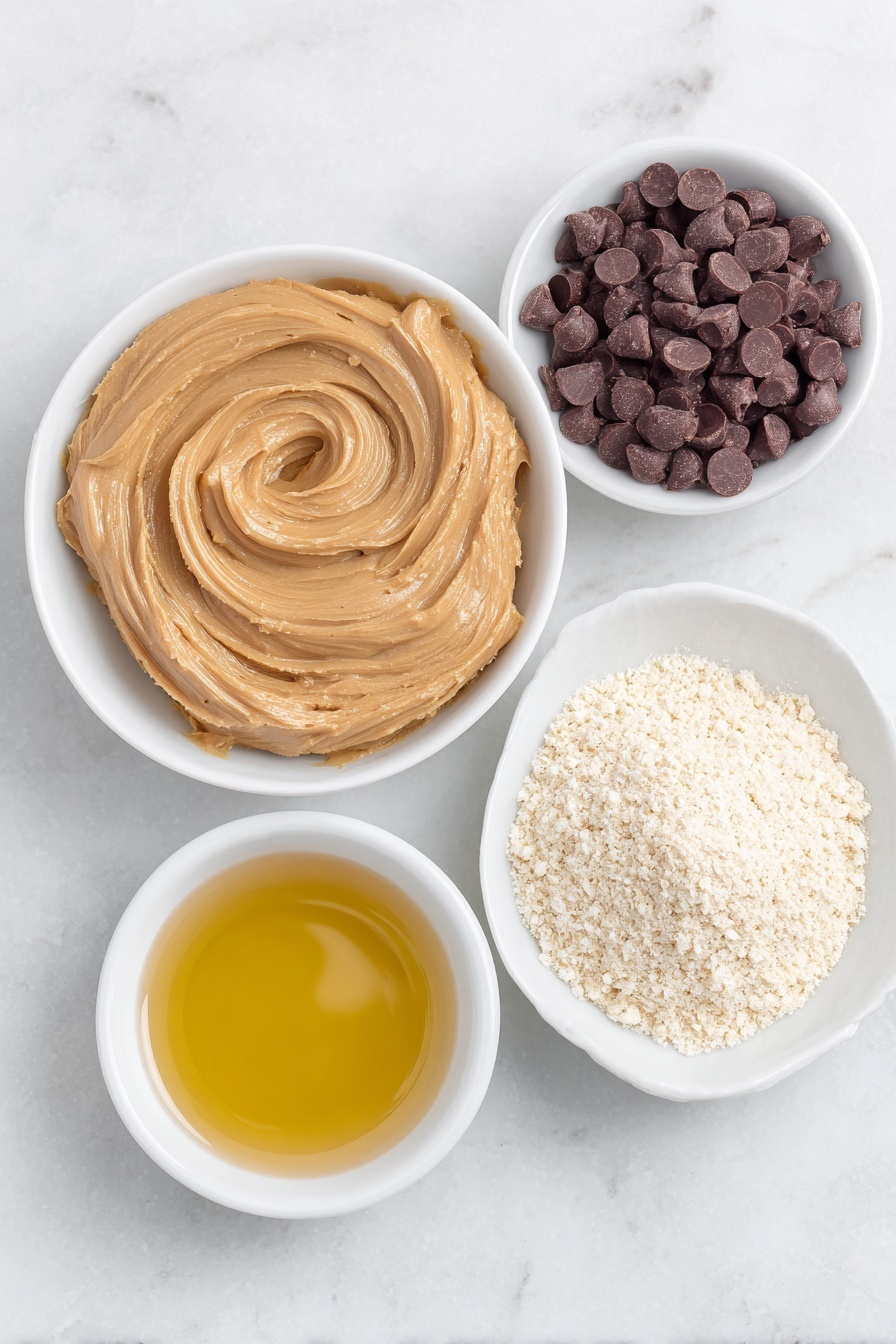
- Rolled oats: Processed into oat flour, they give body and a tender texture.
- Peanut butter: Choose creamy or natural for flavor depth and to keep the mixture sticky.
- Maple syrup: The natural sweetener that also helps bind ingredients without overpowering.
- Chocolate chips: Melts into a glossy, rich topping that contrasts perfectly with the peanut butter base.
- Coconut oil (optional): Helps the chocolate become silky and set smoothly on top.
Tweak to Your Taste
One reason I return to this No-Bake Peanut Butter Oat Cups Recipe again and again is how easy it is to customize. Whether you love a bit of crunch, extra sweetness, or a seasonal twist, feel free to make this recipe your own—it’ll reward you every time!
- Variation: I’ve added pumpkin puree and a sprinkle of pumpkin spice in the fall, which gives the cups a lovely moistness and festive touch.
- Nut-Free Option: Swap peanut butter for sunflower seed butter if you’re avoiding nuts.
- Extra Texture: Stir in chopped nuts or seeds for a satisfying crunch.
- Sweetness Level: Adjust maple syrup to taste if you want them less or more sweet.
Step-by-Step: How I Make No-Bake Peanut Butter Oat Cups Recipe
Step 1: Make Your Oat Flour
I start by pulsing rolled oats in a high-speed blender or food processor until fine, almost like flour. This step is crucial because it ensures the oat flour blends smoothly without lumps, helping everything stick together nicely. Don’t overblend into powder, just enough to break down the oats evenly.
Step 2: Warm and Blend Your Wet Ingredients
Next, I microwave the peanut butter and maple syrup together for about 40-60 seconds until warm and easy to mix. Stir it thoroughly—that warm combo is the glue that holds your oat mixture together, so no skipping this step!
Step 3: Combine with Oat Flour
Gradually mix the oat flour into your peanut butter mixture. It takes a bit of muscle here because the mixture should be thick but moldable. If it feels too crumbly, I usually add a teaspoon or two more of maple syrup or peanut butter. One time, I added pumpkin puree for an even moister texture, and it came out fantastic! Just don’t add too much liquid or it gets messy.
Step 4: Pack Into Muffin Liners
I line a muffin tin with cupcake liners or use a silicone muffin mold and press the mixture firmly in the cups. Using your fingers works best here—you want the base compact to hold shape once chilled. If you skip liners, just know it’s trickier to get the cups out without crumbling.
Step 5: Melt and Add Chocolate Topping
While your cups chill, melt chocolate chips with a teaspoon of coconut oil in the microwave, stirring every 30 seconds until smooth. Pour a layer over each cup and smooth out with the back of a spoon. I toss flaky sea salt or mini chocolate chips on top before the chocolate sets—it’s such a simple trick that takes these cups to the next level.
Step 6: Chill and Enjoy
Pop your pan into the fridge for 2-3 hours, or until firm. The hardest part? Waiting! Once set, carefully peel off the liners or pop out the silicone molds. These cups keep well in an airtight container refrigerated for about 5 days, perfect for snacking throughout the week.
Pro Tips for Making No-Bake Peanut Butter Oat Cups Recipe
- Perfect Oat Texture: Pulse oats just enough to avoid a gritty texture but still keep that wholesome oat flavor.
- Warm Peanut Butter Mix: Warming peanut butter and syrup helps everything meld smoothly and makes mixing easier.
- Press Firmly: Don’t be shy about firmly packing the mixture into the muffin liners to avoid crumbling later.
- Chilling Time: Give the cups the full fridge time—they set much better and slice cleanly once chilled properly.
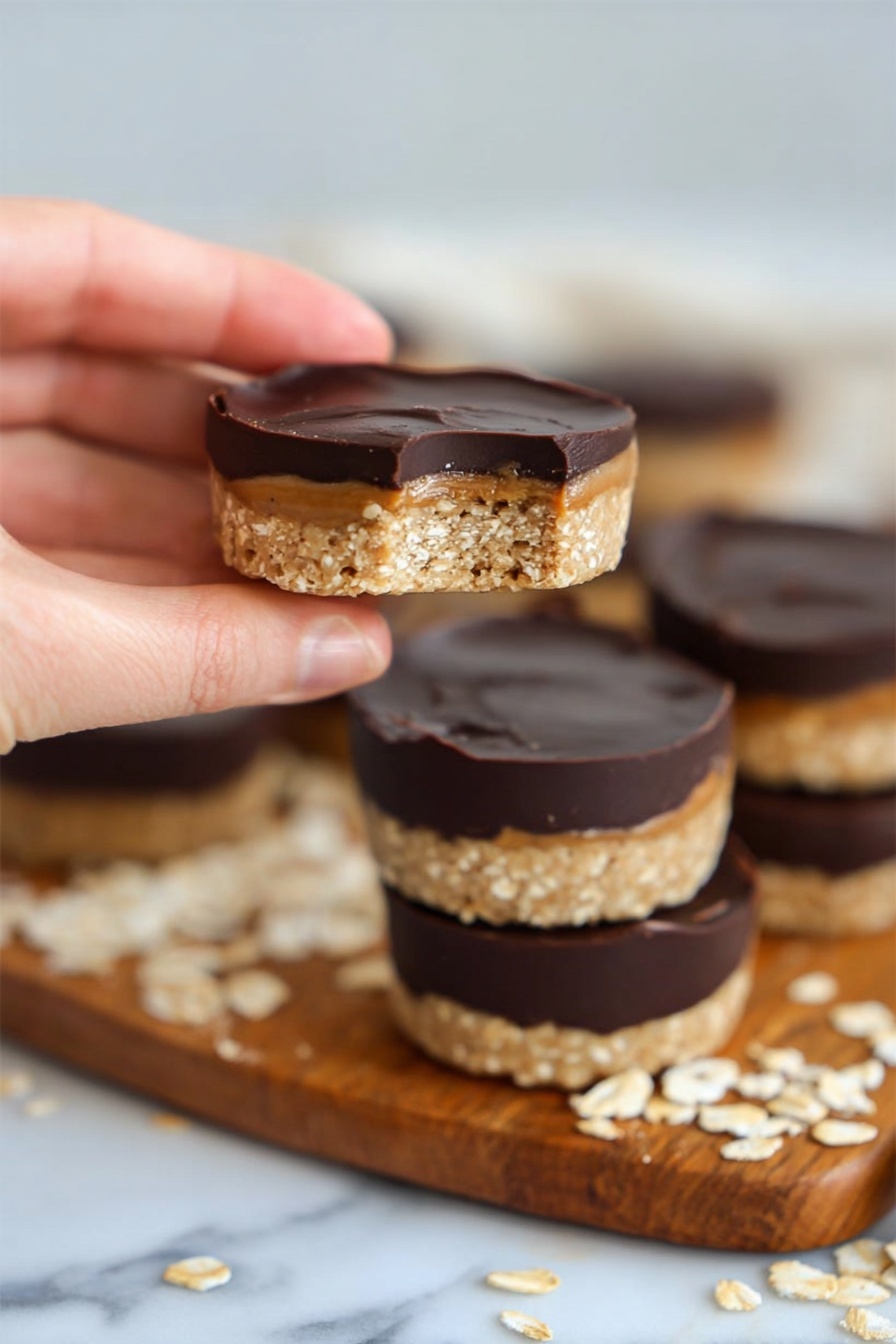
How to Serve No-Bake Peanut Butter Oat Cups Recipe
Garnishes
I love sprinkling a tiny pinch of flaky sea salt on the chocolate topping for a sweet-salty contrast that makes these cups addictive. When I want to dress them up, a few mini chocolate chips or colorful sprinkles add a fun touch, especially if serving to kids or guests.
Side Dishes
These cups pair beautifully with a hot cup of coffee or tea for a cozy afternoon snack. I also like serving them alongside fresh fruit or a dollop of Greek yogurt for a balanced mini-meal that keeps your energy steady.
Creative Ways to Present
For special occasions, I’ve turned this recipe into giftable treats by wrapping individual cups in parchment and tying with twine. They also look delightful served on a tiered dessert stand with a variety of nut butters and dipping sauces nearby for a build-your-own dessert spread.
Make Ahead and Storage
Storing Leftovers
I keep my leftover peanut butter oat cups refrigerated in an airtight container lined with parchment paper between layers to prevent sticking. They hold up wonderfully for up to 5 days, which keeps me stocked with tasty snacks all week long.
Freezing
If I want to save some for later, I freeze the cups in a single layer on a baking sheet, then transfer them to a freezer bag. They thaw beautifully overnight in the fridge and still have that perfect chewy texture without getting soggy.
Reheating
No real reheating needed here—these are best enjoyed chilled or at room temperature. If you want to soften the chocolate topping, just let them sit out for 10-15 minutes; they soften gently without melting too much.
FAQs
-
Can I use crunchy peanut butter instead of creamy?
Absolutely! Using crunchy peanut butter will add a bit more texture within your oat cups, making each bite more interesting. Just make sure to mix thoroughly so the peanut bits are evenly distributed.
-
What if I don’t have maple syrup? Can I substitute another sweetener?
You can swap maple syrup for honey, agave, or even brown rice syrup. The key is that the sweetener should be liquidy enough to bind the oats and peanut butter. Adjust quantities by taste and consistency as needed.
-
How do I prevent the cups from sticking to the muffin pan?
I highly recommend using silicone muffin molds or lining your tin with cupcake liners. If you’re using a metal muffin pan without liners, the cups might stick and break apart when removing, which can be frustrating.
-
Can these cups be made vegan?
Yes! Use maple syrup or agave (instead of honey if you swap that in), and double-check your chocolate chips to ensure they’re dairy-free. The rest of the ingredients are naturally vegan-friendly.
Final Thoughts
This No-Bake Peanut Butter Oat Cups Recipe has consistently been a favorite in my kitchen because it’s straightforward, customizable, and downright delicious. I love how it strikes that balance between healthy-ish and indulgent, without any baking stress. If you try it, I’m confident these cups will become a staple snack for you, too—whether you need something quick for busy days or a sweet treat to share with friends. Give it a go and enjoy every chewy, chocolatey bite!
Print
No-Bake Peanut Butter Oat Cups Recipe
- Prep Time: 15 minutes
- Cook Time: 0 minutes
- Total Time: 3 hours 15 minutes
- Yield: 12 servings
- Category: Snack
- Method: No-Cook
- Cuisine: American
- Diet: Vegetarian
Description
These No Bake Peanut Butter Oat Cups are a delicious and easy-to-make snack combining creamy peanut butter, finely processed oat flour, and a smooth chocolate topping. Sweetened naturally with maple syrup and prepared without any baking, they’re perfect for a quick treat or lunchbox addition. Refrigerated until set, these cups offer a chewy texture and rich flavor that peanut butter lovers will adore.
Ingredients
Base
- 1.5 cups peanut butter
- 1.5 cups rolled oats (processed finely to make oat flour)
- 1/4 cup maple syrup
Topping
- 1 cup chocolate chips
- 1 tsp coconut oil (optional)
Instructions
- Make Oat Flour: Blend the rolled oats in a high-speed blender or food processor until they reach a fine oat flour consistency.
- Combine Wet Ingredients: Add the peanut butter and maple syrup to a medium microwave-safe bowl and heat for 40 to 60 seconds. Stir thoroughly until the mixture is fully combined and smooth.
- Mix in Oat Flour: Gradually add the oat flour to the peanut butter mixture, mixing well. The mixture should be very thick but moldable. If too dry, add additional maple syrup or peanut butter one teaspoon at a time. Optionally, add 1/4 to 1/3 cup pumpkin puree for moisture.
- Prepare Muffin Pan: Line a muffin pan with cupcake liners or use a silicone muffin pan for easy removal.
- Fill Muffin Cups: Scoop the peanut butter oat mixture evenly into each muffin cup and firmly press down to compact the mixture.
- Melt Chocolate: In a microwave-safe small bowl, combine chocolate chips with coconut oil (optional). Heat in 30-second increments, stirring between intervals, until the chocolate is completely melted and smooth.
- Add Chocolate Topping: Pour a layer of melted chocolate over each cup and smooth with the back of a spoon. Optionally sprinkle flaky salt, sprinkles, or mini chocolate chips before the chocolate hardens.
- Chill to Set: Refrigerate the cups for 2 to 3 hours until fully set and firm.
- Serve and Store: Carefully remove the cups from the pan. Store in an airtight container in the refrigerator for up to 5 days for best freshness.
Notes
- For a pumpkin-flavored variation, add 1/3 cup pumpkin puree and 1 1/2 teaspoons pumpkin spice to the oat mixture before molding.
- If the mixture is too crumbly, adjust moisture by adding small amounts of maple syrup or peanut butter incrementally.
- Use silicone muffin pans or liners to ease removal of the cups.
- Store in the refrigerator due to the use of fresh ingredients and no baking.
Nutrition
- Serving Size: 1 cup
- Calories: 220 kcal
- Sugar: 10 g
- Sodium: 50 mg
- Fat: 15 g
- Saturated Fat: 4 g
- Unsaturated Fat: 10 g
- Trans Fat: 0 g
- Carbohydrates: 18 g
- Fiber: 3 g
- Protein: 6 g
- Cholesterol: 0 mg
