
No-Bake Fudgy Chocolate Squares Recipe
If you adore rich, chocolaty treats but don’t want to fuss around with an oven, I’ve got just the thing for you: my No-Bake Fudgy Chocolate Squares Recipe. Trust me, this is one of those desserts that’ll quickly become your go-to when you want something decadent without all the hassle. I first stumbled upon this recipe when craving a chocolate fix on a lazy weekend afternoon—and it did not disappoint.
What makes this No-Bake Fudgy Chocolate Squares Recipe truly special is its luscious, melt-in-your-mouth texture that feels indulgent yet is surprisingly simple to pull together. Whether you’re entertaining guests last minute or just want a delightful treat after dinner, these squares offer that perfect fudgy bite that feels like a mini celebration.
Why This Recipe Works
- No Baking Required: Saves time and heat, perfect for warm days or quick fixes.
- Fudgy Texture: The mix of bittersweet chocolate and condensed milk creates a silky, rich consistency.
- Simple Ingredients: Uses pantry staples and easy-to-find items for convenience.
- Easy to Customize: Adaptable to preferences with espresso powder or sea salt to enhance flavor.

Ingredients & Why They Work
Each ingredient in my No-Bake Fudgy Chocolate Squares Recipe has a role that brings balance – from the crunchy cookie crust to the deeply chocolatey filling. The key is quality chocolate and just the right sweetness to keep things rich but not overpowering.
- Chocolate wafer cookies: They provide the crunchy, chocolatey base that perfectly contrasts the fudgy layers.
- Unsalted butter: Adds richness and helps bind the crust and topping for that silky mouthfeel.
- Granulated sugar: Just a touch to balance bitterness and add subtle sweetness.
- Kosher salt: Enhances flavor depth and balances sweetness without being salty.
- Bittersweet chocolate (70% cacao): Gives intense chocolate flavor without too much sweetness—truly key for that deep fudge taste.
- Sweetened condensed milk: Adds creaminess and sweetness while keeping the fudgy texture intact.
- Instant espresso powder: A secret booster that elevates the chocolate flavor beautifully.
- Vanilla extract: Rounds out the flavor and adds warmth.
- Flaky sea salt: Sprinkled at the end to give you that unexpected pop and balance.
Tweak to Your Taste
I love how this No-Bake Fudgy Chocolate Squares Recipe adapts to different flavors. Whenever I make this for friends, I like to add a bit more espresso powder for a mocha twist or swap out bittersweet chocolate for milk chocolate if I’m feeling sweeter vibes that day.
- Variation: Adding chopped nuts like pecans or walnuts into the crust for an extra crunch—my family enjoys this nutty surprise.
- Dairy-Free: You can use coconut oil in place of butter and a dairy-free condensed milk alternative, perfect for friends with allergies.
- Seasonal: Try sprinkling a pinch of cinnamon or chili powder on top for festive or spicy notes.
Step-by-Step: How I Make No-Bake Fudgy Chocolate Squares Recipe
Step 1: Prepping the Parchment-Ready Pan
First things first: I lightly spray an 8-by-8-inch pan, then line it with parchment paper with a generous 2-inch overhang on two sides. This little parchment “handle” saves so much frustration when lifting the squares out later. Be sure to spray the parchment too—it helps everything release nice and easy.
Step 2: Making the Cookie Crust
Next, into the food processor go the chocolate wafer cookies—about 15 quick pulses until fine crumbs form. I always stop to scrape down the sides so none of those cookie bits go untouched. Meanwhile, I melt half the butter, then stir it with sugar and a pinch of salt into the crumbs. Press this firmly into the bottom of your prepared pan using a flat glass or measuring cup. Firm pressure is key to a sturdy base! Pop it in the freezer for about 15 minutes while you prepare the luscious filling.
Step 3: Crafting the Chocolate Filling
Now for the magic: melt 2 cups of bittersweet chocolate with the remaining butter, microwaving in 30-second bursts and stirring to silky smooth perfection. To this, I whisk in sweetened condensed milk, espresso powder, vanilla, and a sprinkle of salt. Pour this rich mix over your chilled crust, smoothing it evenly with an offset spatula. Into the fridge it goes until set—usually about an hour. This waiting is oh-so-worth it.
Step 4: The Final Chocolate Layer
For the finishing touch, melt the remaining chocolate and butter together, then pour it over the firm chocolate layer. Spread it evenly—this gives it that glossy top we all crave. Pop it back in the fridge for another 30 minutes until fully set. I love to sprinkle flaky sea salt on top just before slicing to bring out all the deep chocolate notes.
Step 5: Slice and Serve
When you’re ready, lift the entire block out easily thanks to that parchment overhang and place on a cutting board. A sharp knife warmed under hot water then wiped dry gives you those clean, neat edges with zero crumbling. Cut into 36 bite-sized squares and prepare to impress!
Pro Tips for Making No-Bake Fudgy Chocolate Squares Recipe
- Even Crust Pressing: Press cookie crumbs firmly and evenly to avoid cracks and crumbling when cutting.
- Chocolate Melting: Use short microwave bursts stirring frequently—it prevents the chocolate from seizing.
- Warm Knife Cutting: Running your knife under hot water between cuts leads to smooth, clean slices.
- Salt Garnish: Don’t skip the flaky sea salt on top—it balances sweetness and ups the flavor complexity.
How to Serve No-Bake Fudgy Chocolate Squares Recipe
Garnishes
I’m a sucker for a simple sprinkle of flaky sea salt on these squares—it’s such a small step but creates a perfect sweet-savory finish. Sometimes, for a festive touch, I’ll add finely chopped toasted almonds or a dusting of cocoa powder just before serving.
Side Dishes
This treat pairs beautifully with a scoop of vanilla ice cream or a dollop of fresh whipped cream for an irresistible dessert duo. If I’m serving it at a party, I like to have fresh berries nearby to add brightness and color to the plate.
Creative Ways to Present
For special occasions, I arrange the squares on a pretty platter lined with parchment paper and add edible gold leaf for sparkle—guests always love this extra bit of glam. Another fun idea is stacking them in little towers tied with ribbon for charming individual servings.
Make Ahead and Storage
Storing Leftovers
I store leftover squares in an airtight container in the fridge, and they keep beautifully for up to a week. Just keep them chilled until you’re ready to serve—they hold their fudgy texture perfectly without drying out.
Freezing
Freezing works wonders here! I wrap them individually in plastic wrap then place in a resealable bag—this way they won’t absorb freezer flavors. When you want one, just thaw in the fridge overnight for convenient, delicious treats anytime.
Reheating
Since these squares are meant to stay cool and fudgy, I don’t recommend reheating. Instead, let them sit at room temperature for 10 minutes before enjoying to soften up just enough for that perfect melt-in-your-mouth experience.
FAQs
-
Can I use gluten-free cookies for the crust?
Absolutely! Gluten-free chocolate wafer cookies work well in this recipe. Just make sure they’re finely crushed to maintain the right crust texture.
-
What if I don’t have espresso powder?
You can omit the instant espresso powder if you don’t have it on hand. The chocolate squares will still be delicious, but the espresso adds a nice depth that makes the chocolate flavor pop.
-
How do I get clean cuts without crumbling?
Run your knife under hot water, wipe it dry, and slice with a smooth motion for neat edges. Repeat after each cut for best results.
-
Can I make these squares vegan?
Switching to vegan butter and a plant-based sweetened condensed milk substitute can help make this recipe vegan-friendly, though the texture might be slightly different.
-
How long do these last at room temperature?
Because of the dairy and chocolate content, these squares are best kept refrigerated and shouldn’t be left out for more than a couple of hours.
Final Thoughts
This No-Bake Fudgy Chocolate Squares Recipe is one of those rare finds that satisfies my chocoholic cravings with minimal effort and maximum taste. I always feel a little thrill when slicing into them, knowing I didn’t have to turn on the oven and yet ended up with a dessert that’s rich, smooth, and downright delicious. I’m confident you’ll enjoy making and sharing these fudgy squares just as much as I do—so go ahead, give them a try and watch them vanish from the plate in no time!
Print
No-Bake Fudgy Chocolate Squares Recipe
- Prep Time: 20 minutes
- Cook Time: 5 minutes
- Total Time: 2 hours 10 minutes
- Yield: 36 squares
- Category: Dessert
- Method: No-Cook
- Cuisine: American
Description
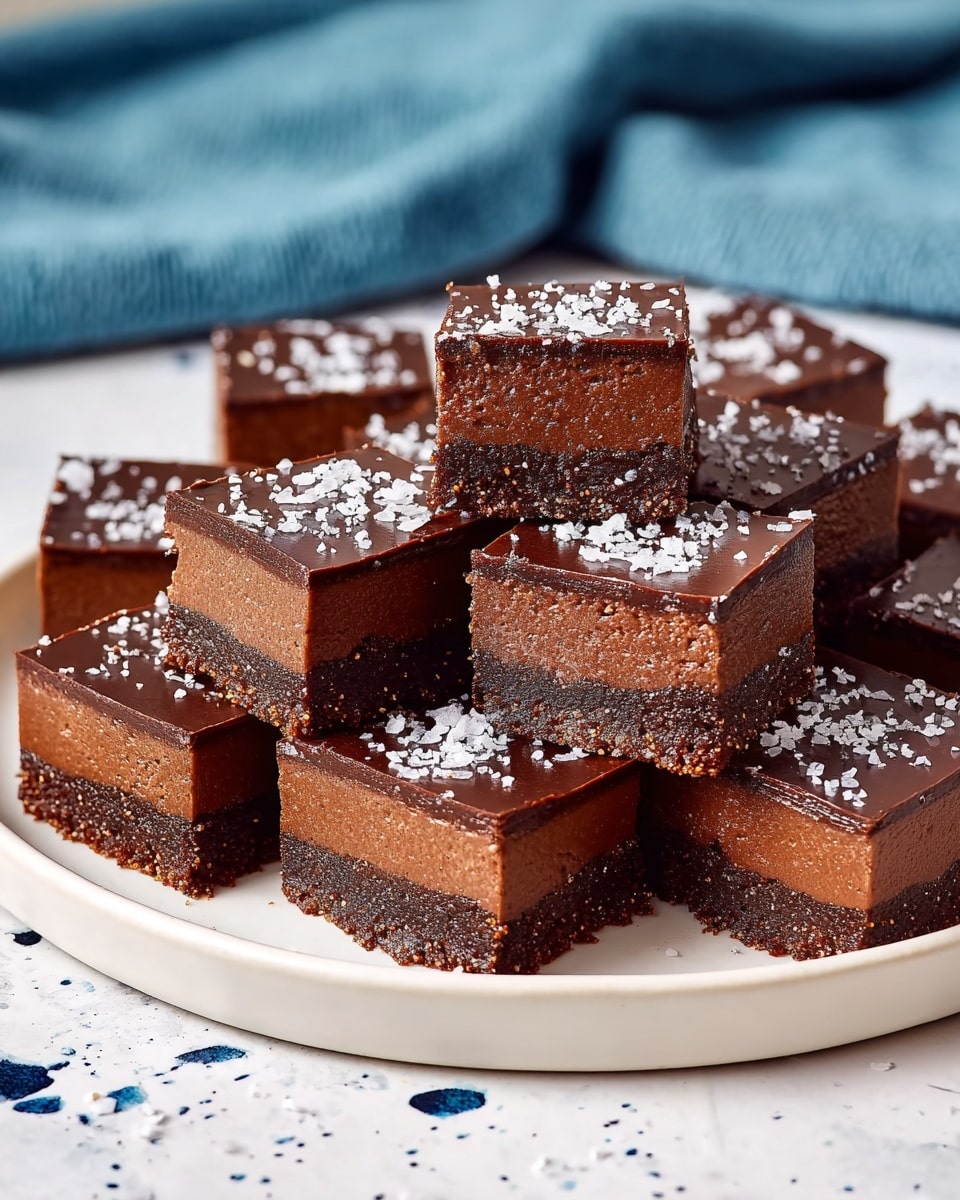
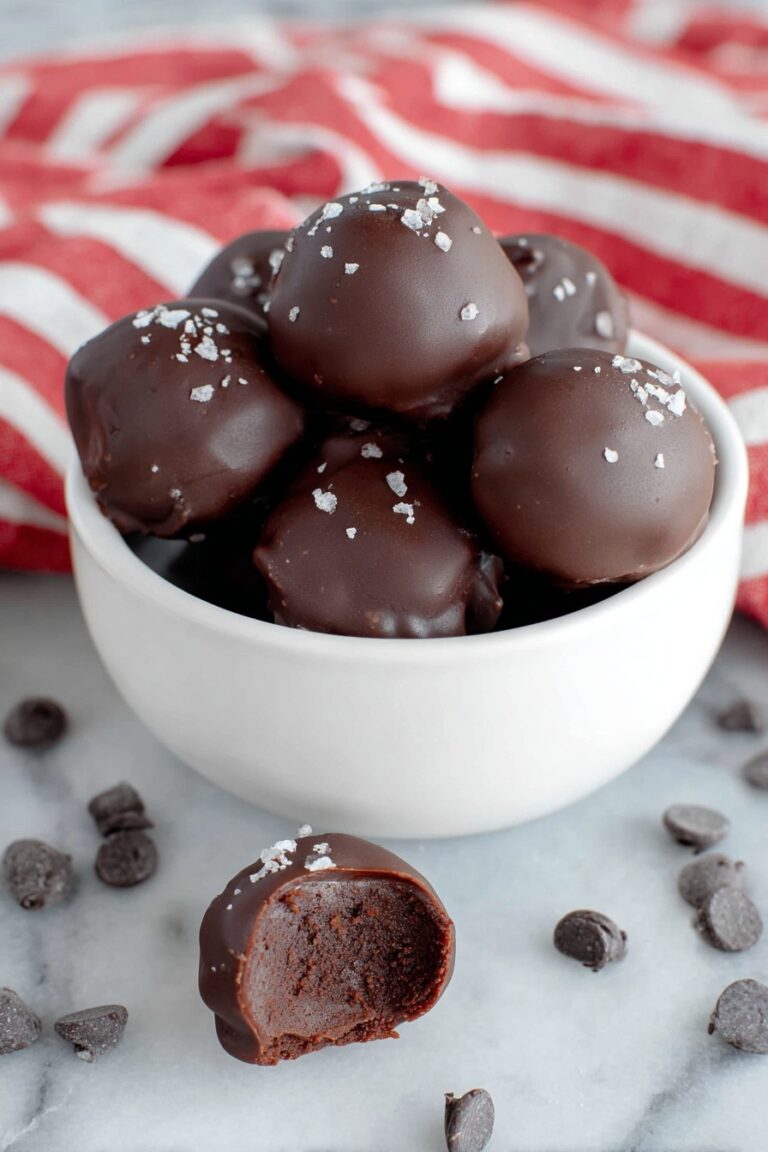
A decadent no-bake fudgy chocolate squares recipe featuring a crunchy chocolate cookie crust, layered with rich bittersweet chocolate ganache, and topped with a glossy chocolate butter glaze finished with flaky sea salt. Perfect for chocolate lovers seeking an easy yet indulgent dessert.
Ingredients
Crust
- cooking spray
- 1 (9-ounce; 255 g) package chocolate wafer cookies (about 72 cookies), such as Dewey’s, Oreos, or Goya Chocolate Maria Cookies
- 8 tablespoons unsalted butter (113 g; 1 stick), cut into 1 tablespoon pieces, divided
- 1 tablespoon granulated sugar (13 g)
- 1/4 teaspoon Diamond Crystal kosher salt
Chocolate Filling
- 8 ounces chopped bittersweet chocolate (227 g; about 1 2/3 cups), 70% cacao, divided
- 4 tablespoons unsalted butter (56 g; 1/2 stick), divided
- 1 (14-ounce) can sweetened condensed milk
- 2 teaspoons instant espresso powder
- 2 teaspoons vanilla extract
- 1/2 teaspoon Diamond Crystal kosher salt
Topping
- 1/2 cup chopped bittersweet chocolate (113 g; about 2/3 cup), 70% cacao
- 4 tablespoons unsalted butter (56 g; 1/2 stick)
- flaky sea salt, to garnish
Instructions
- Prepare Pan: Lightly spray an 8- by 8-inch baking pan with cooking spray and line the bottom and sides with parchment paper, leaving a 2-inch overhang on two sides. Lightly spray parchment paper with cooking spray and set aside.
- Make Crust: Pulse the chocolate wafer cookies in a food processor until finely ground, about 15 pulses, scraping down the sides as needed. In a small microwave-safe bowl, microwave 8 tablespoons butter on high for about 1 minute until melted, stirring occasionally. Stir melted butter, sugar, and 1/4 teaspoon salt into ground cookies until combined. Press the mixture firmly into the prepared pan with a flat-bottomed glass to form an even crust. Freeze uncovered until firm, about 15 minutes.
- Prepare Chocolate Filling: In a large microwave-safe bowl, combine 2 cups chopped chocolate and 4 tablespoons butter. Microwave on high, stirring every 30 seconds until melted and smooth, about 2 minutes. Stir in sweetened condensed milk, instant espresso powder, vanilla extract, and remaining 1/2 teaspoon salt until fully combined. Pour over chilled crust and spread evenly using an offset spatula. Refrigerate uncovered until set, about 1 hour.
- Make Chocolate Topping: In a medium microwave-safe bowl, combine remaining 1/2 cup chopped chocolate and 4 tablespoons butter. Microwave on high for about 1 minute, stirring occasionally until melted and smooth. Pour over the chilled chocolate layer and spread evenly using an offset spatula. Refrigerate uncovered until set, about 30 minutes.
- Garnish and Slice: Sprinkle the top with flaky sea salt. Use the parchment overhang to lift the chocolate squares from the pan and transfer to a cutting board. Cut into 36 squares using a sharp knife warmed under hot water and dried for cleaner cuts.
Notes
- Use Oreo wafers or similar chocolate wafer cookies available online or at specialty grocery stores.
- For cleaner slicing, warm the knife under hot water and dry it before each cut.
- Refrigerate finished squares in an airtight container for up to 1 week.
- Freeze tightly wrapped chocolate squares for up to 1 month; thaw overnight in the refrigerator before serving.
Nutrition
- Serving Size: 1 square
- Calories: 220 kcal
- Sugar: 18 g
- Sodium: 80 mg
- Fat: 14 g
- Saturated Fat: 8 g
- Unsaturated Fat: 5 g
- Trans Fat: 0 g
- Carbohydrates: 23 g
- Fiber: 2 g
- Protein: 3 g
- Cholesterol: 30 mg


