
Mummy Halloween Brownies Recipe
If you’re on the hunt for a festive, delicious treat that’s as fun to make as it is to eat, then I’ve got just the thing for you — my Mummy Halloween Brownies Recipe. These spooky little desserts are perfect for Halloween parties or just adding a little seasonal magic to your kitchen. They combine rich, fudgy brownies with a creamy chocolate ganache “bandage” and adorable candy eyeballs that bring the whole mummy look to life. Trust me, once you try these, your Halloween will never be the same!
Why This Recipe Works
- Fudgy Texture: The blend of butter and dark chocolate gives these brownies a perfectly moist, rich bite that everyone loves.
- Creamy Ganache: The ganache drizzled in mummy-like swirls not only looks fantastic but adds a luscious chocolate creaminess.
- Easy Decoration: Using candy eyeballs and piped ganache makes decorating so approachable — even if you’re not the craftiest baker.
- Kid-Friendly Fun: It’s a recipe that doubles as an activity and treat, perfect for getting little helpers excited about baking.

Ingredients & Why They Work
This Mummy Halloween Brownies Recipe is all about classic, simple ingredients that come together beautifully. The quality of your chocolate and butter will really shine through here, so I recommend going for the best you can find without breaking the bank. Also, a good parchment lining and cooking spray set the stage for easy brownie removal — total game changer.
- Unsalted butter: Adds richness and moisture; using unsalted lets you control salt perfectly.
- Dark chocolate: Gives depth and richness — it’s the star of the show for fudgy brownies.
- Granulated sugar: Sweetens and helps create that shiny brownie crust.
- Large eggs: Provide structure and a tender crumb.
- All-purpose flour: Just enough to hold everything together without making it cakey.
- Kosher salt: Balances sweetness and enhances chocolate flavor.
- Heavy cream: For the ganache — adds silky texture and richness.
- Candy eyeballs: For that adorable, spooky finishing touch.
- Nonstick cooking spray: Prevents the brownies from sticking, especially on the parchment.
Tweak to Your Taste
One of the best things about the Mummy Halloween Brownies Recipe is how easy it is to switch things up to suit your cravings or dietary needs. I often experiment with different chocolate percentages or adding a pinch of espresso powder to boost the chocolate flavor — it’s amazing what a little tweak can do.
- Variation: Try swapping dark chocolate for milk chocolate for a sweeter brownie that kids tend to love even more.
- Dietary modification: You can substitute all-purpose flour with a gluten-free blend; just keep an eye on baking time since texture may vary.
- Spice it up: Add a teaspoon of cinnamon or pumpkin pie spice for a subtle autumn twist.
- Nutty addition: Toss in chopped walnuts or pecans to add crunch and depth.
Step-by-Step: How I Make Mummy Halloween Brownies Recipe
Step 1: Prepare Your Pan & Preheat the Oven
First thing’s first, preheat your oven to 350°F. Line a 9×9 inch baking pan with parchment paper — this tip is a lifesaver for getting your brownies out cleanly without sticking. I also spray the parchment with nonstick cooking spray, which adds extra insurance. Trust me, it’s worth the extra step for neat brownies you can decorate easily.
Step 2: Melt Butter & Chocolate Gently
Using a double boiler or a heatproof bowl set over simmering water, melt the butter and chopped dark chocolate together on medium-low heat. Stir it occasionally to avoid burning — a little patience here ensures your brownies will be ultra smooth and rich. Once it’s completely melted and glossy, remove it from the heat.
Step 3: Whisk Sugar & Eggs Separately, Then Combine
Split your sugar into two equal parts. Add 1 cup to the chocolate mixture and whisk until smooth and slightly cooled. In a large bowl, whisk the eggs with the remaining cup of sugar until the mixture is pale and smooth — this helps create a tender crumb. Then, while whisking, slowly fold the chocolate mixture into the eggs. This step takes a bit of finesse but don’t worry, it’s easier than it sounds.
Step 4: Fold in the Dry Ingredients and Bake
Add the flour and kosher salt to the wet mixture, folding gently with a rubber spatula just until combined — overmixing is the enemy here if you want that fudgy brownie texture. Pour your batter into the prepared pan and bake for 35 to 40 minutes. The key is to remove them when a toothpick inserted near the center comes out just barely clean with a few moist crumbs. Let cool completely before decorating — patience pays off!
Step 5: Make the Chocolate Ganache
While your brownies cool, heat the heavy cream over medium heat in a small saucepan until it just begins to gently simmer (don’t let it boil!). Remove from heat and add the chopped dark chocolate. Whisk until smooth and shiny. Pop this into the fridge for about 30 minutes, or until it firms up enough to pipe. I’ve learned that the ganache consistency is everything for the mummy effect!
Step 6: Cut, Decorate & Serve
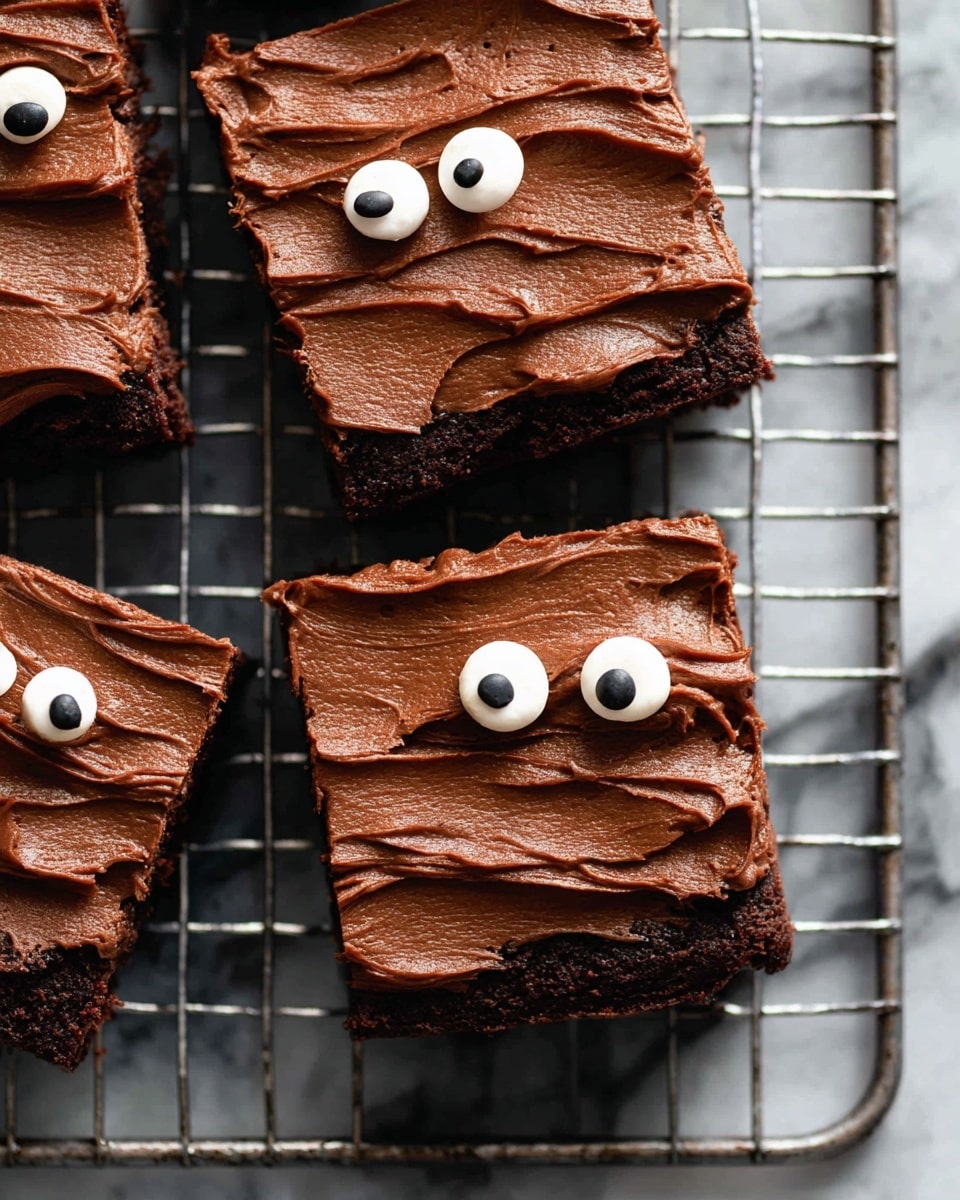
Lift cooled brownies out of the pan using the parchment edges and peel the paper away. Use a sharp knife to cut into 18 long, thin strips (6 rows by 3 rows). Whisk the chilled ganache until smooth again, then transfer it to a piping bag fitted with a small flat tip — no piping tip? No problem, use a Ziploc bag and snip a tiny hole in the corner. Pipe the ganache back and forth over each brownie strip to mimic mummy wrappings, then add two candy eyeballs per brownie. How cute! Serve immediately or store in a single layer in an airtight container at room temperature for up to 3 days.
Pro Tips for Making Mummy Halloween Brownies Recipe
- Use Good Quality Chocolate: It really makes the difference in flavor and texture — opt for at least 60-70% cocoa solids.
- Don’t Overbake: Check at 35 minutes; the brownies keep cooking in the pan once removed, so slightly underbaked is perfect.
- Cool Completely Before Decorating: Hit the pause button and let them cool fully to avoid melted ganache.
- Pipe Slowly for Best Results: Steady, slow zig-zags mimic mummy wrappings better than rushing through it.
How to Serve Mummy Halloween Brownies Recipe
Garnishes
I personally keep garnishes simple and sweet for these brownies — the candy eyeballs are the star, but sometimes I add a tiny sprinkle of edible glitter or a dusting of powdered sugar for a ghostly effect. If you’re feeling extra playful, add a few mini plastic spiders or other Halloween-themed toppers around the serving platter. It makes for a smashing presentation that kids go crazy for!
Side Dishes
I like pairing these brownies with a scoop of vanilla ice cream or a dollop of whipped cream to balance the rich chocolate. For drinks, a cup of warm apple cider or a frothy pumpkin spice latte feels just right for the season. If you’re hosting a big Halloween bash, these brownies also go great alongside simple finger foods like popcorn or roasted nuts.
Creative Ways to Present
Last Halloween, I arranged the brownies on a black platter lined with fake cobwebs and scatterings of candy corn — the contrast really made those white chocolate “wrappings” pop! Another fun idea is serving them in individual clear cellophane bags tied with orange and black ribbon for a take-home party favor. Get creative with your display — it’s half the fun!
Make Ahead and Storage
Storing Leftovers
Once decorated, store your mummy brownies in a single layer in an airtight container at room temperature. From my experience, they stay fresh and fudgy for about 3 days. Avoid stacking them to keep the ganache designs intact.
Freezing
I’ve frozen undecorated brownies before baking day — just wrap them tightly in plastic wrap and foil, and they freeze well for up to 2 months. When you’re ready to decorate, thaw completely at room temperature before piping the ganache and adding eyes. Decorating frozen or partially frozen brownies just doesn’t work as well.
Reheating
Since these brownies are best served cool for the ganache, I don’t recommend reheating. If you prefer warm brownies, enjoy one undecorated, then add ganache or frosting afterward. That way you get the best texture and appearance.
FAQs
-
Can I use milk chocolate instead of dark chocolate for this Mummy Halloween Brownies Recipe?
Absolutely! Milk chocolate will make the brownies sweeter and slightly less intense in chocolate flavor, which could be a big hit with kids or those who prefer milder chocolate.
-
What if I don’t have candy eyeballs for decorating?
No worries! You can substitute with small chocolate chips, mini marshmallows with chocolate dots piped on, or even simple white icing dots with a tiny dot of melted chocolate in the center.
-
How do I know when my brownies are done baking?
Use the toothpick test — insert a toothpick into the center and pull it out carefully. You want a few moist crumbs sticking to the toothpick but no wet batter. This ensures fudgy but fully cooked brownies.
-
Can I make these brownies gluten-free?
Yes! Replace all-purpose flour with a 1:1 gluten-free baking flour blend. Just watch the texture and baking time as some blends absorb liquid differently.
-
How long will these mummy brownies keep?
Stored properly in an airtight container at room temperature, they’ll stay fresh for about 3 days. For longer storage, freeze them undecorated and decorate after thawing.
Final Thoughts
Honestly, the Mummy Halloween Brownies Recipe has become one of my favorite seasonal rituals — it’s simple enough to make with my kids, and the smiles we get when the “mummies” are devoured are priceless. Whether you’re baking for a party, school event, or just because you love Halloween as much as I do, these brownies will absolutely delight. So roll up your sleeves, grab your piping bag, and let’s get spooky with chocolate. You’re going to nail this — and I can’t wait to hear what you think!
Print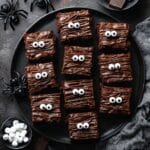
Mummy Halloween Brownies Recipe
- Prep Time: 45 minutes
- Cook Time: 40 minutes
- Total Time: 1 hour 55 minutes
- Yield: 18 brownies
- Category: Dessert
- Method: Baking
- Cuisine: American
Description
Celebrate Halloween with these spooky Mummy Halloween Brownies, featuring rich dark chocolate brownies topped with creamy ganache ‘mummy wraps’ and adorable candy eyeballs for a festive treat.
Ingredients
For the Brownies:
- Nonstick cooking spray
- 8 ounces unsalted butter (2 sticks), cut into tablespoons
- 6 ounces dark chocolate, roughly chopped
- 2 cups granulated sugar, divided
- 4 large eggs
- 1 cup all-purpose flour
- 1 teaspoon kosher salt
For the Ganache:
- ½ cup heavy cream
- 4 ounces dark chocolate, roughly chopped
For Decoration:
- 36 small candy eyeballs
Instructions
- Preheat and Prepare Pan: Preheat the oven to 350 degrees F. Line a 9 x 9-inch pan with parchment paper and spray the parchment with nonstick cooking spray to prevent sticking.
- Melt Butter and Chocolate: Using a double boiler, heat the butter and chopped dark chocolate over medium-low heat, stirring occasionally until fully melted and smooth. Remove from heat.
- Combine Chocolate and Sugar: Add 1 cup of granulated sugar to the melted chocolate mixture and whisk until smooth and well incorporated.
- Mix Eggs and Sugar: In a large bowl, whisk the 4 large eggs with the remaining 1 cup sugar until smooth and slightly frothy. Slowly pour the chocolate mixture into the eggs while whisking continuously until just combined.
- Add Dry Ingredients: Fold in the all-purpose flour and kosher salt with a rubber spatula until just combined, taking care not to overmix.
- Bake the Brownies: Pour the batter into the prepared pan and bake in the preheated oven for 40 minutes or until a toothpick inserted in the center comes out just barely clean. Remove from oven and cool completely on a cooling rack before decorating.
- Prepare the Ganache: In a small saucepan, heat the heavy cream over medium heat until it just begins to simmer. Remove from heat and add the chopped dark chocolate. Whisk until smooth and fully combined. Refrigerate for 30 minutes or until the ganache is firm enough to pipe.
- Cut Brownies: Lift the cooled brownies out of the pan using the parchment paper. Peel off the parchment and slice the brownies into 6 rows by 3 rows, making 18 long, thin brownies.
- Pipe Ganache and Decorate: Whisk the chilled ganache until smooth and transfer it to a piping bag fitted with a small flat tip or a Ziploc bag with a small hole cut in one corner. Pipe the ganache back and forth over each brownie to create mummy wrapping effects. Place 2 candy eyeballs on each brownie onto the ganache.
- Serve or Store: Serve the decorated brownies immediately or store them in a single layer in an airtight container at room temperature for up to 3 days.
Notes
- Use parchment paper with overhang to easily lift brownies from the pan.
- Be careful not to overbake brownies to keep them fudgy and moist.
- The ganache should be chilled to a piping consistency but not too hard; whisk to soften before piping.
- Substitute candy eyeballs with mini chocolate chips if unavailable.
- Store brownies in a single layer to prevent smudging the ganache decoration.
Nutrition
- Serving Size: 1 brownie
- Calories: 320 kcal
- Sugar: 30 g
- Sodium: 120 mg
- Fat: 20 g
- Saturated Fat: 12 g
- Unsaturated Fat: 7 g
- Trans Fat: 0 g
- Carbohydrates: 35 g
- Fiber: 3 g
- Protein: 4 g
- Cholesterol: 80 mg

