
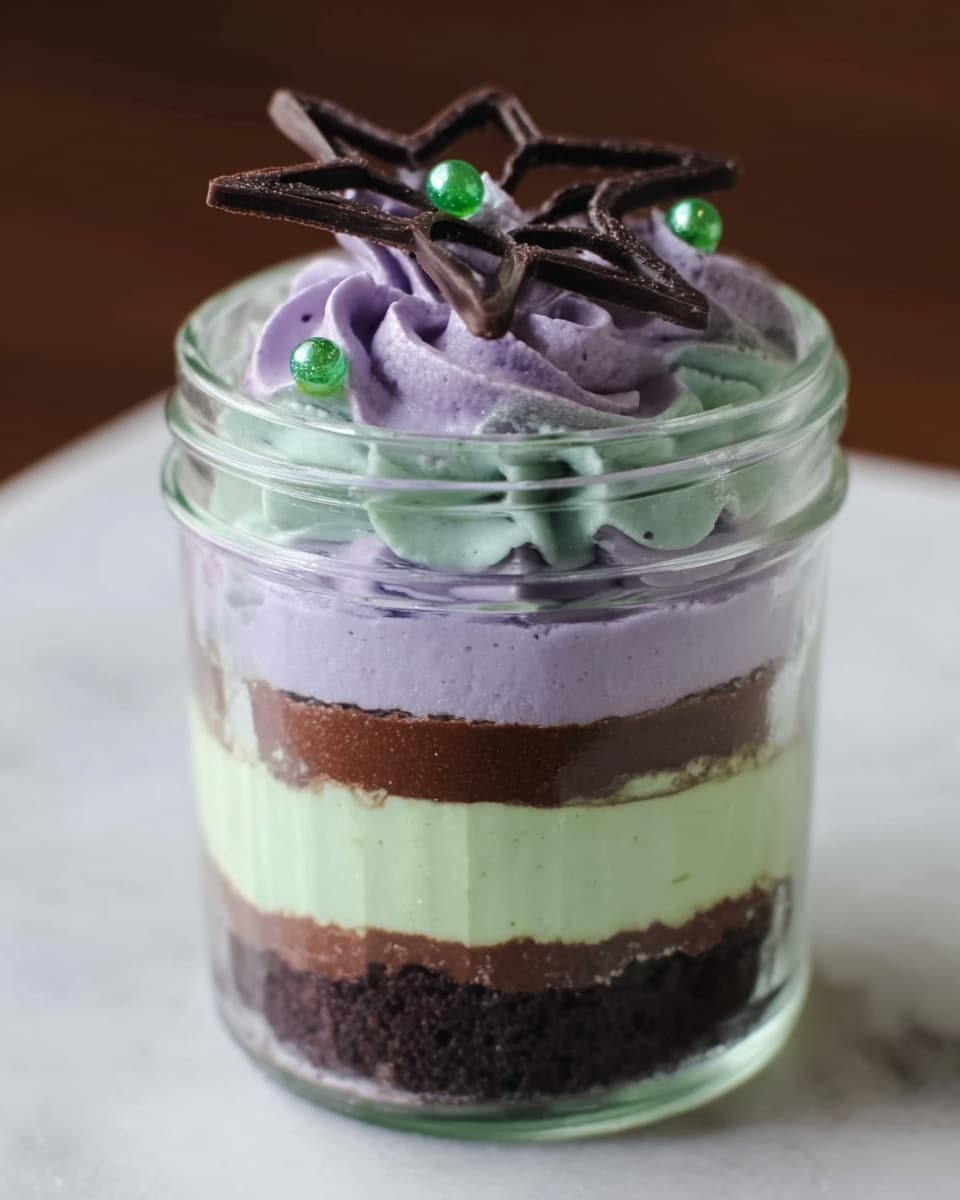
Mason Jar Cakes with Spider Web Decorations Recipe
If you’re on the hunt for a spooky yet utterly delightful treat, you’re going to love this Mason Jar Cakes with Spider Web Decorations Recipe. These individual chocolate cakes layered with fluffy marshmallow frosting and topped with eerie chocolate spider webs are totally fan-freaking-tastic for Halloween parties or anytime you want a fun, portable dessert. Trust me, once you make these, you’ll want to show them off — they’re as charming as they are yummy!
Why This Recipe Works
- Perfect Portioning: Baking in mason jars makes for delightful single servings, no cutting or mess required.
- Moist, Rich Cake Base: Using a Devil’s Food cake mix nails that deep chocolate flavor every time, so your cakes come out moist and crowd-pleasing.
- Unique Spider Web Decorations: The chocolate spider webs add an impressive, spooky touch that anyone will admire, showing off your creativity.
- Layered Flavored Frosting: Combining marshmallow cream and butter makes the frosting beautifully fluffy with a hint of sweetness that’s not too overpowering.

Ingredients & Why They Work
The ingredients here come together to balance ease, flavor, and festive flair. I always keep a box of Devil’s Food cake mix on hand for quick desserts, and pairing it with a homemade marshmallow frosting gives it an elevated, homemade feel without the fuss.
- Devil’s Food Chocolate Cake Mix: Provides that rich chocolate base with minimal effort—just add oil, eggs, and water, and you’re set.
- Vegetable Oil, Eggs, and Water: These keep the cake moist and tender, just follow the box directions carefully for the best texture.
- Butter (room temperature): Creamed into the frosting for smoothness and to balance the marshmallow sweetness.
- Powdered Sugar: Adds sweetness and helps achieve that fluffy frosting texture.
- Marshmallow Cream: Gives the frosting a dreamy, light texture and a delicious marshmallow flavor that pairs amazingly with chocolate.
- Vanilla Extract: Enhances all the flavors with a warm, familiar note.
- Purple and Green Food Coloring: Brings a fun, spooky vibe to your frosting layers.
- Dark Chocolate Candy Melts: Perfect for melting and piping those delicate spider webs that harden beautifully.
- Mason Jars (8 oz): These jars hold your cakes perfectly and look super cute and festive.
- Ziploc or Piping Bags: Essential tools for frosting and piping your spider web designs with ease.
- Sprinkles (optional): Adds a playful, colorful touch if you want extra flair.
Tweak to Your Taste
I’m all for making recipes your own! I often swap the purple and green food coloring for classic Halloween orange and black to match my party theme. Sometimes I sneak in a splash of coffee under the frosting to deepen the chocolate flavor. You can easily adjust colors, decorations, or even the cake flavor as you like.
- Variation: One Halloween, I used a red velvet cake mix instead of chocolate—it was a hit, especially with kids who love that vibrant color.
- Dietary Modifications: To make it gluten-free, I tested a gluten-free chocolate cake mix and it worked well, just bake a little longer to make sure it’s fully cooked.
- Difficulty Levels: If you want to simplify it, you can skip making spider webs and use ready-made Halloween-themed toppers or sprinkles instead.
Step-by-Step: How I Make Mason Jar Cakes with Spider Web Decorations Recipe
Step 1: Prep and Bake Your Cupcakes
Preheat your oven to 350 degrees Fahrenheit. Line your muffin pans with paper baking cups so your cakes pop out easily later. Mix the Devil’s Food cake mix according to the box instructions with oil, eggs, and water—make sure to whisk everything well to avoid lumps and keep the batter smooth. Fill those muffin cups about two-thirds full and bake for approximately 18 minutes or until a toothpick comes out clean. Once baked, set them aside to cool fully before frosting.
Step 2: Whip Up the Fluffy Marshmallow Frosting
While your cupcakes cool, start on the frosting. In a mixer, cream the room temperature butter until it’s nice and smooth. Add the marshmallow cream, powdered sugar, and vanilla extract and beat everything together for about 4 minutes until light and fluffy. The marshmallow cream is key here—it gives your frosting that cloud-like texture that’s just heavenly.
Step 3: Color Your Frosting and Prepare the Layers
Divide the frosting evenly into two bowls. I add about 3 drops of purple food coloring to one and 3 drops of green to the other, stirring each until fully combined. These bold colors really pop in the jars. Now, carefully remove the paper liners from the cupcakes, then slice each cupcake horizontally in half with a serrated knife—try to get an even cut so your layers look neat inside the jars.
Step 4: Assembly Time — Layering Your Mason Jar Cakes
Place one half of the cupcake inside the bottom of each mason jar. Spoon one color of frosting into a piping or Ziploc bag and snip the corner so you can dollop or pipe the frosting nicely over the cake layer. Add sprinkles or candies if you want, then top with the second cake half. Repeat with the other color of frosting and end with a final swirl of frosting on top, garnished with more sprinkles. It’s like edible art!
Step 5: Create Your Spooky Spider Web Decorations
This is the fun part that really elevates the Mason Jar Cakes with Spider Web Decorations Recipe. Print or draw a spider web design on paper, then lay wax paper over it. Melt the dark chocolate candy melts in a microwave-safe bag by heating in 30-second bursts, stirring each time until fully melted. Cut a tiny corner from the bag to pipe. Trace the spider web design carefully on the wax paper and let the chocolate harden completely before peeling off. These delicate webs are perfect perched on top or even leaning inside the jar lids for a little spooky surprise.
Pro Tips for Making Mason Jar Cakes with Spider Web Decorations Recipe
- Don’t Skip Cooling: Make sure cupcakes are fully cool before frosting or slicing to avoid crumbly layers or melted frosting.
- Use Sharp Serrated Knife: It helps cut that horizontal layer cleanly without squashing the cupcake.
- Piping Bag Control: Snipping a small tip of the Ziploc bag helps control frosting flow for neat layering and decoration.
- Spider Web Patience: Let your chocolate webs fully harden at room temp before handling, or pop them in the fridge briefly to firm up quickly without cracking.
How to Serve Mason Jar Cakes with Spider Web Decorations Recipe
Garnishes
I love topping my mason jar cakes with a few extra themed sprinkles—think black bats, orange pumpkins, or tiny edible glitter stars for an enchanting effect. If you want a bit of crunch, crushed chocolate cookies or candy pieces also work wonderfully and add texture against the soft cake.
Side Dishes
These mason jar cakes pair beautifully with warm drinks like spiced cider or hot chocolate, making them a sweet finishing touch at fall get-togethers. I’ve also served them alongside a fresh fruit platter for a lighter option balancing out the richness.
Creative Ways to Present
One Halloween, I arranged the jars on a tiered tray with Spanish moss and little plastic spiders scattered around for a dramatic spooky centerpiece. Another time, I tied festive ribbons around the jars and labeled each with each guest’s name for an easy grab-and-go party favor. Play with themed jars or decorate mason jar lids with stickers or tags to suit your occasion.
Make Ahead and Storage
Storing Leftovers
I store leftover mason jar cakes in the refrigerator with a lid or plastic wrap to keep them fresh for up to 3 days — the jars keep everything nicely contained and moist. Before serving leftovers, I let them sit at room temperature for about 15 minutes to take the chill off, so the frosting isn’t too hard.
Freezing
I’ve frozen these jars successfully by wrapping them tightly in plastic wrap and placing them in a freezer-safe container. When you’re ready, thaw in the fridge overnight. The frosting can get a slightly different texture after freezing, but the cake remains delicious and moist.
Reheating
I generally don’t reheat the jars with frosting directly because it can melt, but if you want to warm the cake a bit, remove the frosting layers and microwave the cake alone on low power for about 15 seconds. Then reassemble and enjoy that fresh-baked warmth!
FAQs
-
Can I make Mason Jar Cakes with Spider Web Decorations Recipe ahead of time?
Absolutely! You can assemble the cakes a day ahead and store them covered in the fridge. For the spider web decorations, if made in advance, store them in an airtight container at room temperature to keep them intact and add right before serving.
-
What if I don’t have candy melts for the spider webs?
You can use dark chocolate chips or bars melted gently over a double boiler or in the microwave in short bursts. Just be sure not to overheat so the chocolate stays smooth and easy to pipe.
-
Can I use homemade cake instead of box mix?
Definitely! If you’re comfortable baking from scratch, a rich chocolate cake recipe works beautifully here. Just make sure your cake is moist and sturdy enough to slice into layers for the mason jars.
-
How long do the mason jar cakes last?
When stored properly in the refrigerator, they should remain fresh for about 3 days. After that, the texture and taste may start to decline.
Final Thoughts
Honestly, making these Mason Jar Cakes with Spider Web Decorations Recipe has become one of my favorite ways to bring a little magic and fun to my dessert table. They’re simple enough to make on a weeknight yet impressive enough to wow your friends or family. The combination of the moist chocolate cake, fluffy marshmallow frosting, and those spooky chocolate webs creates a treat that looks professional but feels so homemade. I hope you give this recipe a try and find as much joy in the process (and the eating!) as I do.
Print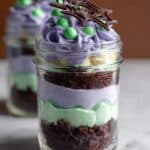
Mason Jar Cakes with Spider Web Decorations Recipe
- Prep Time: 25 minutes
- Cook Time: 18 minutes
- Total Time: 43 minutes
- Yield: 8 servings
- Category: Dessert
- Method: Baking
- Cuisine: American
Description
Delight in these festive Mason Jar Cakes made with rich devil’s food chocolate cake layers and fluffy marshmallow buttercream frosting colored in vibrant purple and green. Perfectly portioned in 8 oz mason jars, these individual cakes are topped with decorative sprinkles and handmade chocolate spider webs for a fun and creative dessert presentation.
Ingredients
Cake
- 1 box Devil’s Food Chocolate Cake mix
- Vegetable oil, eggs, water as directed on box instructions
Frosting
- 1 cup room temperature butter
- 2 cups powdered sugar
- 1 7 oz jar marshmallow cream
- 1 teaspoon vanilla extract
- Food coloring: purple and green
Decoration
- 1 bag dark chocolate candy melts
- 8 oz mason jars
- Ziploc or piping bags
- Sprinkles (optional)
Instructions
- Preheat Oven: Heat your oven to 350 degrees Fahrenheit and place paper baking cups into a standard-size muffin pan.
- Prepare Cake Batter: Mix the devil’s food cake mix according to the package instructions, using the required amounts of water, vegetable oil, and eggs until well combined.
- Bake Cupcakes: Spoon the batter into the muffin cups and bake for approximately 18 minutes or as directed on the box until a toothpick inserted comes out clean.
- Cool Cupcakes: Remove the cupcakes from the oven and pan and let them cool completely on a wire rack.
- Make Frosting: In a mixer, cream the room temperature butter. Add marshmallow cream, then gradually mix in powdered sugar and vanilla extract for about 4 minutes until smooth and fluffy.
- Color Frosting: Divide the frosting evenly into two bowls. Add 3 drops of purple food coloring to one bowl and mix thoroughly; add 3 drops of green food coloring to the other bowl and mix well.
- Prepare Cake Layers: Remove paper liners from cupcakes, then slice each cupcake horizontally in half creating top and bottom layers.
- Assemble Cakes in Jars: Place one cupcake half at the bottom of each mason jar. Fill a Ziploc or piping bag with purple frosting, snip the corner, and pipe frosting over the cake layer. Sprinkle with candies or sprinkles if desired. Repeat layers ending with frosting and sprinkles on top.
- Create Chocolate Spider Webs: Place spider web drawings under a sheet of wax paper. Melt chocolate candy melts in 30-second intervals in the microwave until smooth. Pour melted chocolate into a piping bag or Ziploc bag, snip a small tip, and carefully trace the spider web design on the wax paper. Allow to set and harden at room temperature.
Notes
- For easier frosting application, ensure the butter is at room temperature to achieve a smooth texture.
- You can substitute food coloring with natural alternatives like beet juice for red/purple or spinach powder for green.
- If candy melts are not available, use dark or milk chocolate chips melted with a small amount of vegetable oil to create a similar effect.
- Mason jars should be clean and dry before assembling the cakes to prevent moisture buildup.
- Store the assembled mason jar cakes in the refrigerator to keep frosting firm and fresh.
Nutrition
- Serving Size: 1 jar (approx. 1 cake)
- Calories: 380 kcal
- Sugar: 35 g
- Sodium: 210 mg
- Fat: 18 g
- Saturated Fat: 9 g
- Unsaturated Fat: 7 g
- Trans Fat: 0 g
- Carbohydrates: 50 g
- Fiber: 2 g
- Protein: 4 g
- Cholesterol: 50 mg
