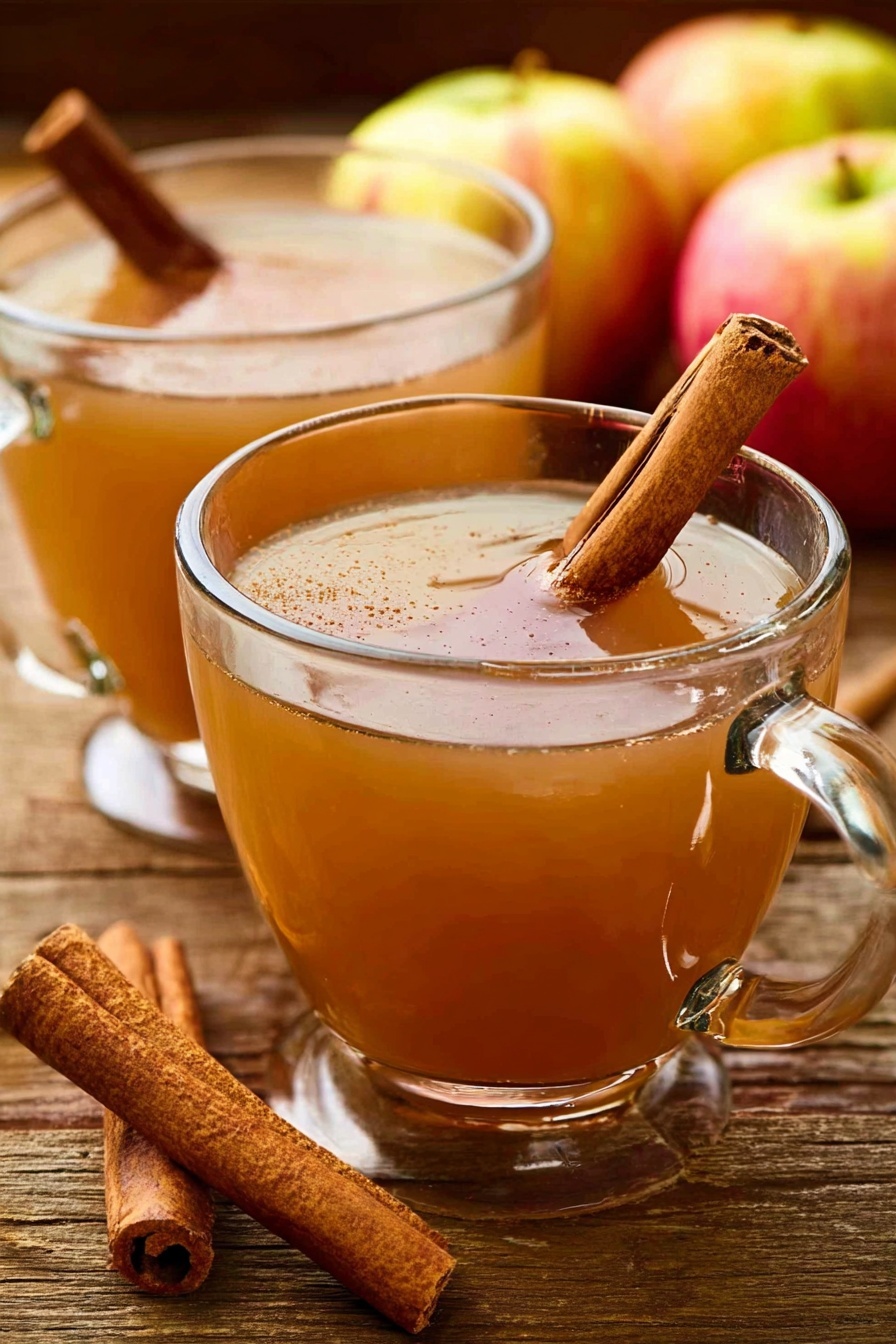
Homemade Apple Cider Recipe
If you’ve ever craved that warm, cozy drink that screams fall, then you’re in for a treat with this Homemade Apple Cider Recipe. Honestly, once I started making cider at home, I could never go back to store-bought stuff — the fresh apple flavor combined with a hint of spices just can’t be beat. Stick with me, and I’ll walk you through how to make this soul-soothing drink, perfect for those chilly evenings or festive gatherings.
Why This Recipe Works
- Simple, Wholesome Ingredients: Only a few pantry staples and fresh apples needed, making it accessible for everyone.
- Deep, Authentic Flavor: Simmering apples with warm spices really brings out that classic cider vibe without additives.
- Customizable Sweetness: You control how sweet or spicy it gets, perfect for adjusting to your personal taste.
- Make-Ahead Friendly: You can prepare it hours (or even a day) ahead to let flavors marry beautifully.

Ingredients & Why They Work
Each ingredient in this Homemade Apple Cider Recipe works together to create that comforting cup you’ll crave all season long. When selecting apples, it’s best to mix sweet and tart varieties — this balances flavor and gives the cider complexity. Let’s break down the key players:
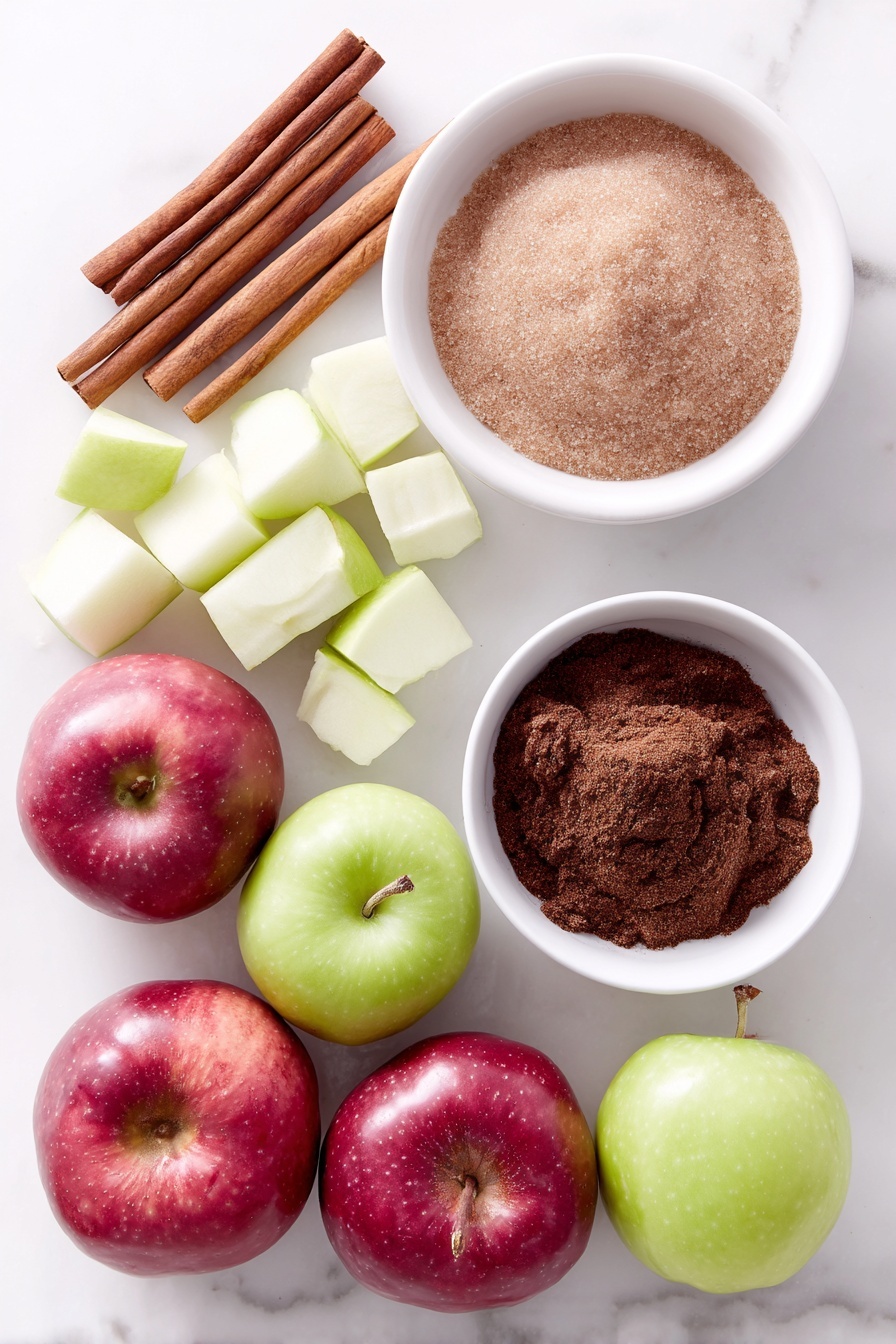
- Apples: Using a mix of sweet and tart apples gives the perfect balance, so your cider isn’t overly sweet or too sharp.
- Light brown sugar: Adds a mild caramel sweetness that deepens the flavor without overpowering the natural apple taste.
- Cinnamon sticks: These lend a warm, cozy spice that’s iconic for apple cider — ground cinnamon works too if that’s what you have on hand.
- Ground allspice: This adds a subtle hint of clove, cinnamon, and nutmeg flavor all in one, making the spice profile rich and inviting.
Tweak to Your Taste
I love that this Homemade Apple Cider Recipe is so easy to personalize. Over the years, I’ve tweaked it depending on mood and occasion — it’s fun to make it your own.
- Spice it up: I sometimes add a few cloves or a star anise for extra warmth; it brings a lovely depth and festive flair.
- Sweetness level: If I want it less sweet, I’ll cut back on the sugar or swap for honey or maple syrup for a different twist.
- Extra fruity: Adding a few sliced oranges or a splash of fresh lemon juice brightens the flavor and adds natural acidity.
- Boozy cider: For friends’ gatherings, I’ll mix in some bourbon or spiced rum — it’s a crowd-pleaser that warms you up fast.
Step-by-Step: How I Make Homemade Apple Cider Recipe
Step 1: Prep and Simmer Your Apples
Start by washing and quartering 10 medium apples — no need to peel or core them because the peels add flavor and richness. Toss those apple chunks into a big stockpot, then pour enough water to cover them by about 2 inches when you press them down (the apples will mostly float, so giving extra water helps). Stir in your brown sugar, cinnamon sticks, and ground allspice.
Bring the pot to a boil uncovered. Let it bubble away for about an hour — this extracts the flavors and softens the apples perfectly. I like to set a timer and stir every 15-20 minutes so nothing sticks to the bottom.
Step 2: Slow Simmer and Infuse
After that hour of boiling, cover the pot, turn the heat down to low, and let everything simmer gently for another 2 hours. This slow-and-low method allows those spices and apples to really marry and deepen the cider’s flavor. It fills your kitchen with such an amazing scent — trust me, it’s worth the wait.
Step 3: Strain and Serve
Once you’re done simmering, let the mixture cool enough so it’s safe to handle. Then strain your cider through a cheesecloth or fine-mesh sieve into a bowl — gently press down on the apple solids to get as much juice out as possible. I usually strain it twice to make sure it’s clear and smooth, but a fine sieve alone can work if you don’t have cheesecloth.
Discard the pulp and spices, then pour your fresh homemade apple cider into mugs or a warm thermos. It’s ready to enjoy immediately, or you can reheat it later (more on that below!).
Pro Tips for Making Homemade Apple Cider Recipe
- Choose Your Apples Wisely: Mixing sweet (like Fuji) and tart (like Granny Smith) apples gives you that rich, balanced cider flavor.
- Don’t Skip Simmering Time: Those long simmer hours deepen flavor — a rushed cider just won’t have the same magic.
- Double Strain for Clarity: Straining twice keeps your cider smooth and free from pulp and seeds, perfect if you want a refined finish.
- Cool Before Straining: Strain when it’s warm, but not piping hot, to avoid burns and brittle cheesecloth or sieve damage.
How to Serve Homemade Apple Cider Recipe

Garnishes
I love to top my cider with a cinnamon stick or a thin orange slice — it adds a pop of color and an extra teasing hint of spice or citrus aroma right as you sip. Sometimes, I sprinkle a tiny pinch of nutmeg on top for that cozy fall vibe.
Side Dishes
Homemade apple cider pairs amazingly with freshly baked goods like pumpkin muffins, soft pretzels, or even classic sugar cookies. When I’m feeling savory, it’s delightful alongside a turkey sandwich or roasted autumn veggies — the cider’s sweetness cuts through nicely.
Creative Ways to Present
For a festive touch, I’ve served cider in mason jars with twine ties and small pine sprigs glued on for a rustic look. Or, warmed in a large crockpot with floating apple slices and cloves for party self-service. It really impresses guests and keeps the drink cozy and hot.
Make Ahead and Storage
Storing Leftovers
I store leftover cider in airtight glass bottles or jars in the fridge for up to 5 days. Before serving, I always give it a gentle shake or stir since some sediment can settle at the bottom.
Freezing
If I want to keep cider longer, I pour it into freezer-safe containers leaving a bit of room for expansion. I’ve frozen it successfully for up to 3 months. Just thaw overnight in the fridge and reheat gently.
Reheating
Reheat your cider on the stovetop over low heat, stirring occasionally to keep flavors melded and avoid scorching. Avoid boiling again, which can dull the fresh apple taste. Microwave works too in short bursts, but I prefer stovetop.
FAQs
-
Can I use any type of apple for this Homemade Apple Cider Recipe?
Absolutely! A combination of sweet and tart apples is ideal for balanced flavor, but you can use all sweet or all tart varieties depending on your preference. Just keep in mind sweeter apples yield a sweeter cider.
-
Is it necessary to peel or core the apples?
No need to peel or core them. The peels add natural sweetness, nutrients, and color to your cider. Quartering apples is enough so they can cook down easily during simmering.
-
How long can I store homemade apple cider in the fridge?
Stored in an airtight container, your cider will keep nicely for about 4 to 5 days. Give it a gentle stir before serving as some sediment may settle.
-
Can I make this cider ahead for a party?
Definitely! Making it a day ahead allows flavors to meld beautifully. Warm it up gently before serving and garnish with fresh cinnamon sticks or apple slices.
-
What’s the best way to sweeten my apple cider?
Light brown sugar is traditional and adds nice depth, but you can experiment with honey, maple syrup, or even coconut sugar for different flavor profiles. Just adjust sweetness to your liking while simmering.
Final Thoughts
This Homemade Apple Cider Recipe is one of my all-time favorite cozy drinks for good reason. It fills your kitchen with the most comforting scents and tastes like autumn in a cup. Whether you’re sipping it solo wrapped in a blanket or sharing with friends, it always feels a little like magic. I hope you enjoy making and drinking it as much as I do — trust me, once you try it, it’ll become a staple in your seasonal traditions!
Print
Homemade Apple Cider Recipe
- Prep Time: 15 minutes
- Cook Time: 3 hours
- Total Time: 3 hours 15 minutes
- Yield: 8 servings
- Category: Beverage
- Method: Stovetop
- Cuisine: American
Description
This homemade apple cider recipe is a warm, comforting beverage made by simmering fresh apples with aromatic spices and brown sugar. Perfect for cozy fall days or holiday gatherings, this cider is naturally sweetened and filled with rich flavors of cinnamon and allspice.
Ingredients
Main Ingredients
- 10 medium apples, quartered
- ½ cup (100 g) light brown sugar, packed
- 4 sticks cinnamon, or 2 teaspoons ground cinnamon
- 1 tablespoon ground allspice
Instructions
- Prepare the apples: Place the quartered apples in a large stockpot. Add enough water to cover the apples by 2 inches when they are gently pushed down, as apples tend to float.
- Add spices and sugar: Stir in the packed brown sugar, cinnamon sticks (or ground cinnamon), and ground allspice into the pot with the apples and water.
- Boil the mixture: Bring the mixture to a boil uncovered and allow it to boil for 1 hour, which helps extract the flavors from the apples and spices.
- Simmer the cider: After boiling, cover the pot and reduce the heat to maintain a gentle simmer for 2 hours, deepening the flavors and softening the apples.
- Strain the cider: Let the mixture cool slightly before straining it through a cheesecloth or fine-mesh sieve into a bowl. Gently press down on the solids to extract as much liquid as possible. Discard the solids and strain the liquid once more through the cheesecloth for a clear cider.
Notes
- You can substitute ground cinnamon for cinnamon sticks, but stick to 2 teaspoons to avoid overpowering the cider.
- If you prefer a spicier cider, consider adding a few cloves or a slice of fresh ginger during the simmering process.
- The cider can be served warm or chilled and stored refrigerated for up to a week.
- For a sparkling version, mix the chilled cider with carbonated water before serving.
- Use a variety of apples for a more complex flavor, such as a mix of sweet and tart apples.
Nutrition
- Serving Size: 1 cup
- Calories: 120 kcal
- Sugar: 25 g
- Sodium: 10 mg
- Fat: 0.2 g
- Saturated Fat: 0 g
- Unsaturated Fat: 0.2 g
- Trans Fat: 0 g
- Carbohydrates: 30 g
- Fiber: 2 g
- Protein: 0.5 g
- Cholesterol: 0 mg

