
Halloween Spider Donut Snack Recipe
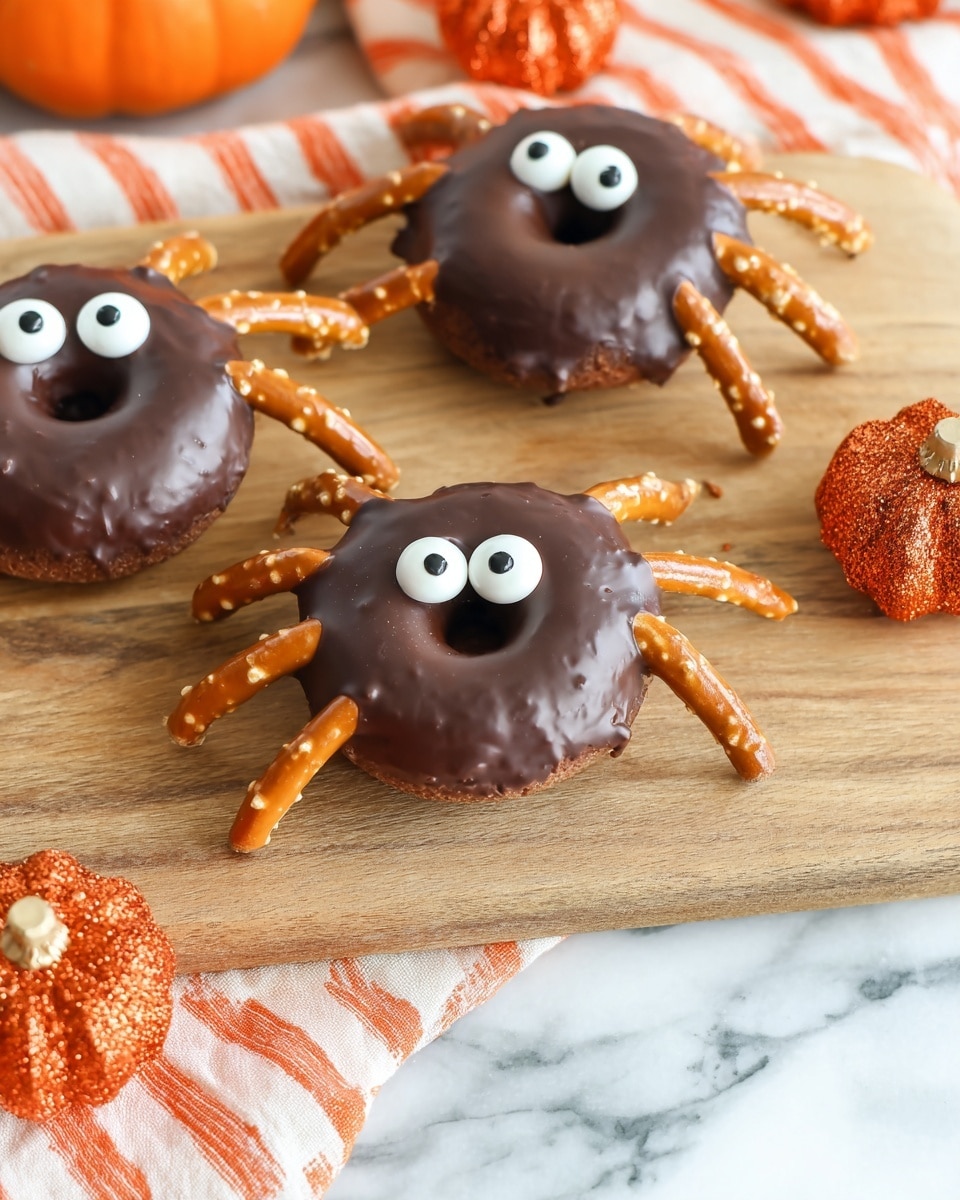
If you’re looking for a fun, spooky treat that’s super easy to make and guaranteed to wow your Halloween guests, you’re going to love this Halloween Spider Donut Snack Recipe. It’s one of those no-fuss recipes that look impressively creepy but take just minutes to pull together. Trust me, these adorable spider donuts have become a favorite in my house—they’re a perfect mix of sweet, crunchy, and downright adorable. Stick with me, and I’ll guide you through every step so your snack table can be the star of the party!
Why This Recipe Works
- Quick and Easy: It takes just about 15 minutes from start to finish, so it’s perfect even if you’re crunched for time before Halloween parties.
- Minimal Ingredients: You only need four simple items that are easy to find at any grocery store.
- Kid-Friendly Fun: This recipe lets the kids get in on the action, especially when attaching legs and eyes—it’s super hands-on.
- Visual Impact: The pretzel legs and candy eyes instantly turn regular mini donuts into spooky little spiders that are almost too cute to eat.

Ingredients & Why They Work
The magic of this Halloween Spider Donut Snack Recipe comes from combining familiar, kid-friendly snacks into something totally festive. Each ingredient plays a role in creating texture, flavor, and eye-catching detail you’ll love showing off.
- Chocolate Mini Donuts: The perfect bite-sized base—soft, chocolatey, and small enough to handle easily.
- Chocolate Chips: These melt into the perfect “glue” for attaching candy eyes—easy to control once melted and hardens quickly.
- Pretzel Twists: Their natural curve shapes into spider legs beautifully, and the salty crunch contrasts so well with the sweet donut.
- Candy Eyes: These give your spider donuts personality and that authentic spooky look that kids and adults both adore.
Tweak to Your Taste
One of the things I love most about this Halloween Spider Donut Snack Recipe is how easy it is to tweak. Whether your family loves more chocolate, or you want to swap candies for allergy-friendly options, the basics stay fun and flexible.
- Variation: I’ve made these with vanilla or glazed mini donuts when I couldn’t find chocolate ones—and they still turned out super cute. Just swap chocolate chips for white chocolate chips if using light donuts.
- Allergy-Friendly: Use allergy-safe pretzels and no-chocolate “glue” if needed, like a thick vanilla icing, to adapt to dietary needs.
- Extra Spooky: Adding tiny “fangs” with small slivers of white chocolate or mini marshmallows stuck with melted chocolate can really dial up the Halloween vibe.
- Flavor Boost: Sprinkle a little sea salt or cinnamon sugar on top of the donuts before assembling for a flavor pop that’s unexpected but fantastic.
Step-by-Step: How I Make Halloween Spider Donut Snack Recipe
Step 1: Prep Your Ingredients
First things first, unpack your chocolate mini donuts and lay them out on a clean workspace. Break your pretzel twists carefully so each piece curves like a spider’s leg—you’ll want four legs on each side for each donut spider, so have eight pretzel pieces ready per donut. Taking a little time here means your spider legs will look more natural and less sharp or uneven.
Step 2: Attach the Pretzel Legs
Place the mini donuts on a serving platter or baking sheet. Then gently press the pretzel ‘legs’ into the sides—four on each side—making sure they stick well. If they don’t stay in place easily, you can put a dab of melted chocolate on the back of each pretzel leg for extra hold. I usually find just pressing them in works fine if you do it carefully.
Step 3: Melt the Chocolate Chips
Next up, melt your chocolate chips. Pop them in a microwave-safe bowl and heat them in 30-second increments, stirring gently between each until smooth and creamy. This melted chocolate is your “glue” for attaching candy eyes, and if it’s too thick or grainy, the eyes won’t stick as well, so take your time melting it perfectly.
Step 4: Add the Candy Eyes
Pour the melted chocolate into a piping bag or a zip-top bag with a small corner snipped off. Pipe two small dots on the top center of each donut, then gently press two candy eyes into each dot before the chocolate hardens. That’s what makes the spider “come alive,” so take a moment to position those eyes just right—trust me, it’s worth the little extra care.
Step 5: Let Chocolate Harden & Serve
Allow the melted chocolate to cool and harden fully—this usually takes about 5-10 minutes at room temperature. Once firm, your Halloween spider donuts are ready to creep onto plates at your party. If you’re prepping ahead, cover and store in an airtight container overnight to keep them fresh.
Pro Tips for Making Halloween Spider Donut Snack Recipe
- Use Fresh Donuts: Fresh mini donuts hold pretzels and candy eyes better—stale donuts might crumble or fail to keep legs in place.
- Break Pretzels Carefully: Use your hands instead of tools when breaking pretzels to get more natural, curved legs that fit snugly.
- Control Chocolate Melting: Microwave in short bursts and stir often to avoid burning your chocolate chips, which makes the eyes stick better.
- Cool Properly: Let the chocolate harden fully on a flat, cool surface before moving the donuts to prevent smudging.
How to Serve Halloween Spider Donut Snack Recipe
Garnishes
I usually keep garnishes simple because these little spider donuts already steal the show—but sometimes I sprinkle a few orange or purple sugar crystals around the plate to enhance that Halloween look. If you want to be extra fun, miniature plastic spiders or fake cobwebs around the platter add a playful touch your guests will love.
Side Dishes
I love pairing these sweet spiders with a bowl of tangy apple cider or some hot chocolate to sink your teeth into after snacking. For bigger parties, finger foods like cheese cubes, veggie sticks, or mini sandwiches balance out the sweetness nicely.
Creative Ways to Present
For an extra spooky spread, I’ve placed the spider donuts on a tray lined with green-tinted coconut flakes to mimic “grass” or black licorice “slime.” Another hit is serving them sticking out of a pumpkin-shaped platter surrounded by dry ice for that eerie mist effect. Presentation makes the whole party vibe!
Make Ahead and Storage
Storing Leftovers
I always store leftover spider donuts in an airtight container at room temperature. They keep fresh and soft for about 24 hours, which is usually enough since they tend to disappear quickly! Avoid fridge storage—it can dry out the donuts.
Freezing
While I haven’t frozen the assembled spider donuts (the candy eyes and pretzels don’t hold up that well), you can freeze just the mini donuts if you want to prep in advance. Thaw completely before assembling for best results.
Reheating
If your mini donuts get a bit stale, a quick 10-second zap in the microwave freshens them up nicely before you add legs and eyes. Just skip reheating once the spiders are put together, to keep their look intact.
FAQs
-
Can I use regular-sized donuts for this Halloween Spider Donut Snack Recipe?
You could, but mini donuts work best because their small size makes them easier to handle and they look more like little spiders. Large donuts might be harder to balance legs on and less visually cute for this snack.
-
What can I substitute for pretzel twists if I can’t find them?
If pretzel twists aren’t available, thin pretzel sticks or even thin breadsticks broken to size can work. The key is to find something that’s slender and slightly curved to mimic spider legs.
-
How do I keep the pretzel legs from falling off?
If the legs don’t stick easily when just pressed into the donut, try using a tiny bit of melted chocolate as glue on the pretzels’ tips before attaching. Press firmly and allow to set before moving.
-
Can I make these ahead of time?
Yes! Assemble the spider donuts and store them in an airtight container overnight. Just make sure they’re kept at room temperature to stay fresh and crispy. Avoid refrigeration, which can dry them out.
Final Thoughts
This Halloween Spider Donut Snack Recipe is one of those joyful little kitchen projects that brings a lot of smiles with very little effort. I love how it mixes familiar flavors with a playful twist that gets everyone talking and laughing. Whether it’s a classroom party, a family get-together, or just a fun treat to enjoy after carving pumpkins, these spider donuts bring some festive magic that’s hard to beat. So grab your ingredients, get creative with the legs and eyes, and have a blast making your own spooky snack sensation—I promise it’s a recipe you’ll return to every Halloween!
Print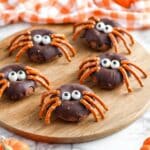
Halloween Spider Donut Snack Recipe
- Prep Time: 15 minutes
- Cook Time: 0 minutes
- Total Time: 15 minutes
- Yield: 8 donuts
- Category: Snack
- Method: No-Cook
- Cuisine: American
Description
This fun and spooky Halloween Spider Donut Snack is a quick and creative treat featuring chocolate mini donuts decorated with pretzel legs and candy eyes, perfect for festive occasions and easy to make with simple ingredients.
Ingredients
Donut and Decoration
- 8 chocolate mini donuts
- 1/4 cup chocolate chips
- 24 pretzel twists
- 16 candy eyes
Instructions
- Prepare the Donuts: Remove the 8 chocolate mini donuts from their package and set them on a clean surface ready for decorating.
- Break Pretzels: Carefully break the 24 pretzel twists into pieces so that you have 8 curved pretzel pieces per donut to form the spider legs, ensuring each piece has a curve visible.
- Attach Legs: Place 4 pretzel legs on each side of each donut to resemble spider legs, pressing gently so they adhere as you continue decorating.
- Melt Chocolate Chips: Place 1/4 cup of chocolate chips into a microwave-safe bowl. Heat in 30-second intervals, stirring between each, until the chocolate is fully melted and smooth.
- Pipe Eyes: Transfer the melted chocolate into a piping bag or small plastic bag, cut a tiny opening at the tip, and pipe two small dots of melted chocolate on the top of each donut where the eyes will go.
- Attach Candy Eyes: Press two candy eyes into the piped melted chocolate on each donut to create the spider’s eyes. Allow the chocolate to harden completely before serving.
Notes
- Serve immediately for the freshest taste and best texture.
- Store any leftovers in an airtight container overnight to keep the donuts fresh.
- Be gentle when breaking pretzels to maintain their shape and ensure good-looking spider legs.
- You can substitute candy eyes with small white and black icing dots if candy eyes are unavailable.
Nutrition
- Serving Size: 1 donut
- Calories: 150 kcal
- Sugar: 12 g
- Sodium: 180 mg
- Fat: 7 g
- Saturated Fat: 3.5 g
- Unsaturated Fat: 2 g
- Trans Fat: 0 g
- Carbohydrates: 20 g
- Fiber: 1 g
- Protein: 2 g
- Cholesterol: 5 mg


