
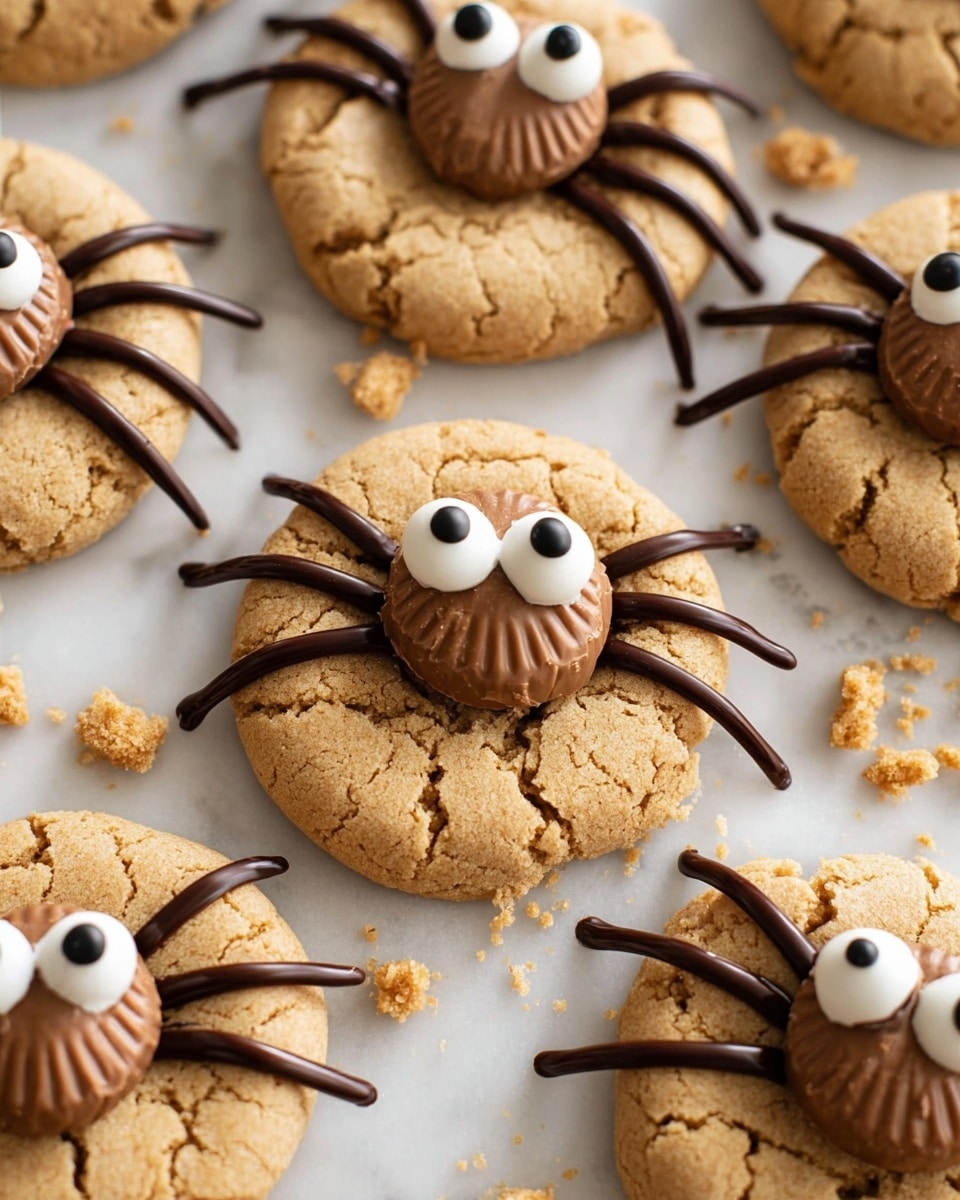
Halloween Inspired Peanut Butter Blossom Spider Cookies Recipe
Okay, friend, if you’re on the hunt for a festive treat that’s both fun and utterly delicious, you’re going to flip for this Halloween Inspired Peanut Butter Blossom Spider Cookies Recipe. These cookies bring together rich peanut butter goodness with the nostalgic peanut butter cup center — but with a spooky twist! Imagine cute little spider legs and candy eyes making your cookies look like tiny, creepy critters crawling right off your Halloween plate. Trust me, these are the kind of cookies that everyone will rave about at your party, and baking them together? A total blast.
Why This Recipe Works
- Perfect Peanut Butter Base: Creamy and soft dough yields tender cookies with the right balance of chewiness and crumb.
- Clever Use of Reese’s Cups: Adding the peanut butter cups after baking keeps them from melting away but still melds them into the cookie for that classic blossom effect.
- Festive, Yet Simple Decoration: Candy eyes and piped chocolate legs make these cookies look super spooky with minimal extra effort.
- Chilling the Dough: Helps control spreading so your cookies bake up thick enough to hold the fun spider details.

Ingredients & Why They Work
Every ingredient here plays its part in making this Halloween Inspired Peanut Butter Blossom Spider Cookies Recipe a standout. From the creamy peanut butter that adds depth, to the sugar coating that gives just a bit of crunch — these are thoughtfully chosen for flavor and texture. And a little tip? Use good-quality peanut butter; it really impacts the taste!
- Unsalted Butter: Softened for easy creaming to create that fluffy dough base.
- Creamy Peanut Butter: Smooth texture blends seamlessly and keeps cookies moist.
- Granulated Sugar: Added in dough and for rolling to add sweetness and a tiny sparkle outside.
- Eggs: Provides structure and richness; make sure they’re at room temperature for even mixing.
- Vanilla Extract: Enhances flavor — a must for sweet baked goods.
- All-purpose Flour: The main dry ingredient that creates the perfect texture.
- Baking Soda: Adds a little lift making cookies soft and tender.
- Salt: Balances sweetness and boosts peanut butter flavor.
- Miniature Reese’s Peanut Butter Cups: The signature center that defines the blossom cookie style.
- Candy Eyes: For the fun spider look — these stick surprisingly well!
- Semi-sweet Chocolate Chips: Melted for piping spider legs, adding contrast and a chocolate hit.
Tweak to Your Taste
I love how flexible this Halloween Inspired Peanut Butter Blossom Spider Cookies Recipe is. Over the years, I’ve made little tweaks based on mood, taste, or pantry staples — so don’t hesitate to get creative and truly make it yours.
- Gluten-Free Version: I once swapped the flour for a gluten-free blend with great results — just watch the dough texture, it might need a tiny extra chill to stabilize.
- Nut-Free Swap: Try sunflower seed butter instead of peanut butter if you’re catering for allergies. The flavor is different but deliciously unique!
- Chocolate Lovers’ Boost: Adding chocolate chips right into the dough ups the ante for chocoholics like me.
- Decorating Variations: For extra spooky fun, I’ve tried red candy eyes or drawn the spider legs with black gel icing — it’s all about what gets you excited in the kitchen.
Step-by-Step: How I Make Halloween Inspired Peanut Butter Blossom Spider Cookies Recipe
Step 1: Cream and Mix Like a Pro
Start by softening your butter and creaming it with the granulated sugar for about 4-5 minutes. The magic here is patience — you want the mixture light and fluffy because that locks in air which makes cookies tender. Then, add the peanut butter and beat for another couple of minutes until fully combined. I like to scrape down the bowl between additions to keep everything nicely mixed. Lastly, toss in the eggs and vanilla — mix just until combined. Over-mixing here can make cookies tough, so be gentle.
Step 2: Flour Power
Next, whisk together your flour, baking soda, and salt in a separate bowl. Gradually add this to your wet ingredients. I use a paddle attachment or a sturdy spoon if mixing by hand. The key is to mix until just combined—no flour patches, but don’t overwork the dough either.
Step 3: Chill and Prep
Wrap or cover the dough tightly and set it in the fridge for 25-30 minutes. Chilling firms up the dough so your cookies don’t spread too thin in the oven — something I learned the hard way after too many flat cookies! When ready, preheat your oven to 350°F (175°C). Use a 1-ounce scoop or spoon to portion the dough, then roll each portion into smooth balls and roll in the extra sugar for that classic sparkle.
Step 4: Bake and Cool
Place the cookie balls about 2-3 inches apart on a parchment-lined baking sheet and pop them into your oven. Bake for about 9-11 minutes until edges are golden but centers still look soft. This softness means your cookies will be perfectly chewy when cooled. Here’s a tip: after baking, let cookies sit on the baking sheet for about 5 minutes—this resting helps them set enough so when you add the Reese’s cup, it doesn’t melt into a big mess.
Step 5: Assemble the Spider
Once your cookies have cooled slightly, gently press a miniature Reese’s peanut butter cup into the center of each cookie. If your peanut butter cups feel too melty, pop them in the freezer a few minutes beforehand—that little chill makes a big difference. Next, press two candy eyes onto each cup; they usually stick nicely as the warm cookie softens the candy just enough. If not, just dab a little melted chocolate behind the eyes to glue them on.
Step 6: Add the Legs
Finally, fill a small piping bag or a plastic sandwich bag with melted chocolate and snip a tiny corner. Pipe spider legs around each peanut butter cup—eight legs, if you want to be anatomically correct! I’ve also tried using black gel icing or even cutting black licorice pieces for the legs—it all depends on your vibe and how crafty you want to get.
Pro Tips for Making Halloween Inspired Peanut Butter Blossom Spider Cookies Recipe
- Chill Dough Twice: For extra thick cookies, chill the dough after mixing and again after scooping for smoother handling.
- Freeze the Peanut Butter Cups: I freeze them for 10-15 minutes before assembly to keep their shape and prevent melting on contact.
- Use a Small Piping Tip: Snipping off a tiny corner on your plastic bag lets you pipe delicate and precise spider legs easily.
- Don’t Skip the Rest After Baking: Let the cookies set on the baking sheet for several minutes to avoid smashing soft cookies when transferring.
How to Serve Halloween Inspired Peanut Butter Blossom Spider Cookies Recipe
Garnishes
When I’m serving these cookies, I keep it simple but effective — a sprinkle of extra mini candy eyes scattered on the serving platter ups the cuteness factor instantly. Sometimes, I dust the tray with a bit of powdered sugar to mimic “spooky spider webs.” A few edible glitter sprinkles wouldn’t hurt if you want some sparkle for the kids.
Side Dishes
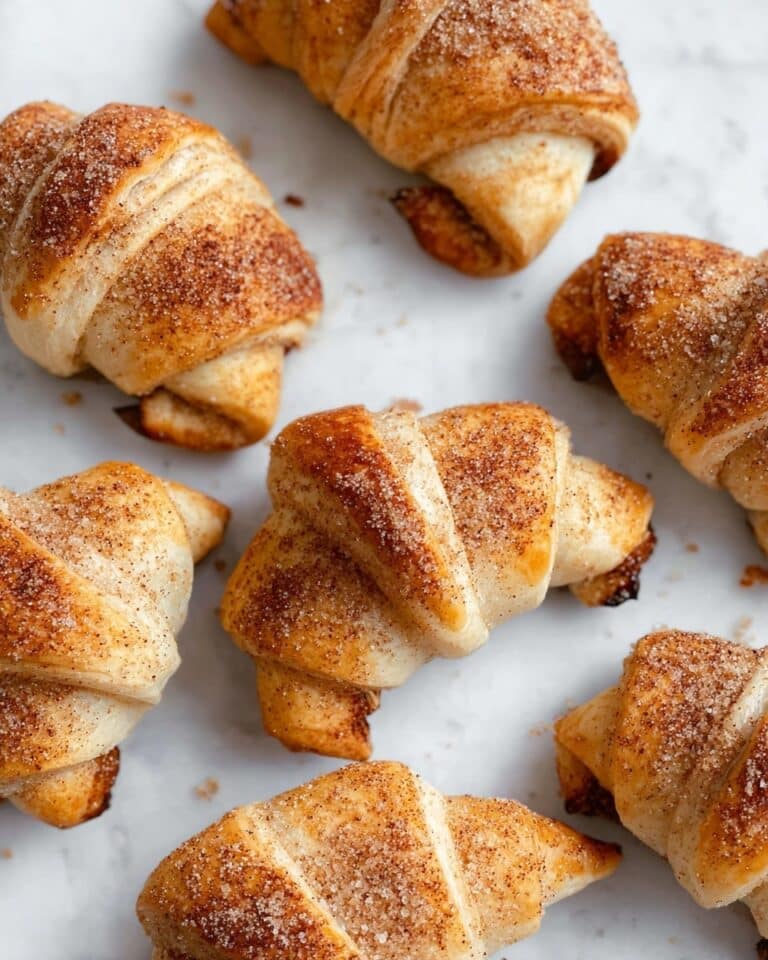
These spider cookies pair beautifully with a glass of cold milk or a warm cup of spiced apple cider—perfect for cozy fall gatherings. I’ve also served them alongside pumpkin bars or cinnamon donuts for an all-out Halloween dessert table that guests adore.
Creative Ways to Present
To jazz things up, I’ve arranged these cookies on a platter lined with faux spider webs and little plastic spiders for a party centerpiece that’s both creepy and cute. Another time, I served them tucked inside a haunted “cookie jar” with a spider-webbed lid for easy access. For kid-friendly events, making a “build-your-own spider cookie” station lets your guests pipe their own legs and add candy eyes — a total crowd-pleaser!
Make Ahead and Storage
Storing Leftovers
I store leftover spider cookies in an airtight container at room temperature, layering them between parchment paper to keep those delicate legs intact. They usually stay fresh for 3-4 days, soft and chewy — though, I admit, they rarely last that long in my house!
Freezing
These cookies freeze well before you add the peanut butter cups and eyes. I portion and freeze the dough balls on a tray, then pop them into a freezer bag. When you’re ready for baking, no need to thaw — just bake a minute or two longer. Assembled cookies don’t freeze as nicely because the candy eyes and chocolate can separate or melt.
Reheating
If you want to warm up leftover cookies, I pop just one or two in the microwave for about 10-15 seconds to soften the peanut butter and chocolate again. Just be careful not to overheat or the candy melts too much and gets messy!
FAQs
-
Can I use crunchy peanut butter instead of creamy?
You absolutely can! Using crunchy peanut butter adds a delightful texture to the cookie dough, but it might affect the smoothness of the dough slightly. If you prefer that little bit of crunch and extra peanut chunks, go for it.
-
Why do I need to chill the dough?
Chilling firms up the dough, which prevents the cookies from spreading too much while baking. This step helps your cookies bake thick and soft instead of flat and crispy, perfect for holding those peanut butter cups and spider decorations.
-
What if I can’t find candy eyes?
No worries! You can draw eyes on the peanut butter cups with a small dab of white icing or melted white chocolate and a tiny dot of dark chocolate for pupils. Alternatively, you could skip eyes altogether and just focus on the spider legs for a minimal but still spooky look.
-
Can I make these cookies vegan?
Making these cookies vegan would require substituting the butter with vegan butter, using a flax or chia egg instead of chicken eggs, and ensuring your peanut butter cups are dairy-free. It’s doable, but the texture might vary slightly—definitely worth experimenting!
-
How do I keep the Reese’s cups from melting too much?
Two tricks help here: chill or freeze the peanut butter cups for 10-15 minutes before assembling, and let the cookies cool for about 5 minutes after baking before pressing the cups on. This prevents the cups from melting into a gooey mess.
Final Thoughts
Honestly, this Halloween Inspired Peanut Butter Blossom Spider Cookies Recipe has quickly become one of my seasonal favorites. It’s just fun to make, delicious to eat, and always a conversation starter at gatherings. I love how it takes a classic peanut butter cookie and turns it into something festive and utterly charming — especially when I see kids’ faces light up. I hope you enjoy making these creepy-cute treats as much as I do. Happy baking and have a spooktacular Halloween!
Print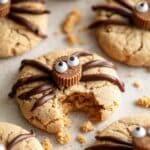
Halloween Inspired Peanut Butter Blossom Spider Cookies Recipe
- Prep Time: 20 minutes
- Cook Time: 11 minutes
- Total Time: 1 hour
- Yield: 24 cookies
- Category: Dessert
- Method: Baking
- Cuisine: American
- Diet: Vegetarian
Description
Halloween Inspired Peanut Butter Blossom Spider Cookies are festive, soft peanut butter cookies topped with miniature Reese’s peanut butter cups decorated with candy eyes and chocolate spider legs, perfect for spooky celebrations.
Ingredients
Cookie Dough
- 1/2 cup unsalted butter, softened
- 1 cup creamy peanut butter
- 1 1/2 cups granulated sugar
- 2 tbsp granulated sugar (for rolling)
- 2 eggs, room temperature
- 1 tbsp vanilla extract
- 2 1/2 cups all-purpose flour
- 1 tsp baking soda
- 1 tsp salt
Decorations
- 24 miniature Reese’s peanut butter cups
- Candy eyes
- 1 oz. semi-sweet chocolate chips, melted
Instructions
- Cream ingredients: In a large mixing bowl fitted with a paddle attachment, cream the softened butter and 1 1/2 cups sugar for 4-5 minutes until light and fluffy. Add the peanut butter and mix for another 1-2 minutes. Then add the eggs and vanilla extract and mix to combine.
- Mix dry ingredients: Add the all-purpose flour, baking soda, and salt to the wet ingredients. Mix until fully incorporated into a smooth dough.
- Chill dough: Cover the dough and chill in the refrigerator for 30 minutes to firm up.
- Form cookies: Using a 1 oz. portion scoop or measuring spoon, scoop out dough and roll into smooth balls with your palms. Roll each ball in the 2 tbsp granulated sugar to coat.
- Prepare for baking: Preheat oven to 350 degrees F. Line a sheet pan with parchment paper and arrange cookie dough balls 2-3 inches apart to allow spreading.
- Bake cookies: Bake the cookies in the preheated oven for 11 minutes until golden brown but still soft. Let cookies sit on the pan for a few minutes after baking, then transfer to a wire rack to cool completely.
- Add toppings: After the cookies have cooled about 5 minutes, gently press one miniature Reese’s peanut butter cup into the center of each cookie. Immediately press two candy eyes onto each peanut butter cup; if they do not stick, use a small dot of melted chocolate as glue.
- Decorate spider legs: Put melted semi-sweet chocolate into a piping bag or plastic sandwich bag with a small corner snipped off. Pipe spider legs onto each cookie around the Reese’s cup. Alternatively, you can draw legs with a toothpick dipped in chocolate, use black Twizzlers, or gel icing.
- Set and store: Allow the chocolate to cool and harden completely. Store leftover cookies in an airtight container at room temperature for 3-4 days.
Notes
- Let the cookies cool about 5 minutes after baking before adding the Reese’s cups to prevent them from melting too much. Freezing the Reese’s cups for a few minutes before placing them can help reduce melting.
- The candy eyes usually stick onto the Reese’s cup due to the cup warming slightly from the cookie; otherwise, use a small dot of melted chocolate to adhere them securely.
- Spider legs can be piped with melted chocolate or drawn on with a toothpick dipped in chocolate. For a fun twist, use black Twizzlers or gel icing for the legs.
Nutrition
- Serving Size: 1 cookie
- Calories: 180 kcal
- Sugar: 15 g
- Sodium: 150 mg
- Fat: 10 g
- Saturated Fat: 3 g
- Unsaturated Fat: 6 g
- Trans Fat: 0 g
- Carbohydrates: 18 g
- Fiber: 1 g
- Protein: 4 g
- Cholesterol: 25 mg


