
Halloween Graveyard Pudding Cups Recipe
Alright, I’m about to share a dessert that’s as fun to make as it is to eat — and trust me, it’s a real crowd-pleaser. This Halloween Graveyard Pudding Cups Recipe is perfect for spooky season gatherings, family parties, or just when you want to impress your friends with something creative yet easy. Imagine creamy chocolate pudding layered with Oreo “dirt,” cute white chocolate ghosts, creepy black trees, and tombstone Milano cookies all nestled in a cup. It’s festive, delicious, and surprisingly simple. Stick around because I’m walking you through every step to make this fan-freaking-tastic dessert a Halloween favorite!
Why This Recipe Works
- Simple Ingredients: Uses common pantry items you probably already have, making it stress-free to put together.
- Layered Texture: Creamy pudding pairs perfectly with crunchy crushed Oreos and crisp cookies for the tombstones.
- Customizable Decorations: White chocolate ghosts and chocolate trees not only look adorable but let you get creative with your spooky theme.
- Make-Ahead Friendly: Can be assembled in advance and stored, making it perfect for busy party prep.

Ingredients & Why They Work
Each ingredient in this Halloween Graveyard Pudding Cups Recipe plays a special role, balancing flavor and texture to amaze your guests. It’s the combo of creamy pudding, crunchy cookies, and melt-in-your-mouth white chocolate that really seals the deal. I always recommend using good-quality white chocolate and instant pudding for the best results — they make the process faster and the taste richer.
- White chocolate: Melts smoothly for shaping cute ghosts and adds a sweet, creamy contrast to the darker elements.
- Black candy melts: Perfect for piping spooky features like ghost eyes and chilling tree shapes, they hold their form well once set.
- Milano cookies: These make the ideal “tombstones” because their sturdy texture and rectangular shape are spot on.
- Instant chocolate pudding mix: Quick to prepare and gives that classic chocolate flavor that everyone loves.
- Cold milk: Needed to whip up the pudding — go for whole milk for creamier results, but skim works too.
- Crushed Oreos: These act as “graveyard dirt,” adding crunch and depth to each spoonful.
- Halloween sprinkles (optional): The perfect finishing touch for extra color and festive flair.
Tweak to Your Taste
I love that this Halloween Graveyard Pudding Cups Recipe leaves plenty of room for your personality to shine through. I’ve played around with flavors and decorations depending on the mood or event, so don’t be afraid to get creative or make it your own.
- Variation: One time, I swapped out the chocolate pudding for pumpkin-flavored pudding — it added a nice autumn twist that guests really enjoyed.
- Dietary modifications: Use dairy-free milk and pudding mixes if you want a vegan-friendly dessert; the key is to find alternatives that thicken nicely.
- Decoration swap: If you’re short on time, pre-made Halloween candies or gummy worms work well as easy “decorations” instead of homemade chocolate ghosts.
Step-by-Step: How I Make Halloween Graveyard Pudding Cups Recipe
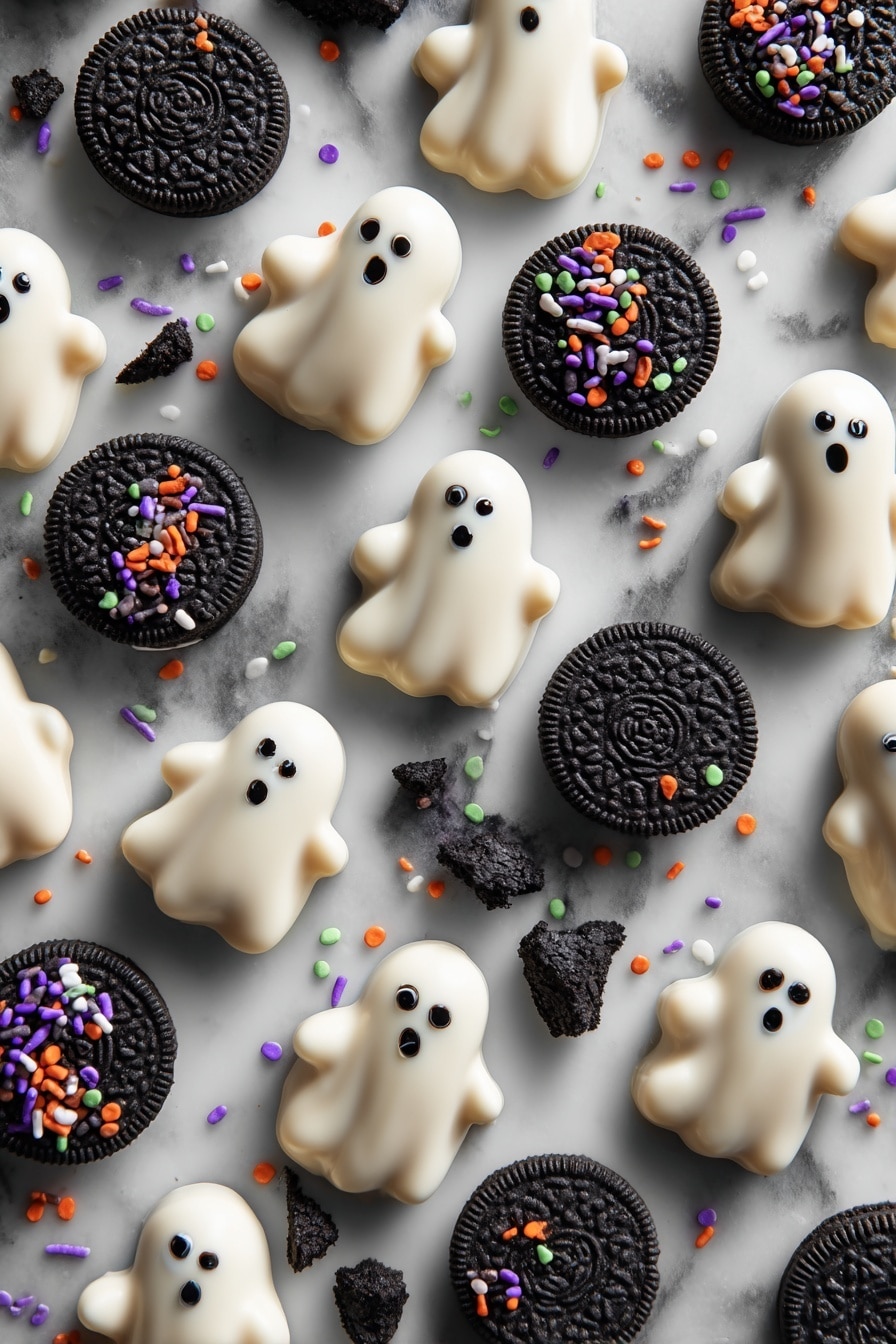
Step 1: Create Your Ghostly White Chocolate Figures
First, melt the white chocolate slowly in the microwave, heating in short 20-second bursts and stirring between each until smooth — patience is key to avoid burning it! Spoon big dollops onto a parchment-lined tray and spread out the bottom to form ghost shapes. If you’re feeling fancy, use a toothpick to pull the edges out a bit, creating cute ghost arms. Pop the tray in the fridge while you tackle the next steps to let the chocolate harden properly.
Step 2: Add Spooky Faces and Trees with Black Candy Melts
Now melt your black candy melts according to package instructions. Pour the melted candy into a piping bag fitted with a small tip — I like using a zip-top bag with the corner snipped if you don’t have a piping set. Carefully pipe eyes and creepy mouths on the white chocolate ghosts, then set them aside to harden again. Use the rest of the black candy melts to pipe eerie tree shapes on parchment paper — give them a thick base so they stand up nicely. While you’re at it, pipe “RIP” or other fun epitaphs onto the Milano cookies to transform them into tombstones.
Step 3: Whip Up the Chocolate Pudding Base
In a big bowl, whisk the instant chocolate pudding mix with cold milk until silky smooth. Let it sit for just a few minutes — you’ll notice it thicken beautifully, which means it’s ready to be layered.
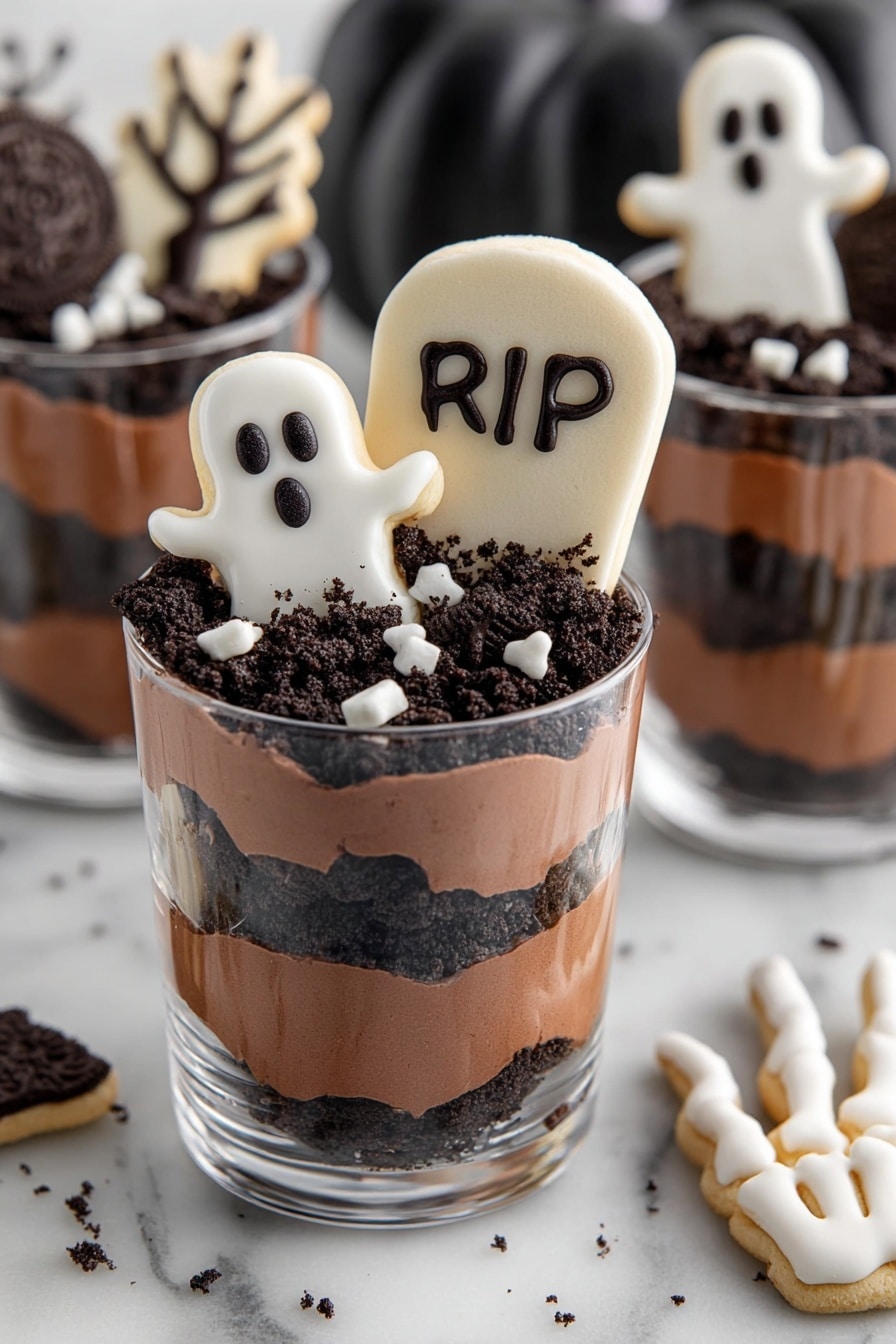
Step 4: Assemble Your Graveyard in Cups
Grab your serving cups and get ready to build some layers! Start with a generous scoop of pudding at the bottom, then sprinkle crushed Oreos on top to look like dirt. Repeat one more round of pudding and Oreos, then refrigerate the cups for about an hour so everything sets up nicely. This chill time also lets the flavors meld together, making each bite more delicious.
Step 5: Decorate and Serve Your Spooky Masterpieces
When your pudding cups are nice and firm, gently press a Milano cookie tombstone into each cup, add a white chocolate ghost right beside it, and stick a black candy tree in the background. If you want, sprinkle some festive Halloween sprinkles on top for that final creepy-cute look. Serve immediately and watch your guests’ faces light up!
Pro Tips for Making Halloween Graveyard Pudding Cups Recipe
- Take Your Time Melting Chocolate: Temper your white and black chocolates gently—burnt chocolate can ruin the look and taste of your ghosts and trees.
- Use Parchment Paper for Easy Removal: Always pipe your chocolate decorations on parchment so they peel off cleanly without breaking.
- Layer Thoughtfully: Crushing Oreos unevenly adds extra texture — try to keep some chunks for that “freshly dug dirt” effect.
- Chill Before Decorating: Ensure the pudding layers are firm before adding decorations so your tombstones and ghosts stand upright without sinking.
How to Serve Halloween Graveyard Pudding Cups Recipe
Garnishes
I usually keep it simple — a sprinkle of Halloween-themed jimmies or candy eyes takes these pudding cups from cute to full-on spooky fun. If I’m feeling extra crafty, I’ll toss in some mini gummy worms crawling over the “graveyard” dirt for a creepy-crawly surprise. It’s these little details that make the dessert so memorable.
Side Dishes
Since the pudding cups are a sweet treat, I like pairing them with savory seasonal bites like roasted pumpkin seeds, cheddar-stuffed pretzel bites, or even mini sliders for a full party spread. They’re also perfect on their own as a whimsical dessert after a spooky-themed meal.
Creative Ways to Present
For bigger parties, I’ve arranged these pudding cups in a “graveyard” scene on a big black tray with crushed Oreos spread out all around. Adding small plastic skeletons or autumn leaves creates a full tablescape that wows guests. You could also try clear mini mason jars for a rustic look or spooky glassware for adults’ parties.
Make Ahead and Storage
Storing Leftovers
I usually cover my pudding cups tightly with plastic wrap or store them in an airtight container in the fridge. It’s best to store the chocolate decorations separately until ready to serve to keep them from melting or softening. These keep well for up to three days — perfect for making ahead for parties.
Freezing
I haven’t frozen the assembled pudding cups because the texture of crushed Oreos and pudding doesn’t hold up well once thawed. However, you can freeze white chocolate ghosts and candy trees on parchment, then thaw gently before decorating.
Reheating
Since these are chilled desserts, there’s no need to reheat. Just serve them cold straight from the fridge for the best texture and taste.
FAQs
-
Can I make the chocolate ghost and tree decorations ahead of time?
Absolutely! The white chocolate ghosts and black candy trees can be made a day or two in advance. Just store them in a cool, dry place or in the fridge, and bring them back to room temperature before decorating your pudding cups.
-
What if I don’t have Milano cookies for the tombstones?
You can swap Milano cookies for any rectangular or sturdy cookie like chocolate wafers, graham crackers cut into shapes, or even ginger snaps. Just make sure they can stand up well in the pudding without breaking.
- Can I prepare this recipe without using candy melts?
Yes! If candy melts aren’t an option, you can melt regular chocolate chips carefully or use edible markers to draw faces on your white chocolate ghosts. You can also skip the trees and keep it simple with just the ghosts and tombstones.
-
How long do these pudding cups last in the refrigerator?
Stored covered airtight, these Halloween Graveyard Pudding Cups stay fresh for up to three days. After that, the texture might start to change, so try to enjoy them within that window.
Final Thoughts
This Halloween Graveyard Pudding Cups Recipe holds a special place in my heart because it brings together my love for simple, creative desserts and festive fun with loved ones. Whether you’re making this with kids or for a party, it’s a guaranteed hit that’s as delightful to assemble as it is to eat. Give it a try — I promise you’ll find yourself coming back to this recipe every October to keep the spooky season sweet and memorable!
Print
Halloween Graveyard Pudding Cups Recipe
- Prep Time: 20 minutes
- Cook Time: 0 minutes
- Total Time: 1 hour 20 minutes
- Yield: 6 cups
- Category: Dessert
- Method: No-Cook
- Cuisine: American
Description
These Halloween Graveyard Pudding Cups are a spooky and fun dessert perfect for Halloween parties. Layers of creamy chocolate pudding and crushed Oreos mimic dirt, topped with white chocolate ghosts, black candy melt tombstones, and eerie trees for a festive graveyard scene.
Ingredients
Decorations
- ⅔ cup white chocolate, melted
- ½ cup black candy melts, melted
- 6 Milano cookies
- Halloween sprinkles (optional)
Pudding Layer
- 1 (3.9 ounce) box instant chocolate pudding mix
- 1 ¾ cups cold milk
- ½ – 1 cup crushed Oreos
Instructions
- Create white chocolate ghosts: Melt the white chocolate in a microwave-safe bowl by heating in 20-second intervals and stirring until smooth. Drop heaped spoonfuls onto a parchment-lined tray and use the back of the spoon to drag the bottom down to form ghost shapes. Use a toothpick to pull the chocolate out on each side to create arms. Refrigerate until set.
- Decorate ghosts: Melt the black candy melts according to package directions and transfer to a piping bag with a small tip. Pipe eyes and mouths onto the white chocolate ghosts and set aside to fully harden.
- Make trees and tombstones: Use remaining melted black candy melts to pipe spooky tree shapes onto parchment paper, creating a thicker base for stability. Allow to set completely. Pipe inscriptions onto Milano cookies to resemble tombstones and let them harden.
- Prepare pudding: In a large bowl, whisk together instant chocolate pudding mix and cold milk until smooth. Let sit for a few minutes to thicken.
- Assemble cups: Add a layer of pudding to the bottom of each serving cup, then a layer of crushed Oreos. Repeat with another pudding layer and finish with a final Oreo layer. Refrigerate for about 1 hour to set.
- Finish and serve: Once chilled, gently press a decorated Milano cookie tombstone into each cup, place a white chocolate ghost beside it, and add a black candy tree at the back. Sprinkle with Halloween sprinkles if desired. Serve and enjoy!
Notes
- Store pudding cups covered with plastic wrap or in an airtight container in the refrigerator for up to 3 days.
- Keep decorations separate from pudding until ready to serve to maintain texture and shape.
- Use parchment paper to easily remove molded chocolate decorations.
- For a dairy-free option, substitute milk and pudding mix accordingly.
- Adjust the amount of crushed Oreos for desired ‘dirt’ texture in the cups.
Nutrition
- Serving Size: 1 cup
- Calories: 350 kcal
- Sugar: 28 g
- Sodium: 180 mg
- Fat: 20 g
- Saturated Fat: 12 g
- Unsaturated Fat: 7 g
- Trans Fat: 0 g
- Carbohydrates: 38 g
- Fiber: 2 g
- Protein: 4 g
- Cholesterol: 15 mg


