
Chocolate Madeleine Mummies Recipe
If you’re on the hunt for a Halloween treat that’s as cute as it is delicious, you’ve got to try this Chocolate Madeleine Mummies Recipe. These little spooky bites combine rich chocolatey flavor with the charming look of mummy wrappings, all made with madeleine’s famously tender crumb. Trust me, once you bake these up, you’ll be coming back for seconds—and maybe even thirds. Stick around because I’m going to share all the tips that helped me nail this recipe perfectly every time!
Why This Recipe Works
- Perfect Texture: The blend of pastry and almond flours with a touch of cocoa creates a tender yet slightly crisp madeleine that melts in your mouth.
- Rich Chocolate Flavor: Butter and dark chocolate melted together give the batter a deep, satisfying chocolate note that’s neither too sweet nor too bitter.
- Fun and Festive: The white chocolate mummy wrappings and candy eyes add a whimsical touch that’s great for Halloween parties or spooky snack time.
- Chill Time Magic: Refrigerating the batter (and sometimes the pan) helps develop those beautiful madeleine “bellies,” resulting in that classic hump everyone loves.

Ingredients & Why They Work
This recipe mixes simple ingredients that you might already have, with just a couple specialty items to make your Chocolate Madeleine Mummies stand out. Each component plays a role in balancing flavor, texture, and that signature bakery-quality taste.
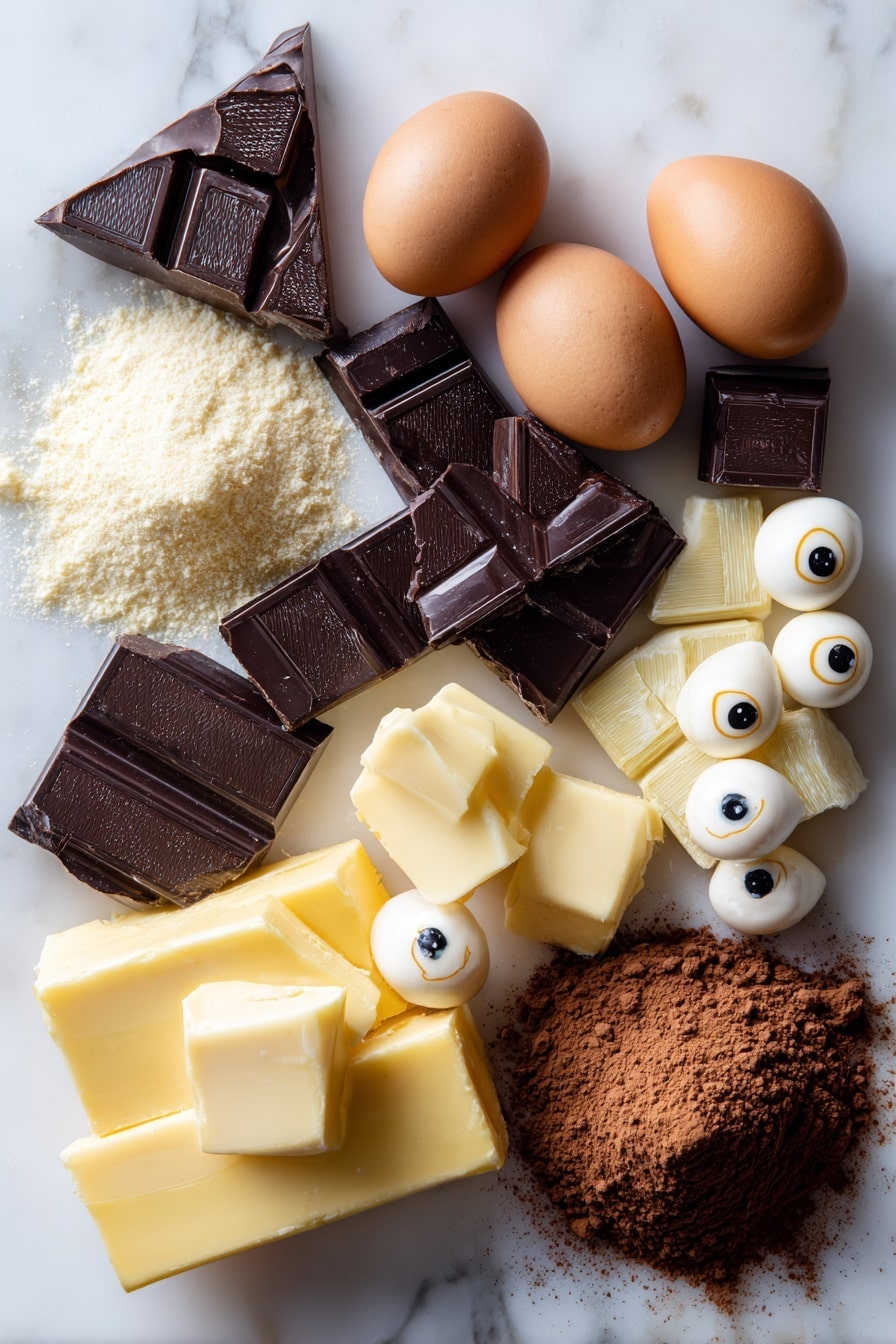
- Unsalted Butter: Melting it with the dark chocolate adds richness and helps keep the texture tender and moist.
- Dark Chocolate: Gives depth to the flavor and pairs wonderfully with cocoa powder for a layered chocolate profile.
- Vanilla Extract: A touch of warmth and aromatic sweetness that lifts the chocolate flavors.
- Eggs: Provide structure to the delicate madeleine, helping them keep their shape while staying soft.
- Honey: Adds natural sweetness and helps with moisture retention, making the texture just right.
- Granulated Sugar: Sweetens without overpowering and helps develop the crisp edges during baking.
- Whipping Cream: Adds fat for tenderness and a silky crumb in the finished madeleines.
- Pastry Flour: Lower protein flour to ensure a soft, delicate crumb rather than a tough bite.
- Almond Flour: Brings nuttiness and helps keep the madeleines moist and tender.
- Cocoa Powder: Intensifies the chocolate flavor without adding extra wet ingredients.
- Baking Powder: Gives just enough lift to keep madeleines light and airy.
- White Chocolate: The star decoration element used to pipe the mummy wraps in a crosshatch pattern.
- Candy Eyes: They make the mummies come alive (literally!), but DIY googly eyes work just as well.
Tweak to Your Taste
One of my favorite parts of this Chocolate Madeleine Mummies Recipe is how easy it is to make your own. I often experiment with little tweaks to suit my mood or add seasonal flair, and honestly, you should too! Personalizing it makes the baking process feel like your own special tradition.
- Variation: I once swapped the almond flour for hazelnut flour, and it added a subtle, toasty backdrop that paired beautifully with dark chocolate.
- Dietary Modification: You can easily swap the butter for coconut oil and use dairy-free dark chocolate to make these mummies vegan-friendly with just as much deliciousness.
- Extra Flavor: Adding a pinch of instant espresso powder to the batter intensifies the cocoa flavor—perfect if you’re a coffee and chocolate fan.
- Decoration Ideas: Instead of candy eyes, try tiny edible pearls or nonpareils for a glittery, magical mummy look for kids’ parties.
Step-by-Step: How I Make Chocolate Madeleine Mummies Recipe
Step 1: Melt Butter and Chocolate with Care
First things first, get your dark chocolate chopped and butter ready in a small heatproof bowl. Set this bowl over a pot of barely simmering water (a gentle water bath), and stir until everything’s just melted and smooth. Don’t rush this—take your time so the chocolate stays fluid but doesn’t seize or burn. Stir in vanilla extract last and set the mixture aside to cool slightly.
Step 2: Whisk Eggs, Sugar, Honey, and Cream
Grab a large bowl and whisk together your eggs and sugar till combined. Then add the whipping cream and honey, whisking again over the water bath for about a minute. This warms the mixture just enough to gently dissolve the sugar and meld the ingredients without cooking the eggs. It’s a quick step but important for that smooth batter texture.
Step 3: Combine Dry Ingredients and Fold Gently
Sift your pastry flour, almond flour, cocoa powder, and baking powder together to make sure there are no lumps. Then fold them carefully into your wet mixture, just until combined. Overmixing will toughen the batter, and we want those light, fluffy mummies, so gentle is the name of the game here.
Step 4: Incorporate Chocolate Butter Mixture in Batches
Add your melted butter and chocolate mix in thirds, folding each addition gently until everything’s just combined. The batter will be rich and thick—if it feels too stiff after chilling, give it a gentle stir with a spatula before piping.
Step 5: Chill Batter and Prepare Pan
Cover your batter well and pop it in the fridge for at least 30 minutes—it makes a difference! Meanwhile, coat your madeleine pan with butter and dust it with cocoa powder to prevent sticking. I like to chill the pan too; a cold surface helps the batter puff up in the oven, giving you that picture-perfect hump.
Step 6: Pipe and Bake the Madeleines
Transfer your chilled batter into a pastry bag—it makes filling each well neat and easy. Pipe the batter evenly but don’t worry about making it perfect; madeleine pans are forgiving, promise. If you have time, refrigerate the filled pan again for about 30 minutes. Then bake your mummies at 340°F for 8-10 minutes, resisting the urge to open the oven early. That window is crucial for the rise and texture.
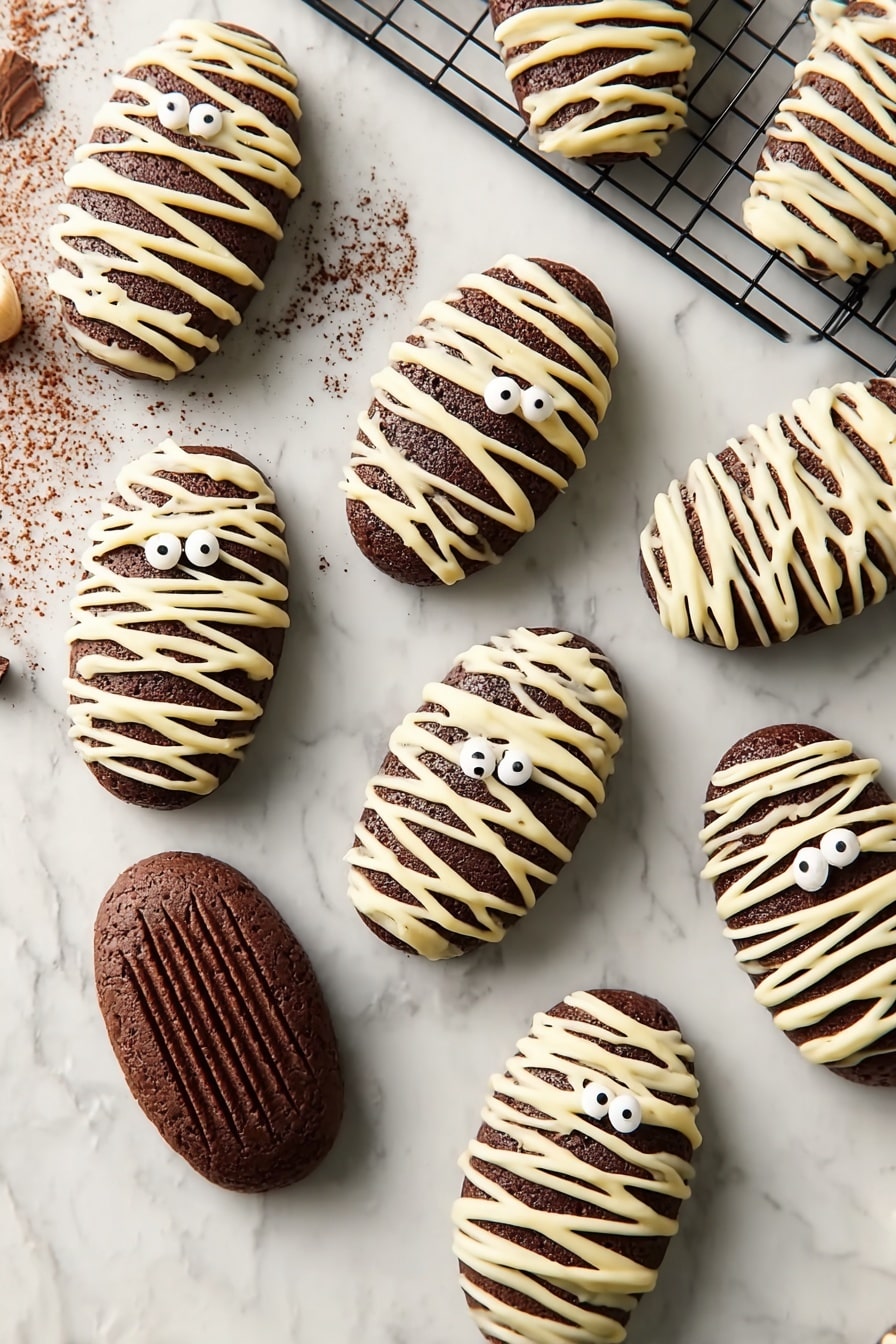
Step 7: Cool and Decorate Your Mummies
Once baked, tap your pan gently to release the madeleines and let them cool on a rack. For decorating, melt white chocolate and load it into a pastry bag with a fine tip. Pipe messy, crosshatch “bandages” over the madeleines, leaving spaces for the eyes. Stick candy eyes onto the white chocolate while it’s still soft, or pipe them on if using DIY eyes. Voila—your spooky, adorable mummy treats are ready to impress!
Pro Tips for Making Chocolate Madeleine Mummies Recipe
- Water Bath Whisking: Keep the heat gentle when warming eggs, sugar, and cream—whisk constantly to avoid any scrambling.
- Chilling is Crucial: Don’t skip chilling the batter or the pan; it really helps develop that signature madeleine hump and perfect texture.
- Don’t Overmix: Folding gently keeps the batter light—overdoing it can lead to dense, tough treats.
- Creative Decorating: If you can’t find candy eyes, make mini eyes with white and dark chocolate piped on parchment paper—the kids love helping with this fun step.
How to Serve Chocolate Madeleine Mummies Recipe
Garnishes
I love keeping it simple with these little mummies—white chocolate “bandages” and candy eyes say it all. But if you want to get fancy, a light dusting of powdered sugar or a drizzle of dark chocolate adds a nice contrast. Little sprinkles in Halloween colors can make these treats extra festive if you’re serving a crowd of kiddos.
Side Dishes
Pair your Chocolate Madeleine Mummies with a warm cup of spiced pumpkin latte or a mug of creamy hot chocolate for cozy vibes. Or serve alongside a fresh fruit platter with clementines and pomegranate—because sometimes you do want that sweet-and-tart balance next to a rich dessert.
Creative Ways to Present
For Halloween parties, I like to plate these mummies on a black slate or a silver tray with faux cobwebs around for a spooky effect. You can even pop them into mini “coffin” bakery boxes for an extra dramatic reveal. Kids especially love when these are served with little “boo!” signs or scattered with Halloween confetti.
Make Ahead and Storage
Storing Leftovers
I store leftover Chocolate Madeleine Mummies at room temperature in an airtight container for up to 3 days. If it’s humid where you live, I recommend keeping them in a cool, dry place to prevent the white chocolate decoration from melting or smudging. They still taste amazing the next day!
Freezing
If you want to freeze these mummies, lay them out on a parchment-lined tray first so they freeze individually. Once solid, transfer them into a freezer bag or airtight container with parchment between layers to avoid sticking. I’ve had great luck freezing for up to a month—just thaw overnight in the fridge before decorating or serving.
Reheating
Honestly, these madeleines are best enjoyed fresh or at room temp. But if you want to warm them slightly, pop them in a 300°F oven for just a few minutes—watch closely so the white chocolate decorations don’t melt too much. Avoid microwaving as it can soften the texture too much and affect the decorations.
FAQs
-
Can I make the Chocolate Madeleine Mummies Recipe ahead of time?
Absolutely! You can prepare the batter and chill it for up to 24 hours before baking. This actually helps the flavors develop more fully. If you want to decorate in advance, just store them carefully in an airtight container to keep the decorations intact.
-
What if I don’t have a madeleine pan?
While a madeleine pan gives you that iconic shell shape, you can bake the batter in mini muffin tins or other small molds. The texture and flavor will still be delicious; just adjust the baking time slightly and keep a careful eye to avoid overbaking.
-
How do I avoid scrambled eggs when whisking over the water bath?
Keep the whisking continuous and the heat gentle; your bowl should be above—not touching—the water to create a warm environment rather than direct heat. If the eggs start to smell cooked or look curdled, you’re heating too fast.
-
Can I make my own candy eyes?
For sure! Pipe small dots of melted white chocolate onto parchment paper for the whites, then add tiny dark chocolate dots in the center while the white is still soft. Let them harden in the fridge before using.
-
What’s the secret to getting the classic madeleine hump?
Chilling the batter and the pan before baking is key, along with the right oven temperature. This helps the batter spread and rise quickly once in the oven, forming that lovably puffy hump on each madeleine.
Final Thoughts
I can’t gush enough about how much joy this Chocolate Madeleine Mummies Recipe brings to both the kitchen and the party table. It’s one of those feel-good recipes that’s perfect for Halloween but delicious enough to enjoy year-round. Whether you’re baking with kids, gearing up for a spooky bash, or simply craving a sweet chocolate treat, these mummies deliver with charm and flavor every time. I hope you have as much fun making and eating these as I do—now go grab that madeleine pan and get started!
Print
Chocolate Madeleine Mummies Recipe
- Prep Time: 15 minutes
- Cook Time: 10 minutes
- Total Time: 45 minutes
- Yield: 16 madeleines
- Category: Dessert
- Method: Baking
- Cuisine: French
- Diet: Vegetarian
Description
Delightfully spooky Chocolate Madeleine Mummies featuring rich dark chocolate and a tender crumb, decorated with white chocolate mummy wrappings and candy eyes. Perfect for a Halloween treat with a moist, buttery texture and a subtle almond and cocoa flavor.
Ingredients
Chocolate Madeleines
- ⅝ cup unsalted butter (140 grams)
- ⅕ cup dark chocolate, chopped (34 grams)
- 1 teaspoon vanilla extract
- 2 large eggs
- 1 ½ tablespoons honey (30 grams)
- ½ cup granulated white sugar (80 grams)
- 2 ½ tablespoons whipping cream
- ½ cup pastry flour, sifted (56 grams)
- ⅓ cup almond flour, sifted (30 grams)
- ⅓ cup cocoa powder (30 grams)
- 1 teaspoon baking powder (8 grams)
Halloween Madeleine Mummy Decorations
- ½ cup white chocolate, melted
- 32 small candy eyes
Instructions
- Melt Chocolate and Butter: In a small bowl over a water bath, melt the dark chocolate and butter together until fluid. Stir in vanilla extract and set aside.
- Prepare Egg Mixture: In a large bowl, whisk together eggs and sugar. Add whipping cream and whisk again. Incorporate honey and whisk the mixture over a water bath for about 1 minute until the sugar has melted and ingredients are fully incorporated.
- Add Dry Ingredients: Sift pastry flour, almond flour, cocoa powder, and baking powder into the wet mixture. Gently fold the dry ingredients in to form the batter.
- Combine with Chocolate Mixture: Gradually mix the melted chocolate and butter into the batter in three additions until fully combined.
- Chill Batter: Cover the batter and refrigerate for at least 30 minutes. Meanwhile, preheat the oven to 340 degrees Fahrenheit.
- Prepare Madeleine Pan: Lightly brush the madeleine pan with butter and dust with cocoa powder, tapping out any excess.
- Pipe Batter and Chill: Transfer batter to a pastry bag and pipe into the madeleine wells. Optionally, cover and refrigerate an additional 30 minutes for a colder pan.
- Bake: Bake the madeleines for 10 minutes without opening the oven door early.
- Cool: Release madeleines from the pan by tapping, then cool them on a wire rack before decorating.
- Decorate Mummies: Fill a pastry bag with melted white chocolate and pipe a messy crosshatch mummy wrapping pattern on each madeleine, leaving space for the eyes.
- Add Candy Eyes: Affix candy eyes onto the white chocolate using a small dot of white chocolate as glue if needed.
- Store: Store the decorated madeleines in a cool place and enjoy saying “Boo!” with every bite.
Notes
- Use a quick water bath to melt sugar in the egg mixture; avoid cooking the eggs to prevent scrambling.
- The chilled batter will be stiff; gently push a spatula through it before piping.
- Madeleine wells are forgiving; pipe the batter approximately into each well without fussing over perfect shapes.
- Chilling the pan helps the batter retain coldness, resulting in puffier madeleine “bellies.”
- Baking times can vary slightly based on pan color; lighter pans bake slightly faster.
- If candy eyes are unavailable, create your own by piping white chocolate dots topped with small dark chocolate centers on parchment paper and cooling.
Nutrition
- Serving Size: 1 madeleine
- Calories: 150 kcal
- Sugar: 10 g
- Sodium: 50 mg
- Fat: 10 g
- Saturated Fat: 6 g
- Unsaturated Fat: 3 g
- Trans Fat: 0 g
- Carbohydrates: 15 g
- Fiber: 2 g
- Protein: 3 g
- Cholesterol: 45 mg


