
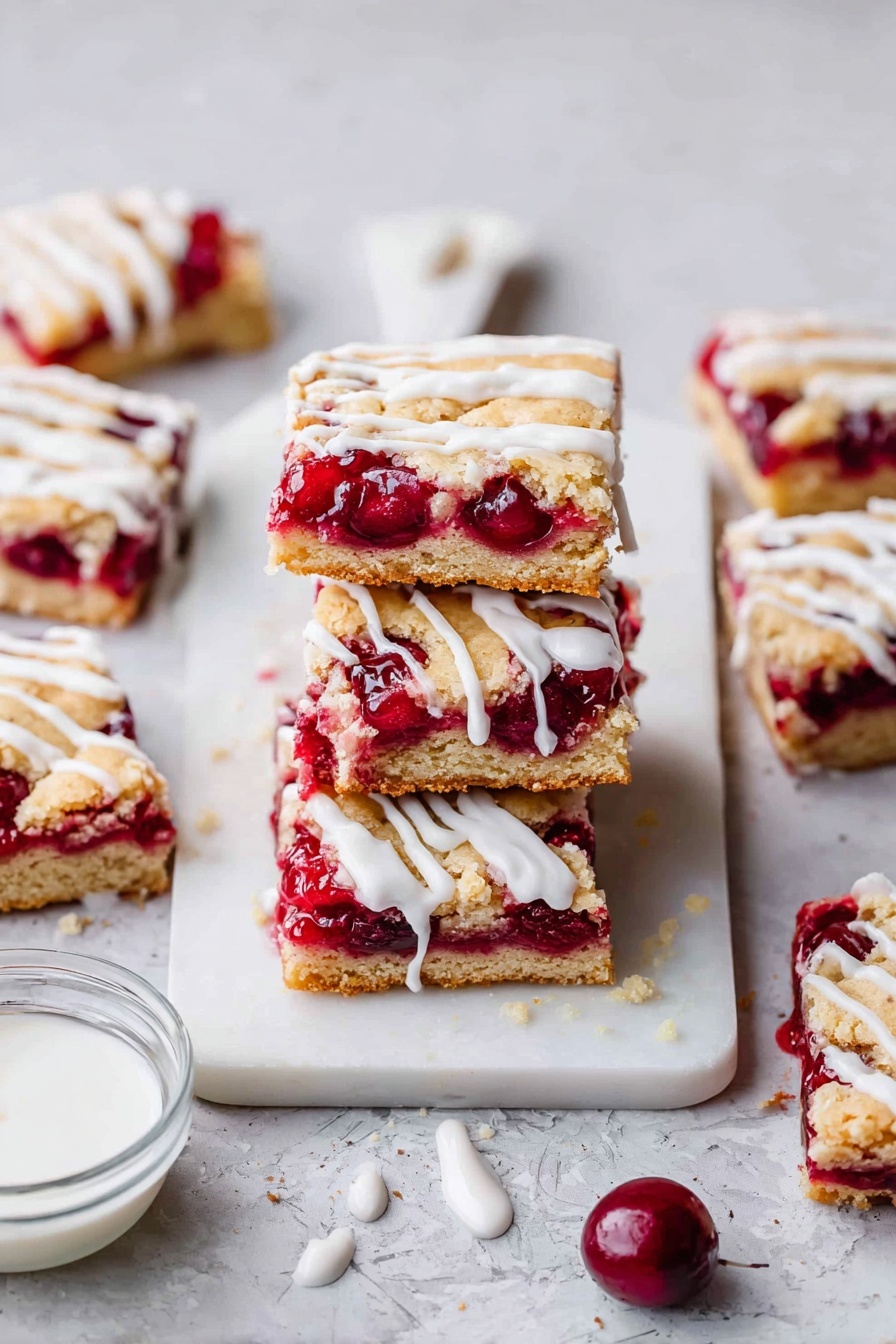
Cherry Pie Bars Recipe
If you love the classic flavors of cherry pie but want something quicker and just as delicious, you’re going to adore this Cherry Pie Bars Recipe. It’s one of those recipes I turn to when I want that perfect balance of buttery crust, sweet-tart cherry filling, and a soft, tender crumb—all in bar form. Plus, it’s super straightforward, making it a total win whether you’re baking for a crowd or just craving a homemade treat. Trust me, once you try these bars, they’ll quickly become a favorite in your dessert rotation.
Why This Recipe Works
- Simplicity: The straightforward mix and bake method means you don’t need to fuss with a pie crust or lattice top, saving time and stress.
- Flavor Balance: The buttery, tender base layered beneath tart cherry pie filling creates an irresistible contrast of textures and tastes.
- Versatility: You can easily tweak the flavors or try different fruit fillings depending on what you have on hand.
- Delicious Finish: The simple glaze with vanilla and almond extracts ties it all together with just the right touch of sweetness.

Ingredients & Why They Work
Every ingredient in this Cherry Pie Bars Recipe plays a part in delivering that luscious texture and well-rounded flavor that keeps you coming back for more. When shopping, I always look for high-quality butter and fresh eggs, because they really do make a difference in the final result.
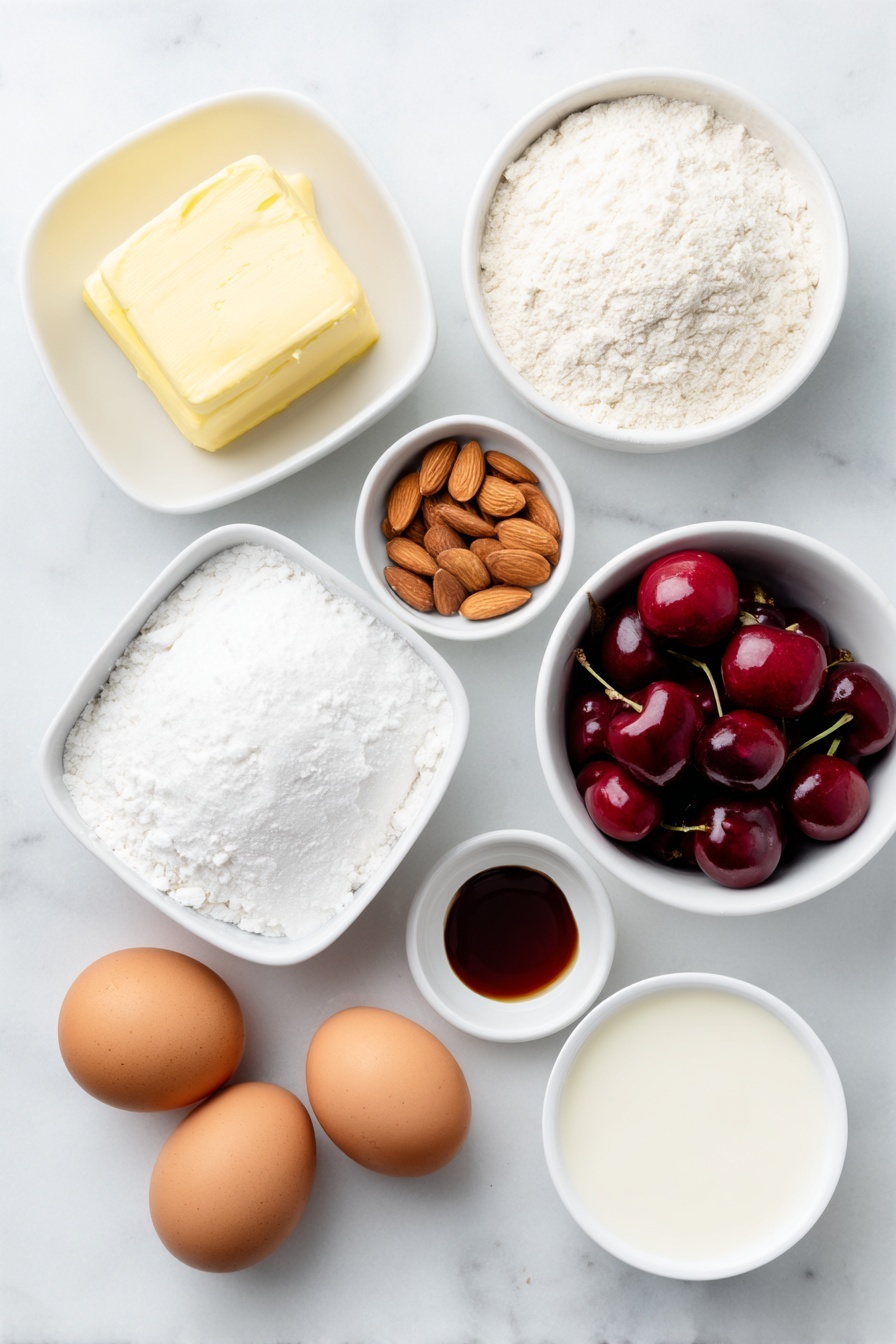
- Unsalted butter: Using unsalted butter lets you control the saltiness precisely and gives the crust that rich, tender crumb.
- Granulated sugar: Sweetens the dough while helping create a slight crispness on the edges.
- Eggs: Key for binding and adding moisture, plus they help the bars rise nicely.
- Vanilla extract: Adds warm, cozy depth to the dough and glaze.
- Almond extract: Just a touch elevates the cherry flavor fantastically—it’s subtle but impactful.
- All-purpose flour: The sturdy base without being too heavy.
- Salt: Balances the sweetness and enhances the flavors.
- Cherry pie filling: The star of the show—choose a good-quality canned filling or homemade if you have time.
- Powdered sugar (for glaze): Creates a smooth glaze that adds sweetness without heaviness.
- Milk (for glaze): Thins the glaze just enough for a perfect drizzle.
Tweak to Your Taste
One of the great things about this Cherry Pie Bars Recipe is how easy it is to personalize. I’ve tried a few versions myself and love adjusting the glaze or trying seasonal twists depending on the time of year.
- Variation: Once, I swapped the cherry pie filling for blueberry in summer and it was a hit at our family picnic—same great texture, just a different taste adventure.
- Dietary Modification: For a gluten-free version, I’ve used a 1:1 gluten-free baking flour blend with pretty good results—just keep an eye on baking time.
- Added Texture: Sprinkle some sliced almonds over the cherry filling before adding the top batter for a delicate crunch.
Step-by-Step: How I Make Cherry Pie Bars Recipe
Step 1: Preheat and Prepare Your Pan
Start by preheating your oven to 350°F (175°C) and spraying a 9 x 13 x 2-inch baking pan with non-stick spray. I find spraying this way instead of buttering the pan helps the bars slide out easily once baked without sticking.
Step 2: Cream Butter and Sugar
In a large mixing bowl, beat together 1 cup of softened unsalted butter and 2 cups of sugar until the mixture looks light and fluffy. This step is crucial—it incorporates air into the dough, which helps it bake up beautifully tender, so don’t rush it!
Step 3: Add Eggs and Extracts
Next, mix in 4 large eggs, beating well after each addition. Then stir in the vanilla and almond extracts. The almond extract may seem subtle, but trust me, it perfectly enhances the cherry flavor in a way that’s hard to beat.
Step 4: Combine Dry Ingredients and Mix
In a separate bowl, whisk together 3 cups of all-purpose flour and 1 teaspoon salt. Gradually add this to the wet mixture, mixing just until combined to avoid overworking the batter—overmixing can make the bars tough.
Step 5: Layer the Bars
Spread about 3 cups of the batter evenly across the bottom of your prepared pan. Then generously spread the 2 (21-ounce) cans of cherry pie filling over the batter layer. Finally, dollop the remaining batter on top as evenly as possible; it doesn’t have to be perfect — these rustic bars charm with their homemade look.
Step 6: Bake to Golden Perfection
Bake the bars for 35 to 40 minutes, or until a toothpick inserted into the batter (avoiding the cherry filling) comes out clean. If you use a larger pan (like 15 x 10 inches), check around 30 minutes, as the layers will be thinner and bake faster. Let them cool completely before adding the glaze.
Step 7: Drizzle the Glaze
Mix 1 cup powdered sugar with ½ teaspoon each of vanilla and almond extracts, plus 2 tablespoons milk to create a smooth glaze. Drizzle over cooled bars for an extra touch of sweetness and that pretty finishing look.
Pro Tips for Making Cherry Pie Bars Recipe
- Butter Temperature: Make sure your butter is softened but not melted for the best creaming results and texture.
- Cherry Filling Evenness: Spread the cherry pie filling carefully but don’t worry about it being perfectly smooth—it will set nicely during baking.
- Dolloping Batter: Don’t try to completely cover the cherry filling with the top batter—it’s okay to have gaps, which make the bars look rustic and inviting.
- Cooling Time: Chill your bars fully before glazing to avoid the glaze melting and sliding off.
How to Serve Cherry Pie Bars Recipe
Garnishes
I usually keep it simple with just the glaze, but for a little extra flair, a dollop of whipped cream or a scoop of vanilla ice cream on the side is dreamy. If you want color contrast, dusting with a bit of powdered sugar or fresh cherries on top brings those lovely pops of red.
Side Dishes
If you’re serving these bars at a gathering, they pair nicely with a cup of freshly brewed coffee or a chilled glass of milk. For something more festive, a sparkling rosé or dessert wine complements the cherry flavors beautifully.
Creative Ways to Present
For special occasions, I’ve arranged these bars on a tiered dessert stand, adding fresh mint leaves and berries around them for a festive touch. Wrapping individual bars in parchment and tying with twine also makes adorable favors for guests.
Make Ahead and Storage
Storing Leftovers
I store leftover Cherry Pie Bars in an airtight container at room temperature for up to 3 days—they stay moist and delicious. If your kitchen is warm, the fridge works too, but let them come back to room temperature before eating for the best taste.
Freezing
I’ve frozen these bars successfully by wrapping them tightly in plastic wrap and then aluminum foil. They’ll keep well for up to 3 months—just thaw overnight in the fridge before serving, and refresh them with a quick 5-minute warm-up in the oven.
Reheating
To reheat, pop an individual bar in a 350°F oven for about 5-7 minutes. This helps revive the buttery crust and warm the cherry filling without drying out the bar. Avoid microwaving, as it can make the texture a bit soggy.
FAQs
-
Can I use fresh cherries instead of canned pie filling in this Cherry Pie Bars Recipe?
Yes, you can, but you’ll want to cook down fresh cherries with sugar and a bit of cornstarch until they thicken into a pie filling consistency first. This step ensures the filling won’t be too watery and will set nicely in the bars.
-
Why does the top batter need to be dolloped and not spread evenly?
Dolloping the top batter lets the cherry filling peek through for a beautiful homemade look and also helps the batter bake evenly without sinking into the filling. It’s a charming, rustic touch that I actually love about this recipe.
-
Can I make this recipe dairy-free or vegan?
With some substitutions like dairy-free margarine and a plant-based egg replacer, you can experiment to make a vegan or dairy-free version. Keep in mind the texture might vary slightly, so it’s helpful to test a small batch first.
-
What’s the best way to cut the bars without them crumbling?
Use a sharp knife and wipe it clean between cuts. Letting the bars cool completely before slicing is also key to keeping the edges clean and minimizing crumbles.
Final Thoughts
This Cherry Pie Bars Recipe truly feels like a warm hug on a plate – comforting, not too fussy, and packed with that incredible cherry flavor we all crave. I love how easy it is to whip up but still impressive enough to share at potlucks or just enjoy with a cup of tea on a quiet afternoon. Give it a try—you’re going to love how these bars come together with so little effort but so much joy in every bite!
Print
Cherry Pie Bars Recipe
- Prep Time: 20 minutes
- Cook Time: 40 minutes
- Total Time: 1 hour
- Yield: 24 bars
- Category: Dessert
- Method: Baking
- Cuisine: American
Description
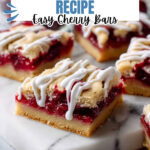
Cherry Pie Bars offer a delightful twist on classic cherry pie, featuring a buttery crust layered with sweet cherry pie filling and topped with a smooth glaze. Perfect for dessert lovers, these bars are easy to make in a 9×13 inch pan and bake to golden perfection.
Ingredients
Crust and Filling
- 1 cup softened unsalted butter
- 2 cups granulated sugar
- 4 large eggs
- 1 teaspoon vanilla extract
- ¼ teaspoon almond extract
- 3 cups all-purpose flour
- 1 teaspoon salt
- 2 (21-ounce) cans cherry pie filling
Glaze
- 1 cup powdered sugar
- ½ teaspoon vanilla extract
- ½ teaspoon almond extract
- 2 tablespoons milk
Instructions
- Preheat the Oven: Set your oven to 350 degrees Fahrenheit. Prepare a 9 x 13 x 2-inch baking pan by spraying it with pan spray and set it aside.
- Cream Butter and Sugar: In a large mixing bowl, cream together 1 cup softened unsalted butter and 2 cups granulated sugar until light and fluffy. Add 4 large eggs one at a time, beating well after each addition. Mix in 1 teaspoon vanilla extract and ¼ teaspoon almond extract to infuse flavor.
- Mix Dry Ingredients: In a separate bowl, whisk together 3 cups all-purpose flour and 1 teaspoon salt. Gradually add the flour mixture to the butter mixture, mixing until fully combined to form the batter.
- Assemble the Bars: Spread 3 cups of the batter evenly over the bottom of the prepared baking pan. Spread the cherry pie filling from the 2 (21-ounce) cans evenly over the batter layer. Use the remaining batter and drop small dollops evenly over the top of the cherry filling.
- Bake: Bake in the preheated oven for 40 minutes or until the top is lightly golden brown and a toothpick inserted in the center comes out clean. If using a larger 15 x 10-inch pan, bake for about 30 minutes. Allow bars to cool completely in the pan.
- Prepare the Glaze: While bars cool, whisk together 1 cup powdered sugar, ½ teaspoon vanilla extract, ½ teaspoon almond extract, and 2 tablespoons milk until smooth.
- Glaze and Serve: Drizzle the glaze evenly over the cooled bars. Cut into 24 bars and serve.
Notes
- For best results, use room temperature butter and eggs for easier mixing.
- You can substitute cherry pie filling with other fruit fillings such as blueberry or apple for variation.
- If you prefer a thicker glaze, reduce the milk to 1 tablespoon.
- Bars can be stored in an airtight container at room temperature for up to 3 days or refrigerated for up to a week.
- To make cutting easier, chill bars before slicing.
- Make sure to cool the bars completely before glazing to prevent the glaze from melting.
Nutrition
- Serving Size: 1 bar
- Calories: 320 kcal
- Sugar: 28 g
- Sodium: 180 mg
- Fat: 15 g
- Saturated Fat: 9 g
- Unsaturated Fat: 5 g
- Trans Fat: 0.5 g
- Carbohydrates: 42 g
- Fiber: 1 g
- Protein: 3 g
- Cholesterol: 75 mg
